Game Start
Deal each player 1 land territory. Redraw if two players start in neighboring territories. Players place 3 MOD and their space station on their starting territory.
All other land territories start with 1 neutral unit (barbarians).
Year (round) Start
All territories, player controlled and neutral controlled, gain 1 unit. The exception is player capitals, which gain 2 units. Note: players do not choose location of new units.
Do not do add units at the start of the 1st year (round).
All players roll the 6-sided die at the start of each round to determine turn order. The highest value rolled goes first and the lowest value goes last. Players who tied roll again to face off to see who goes before the other.
Fortification Move
At the end of a player's turn, he may make up to 3 fortification moves.
The destination territory for all three moves must be to the same territory.
The source and destination territories for each move must be connected by player-controlled territories as in the regular version of Risk.
At least 1 unit must be left behind in the source territory for each move.
Capital

The space station is used as a capital marker since there is no moon in this scenario.
A player may move his capital if he made no attacks during his turn. He may only make 2 fortification moves this turn. These 2 fortification moves must be to the same destination territory, but may be to a different territory than the territory that the capital moved to.
If a player loses his capital, the empire loses significant power and authority. Half of the player's territories become neutral controlled, round down. The player decides which territories he loses to the neutrals. The player must immediately select a new capital.
Water Travel
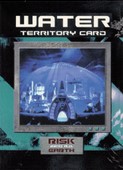
A player can travel through water territories, but must roll the 6-sided die once for each water territory traveled through. If a 6 is rolled then all units traveling over the seas die.
Leave no units behind in water territories. The ocean cannot be owned.
A player may fortify through a water territory if he controls both coastal territories that neighbor the water colony, but the player must roll once per water territory that the fortifying troops travel though. If a 6 is rolled then all die at sea.
Units attacking across the sea must roll again per water territory if attacks go poorly and the attacking player decides to retreat.
Warrior Commander
Acquired if a player takes 3 territories in a single territory with a single army. By single army, it means that the same attacking unit (MOD) must have moved across three territories in a single turn.
Promote one of the units in the conquering army to Commander by replacing the MOD piece with either the Land or Nuclear Commander pieces.
The Warrior Commander lets you replace one of your 6-sided dice with an 8-sided die when fighting.
Strategic Or Naval Commander
Acquired if a player takes 4 territories in a single territory with a single army, and has a Warrior Commander in play.
When a player conquers his 3rd territory, he must immediately decide if he wants to promote a MOD to acquire a 2nd Warrior Commander or go for the Strategic or Naval Commander.
The Strategic Commander allows you to roll an extra die 6-sided die.
When attacking with 3 dice against a defender who is rolling 3 dice, match the 3rd highest attacker die with the 3rd highest defender die. That means that 3 units will die in each battle.
Use the Diplomat and Space Commander pieces to symbolize the Strategic Commander
Maximum of 2 Strategic Commanders
Strategic Commander's abilities do not stack if there are multiple Strategic Commanders in the same territory.
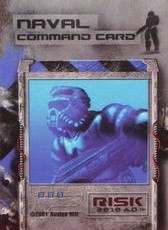
The Naval Commander allows safer water travel.
There is no risk to reinforcing over water when Naval Commander is in play.
There is no risk when attacking across water territories with the Naval Commander.
The risk remains when attacking across water territories without the Naval Commander.
Use the Naval Commander piece
Continue Reading