During the first half of each part of the day, each player in turn order performs one Action. You must choose one of the following Actions: Rest or Move.
Rest
When you choose to Rest, complete these steps in order:
Flip your Rest token to the moon side. You cannot rest if the token is already showing the moon side.
Flip back all used Contract cards and Equipment tiles you have on your board as well as your First Aid tile. They are now available again.
Unlock any one locked Asset tile from your board. Do this by moving it to the most expensive empty Asset space on the left side of your Player board. If you have no empty spaces, discard the tile to the box instead.
Note: You can only Rest once per Day (at most 3 times during the entire game). You can still use Executive actions.
Move
When you choose to Move, complete these steps in order:
-
 Travel
 -
 Avoid
Avoid -
 Visit
Visit
Also, when you Move, you can take any number of Executive Actions. These are additional things that you can do on your turn in addition to your regular Move.
Notoriety
During your turn, depending on your choices, you will either gain or lose Notoriety. This is tracked by moving your Notoriety cubes into your Red and Blue Notoriety boxes.
The Notoriety track is not adjusted until the second half of each part of the day, when your Notoriety marker will rise by 1 for each cube in your Red Notoriety box and fall by 1for each cube in your Blue Notoriety box.
Notoriety is explained in more detail on page XX, but for now, you just need to know about how to track gains and losses during your turn.
When you gain Notoriety, move 1 Notoriety cube from the bottom part of your Notoriety box to your Red Notoriety box.
When you lose Notoriety, move 1 Notoriety cube from the bottom part of your Notoriety box to your Blue Notoriety box.
Example: It is Scar's turn. She uses her Informer card as an Executive Action which allows her to lose 1 Notoriety. She moves one of her Notoriety cubes to her blue box. She then visits the Gallery, where Mr. Bones and Ruby are already.
Because of this, she gains 2 Notoriety, and moves 2 of her Notoriety cubes to her red box.
When the time comes to adjust Notoriety, Scar will move her Notoriety marker up 1 space on the Notoriety track.
Notoriety Special Cases
If you gain Notoriety and there are no more cubes in the bottom part of your Notoriety box, move 1 cube from your Blue Notoriety box back to the bottom part instead. If there are no cubes in your Blue Notoriety box, you cannot gain any more Notoriety this turn.
If you lose Notoriety and there are no more cubes in the bottom part of your Notoriety box, move 1 cube from your Red Notoriety box back to the bottom part instead. If there are no cubes in your Red Notoriety box, you cannot lose any more Notoriety this turn.
Example: On his turn, Vinnie has gained 4 Notoriety so far and not lost any. Therefore, all of his Notoriety cubes are in his Red Notoriety box. He decides to visit a Safe House, which causes him to lose 1 Notoriety.
Since he has no cubes in the bottom part of his Notoriety area, he moves one of the cubes from his Red Notoriety box back to the bottom part. When the Notoriety track is updated, he will gain 3 Notoriety.
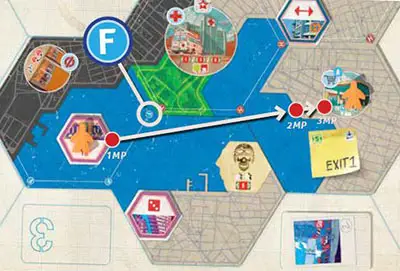
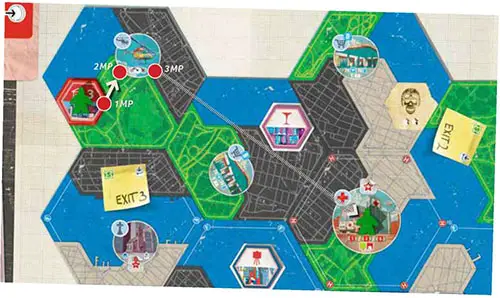
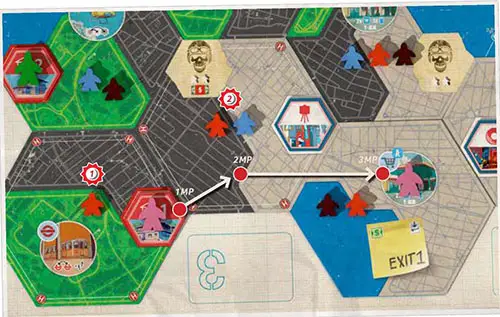
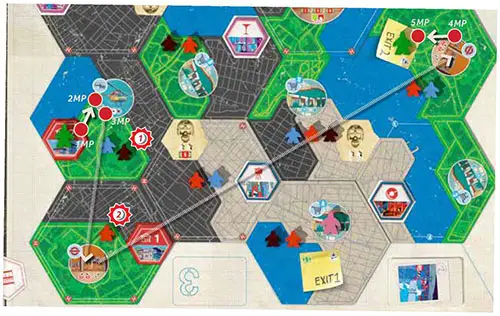
 Step 1: Travel
You must move from one Location to another Location by spending 1, 2, or 3 Movement points (MP). You must always end your movement on a different Location than the one you started on, and may never end on a Land space (streets or water).
Each Movement point you spend may be used for one of the following:
- Leave a Location: Move from a Location to an adjacent Land space.
- Enter a Location: Move from a Land space to an adjacent Location.
- Crossing Land: Cross from one type of Land to a different type of Land.
- Move between Locations: Move from a Location to an adjacent Location (the Locations are touching).
Note: You can move across any number of City tiles with the same Land type without spending any Movement points.
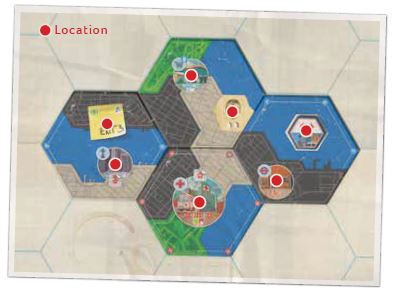
Location
A Location is any space on a City tile which is not a Land type. It is adjacent to all Land spaces touching any part of the Location.
When moving, if you have any Gas Can tokens, for each one you return to the Convenience Store you gain 1 extra MP during your Move action that turn. See page XX on how you get Gas Can tokens.

Water can only be crossed using normal movement if there is a Ferry icon on the Water space of a City tile that is part of the same body of water.
The presence of a Ferry icon indicates there is a Ferry on the entire body of water and it can be used even if your movement does not start or end on the tile with the Ferry icon.
Example: It is Vinnie's turn. He uses 1 MP to leave the store where he ended the previous turn and moves to the industrial area (black). He continues moving through interconnected industrial spaces (costing 0 MP), until he uses his 2nd MP to change to a residential Land type. He then finally moves into the Safe House, spending his 3rd and last MP.
Example: Ruby is currently at the Business in the water. Because this tile has the Ferry icon, all other Water spaces on City tiles that are part of this body of water can be crossed using normal movement.
She spends one Movement point to leave the Business and onto the water, moves freely across the water, spends another Movement point to move from the water to the Commercial area, and then her final Movement point to enter the Convenience Store.

Transportation
There are two extra means of transportation available in the city: the Subway and the Heliport. These Locations follow special rules, namely that you can only use their abilities during your TRAVEL step, whereas the other Locations are only visited during step 3 (VISIT) of your turn.
If you begin your turn on a Subway or Heliport (i.e., you ended the previous turn there), you may use its ability or leave as normal.
Subway

The subway allows you to move faster and further in the city. If you enter a subway Location, you may immediately move directly to another subway Location without spending any movement points.
Using the subway on your turn also rewards you with 1 extra Movement point (allowing you to spend 4 movement points during that turn instead of the usual 3).
Example SUBWAY: Claws is at a Gang Location in the south-west of the city. She spends 1 MP to move to the Industrial area, and then 1 more MP to move to the Subway Location.
She then immediately moves to another Subway Location and uses her remaining 2 MP (including the extra one for using the Subway) to move to the Residential area and then the Store.

Heliport

If you enter the Heliport Location (or start your turn there), you may spend 1 Movement point to move to any Land or Location on a City tile either 1 or 2 tiles away.
Example HELIPORT: Scar is at a Safe House. She spends 1 MP to move to the Residential area, another to the Heliport Location, and finally uses her remaining MP to take the Helicopter to the Hospital.
 Step 2: Avoid
If you moved from one Location to another Location on the same tile, skip this step, as you were not out in the open long enough to be spotted.
If you ended your move on a different City tile than the one you started on, you must try to avoid the Police Officers from each tile that you left (i.e., the tile you started from and all tiles you passed through during movement, but not the Police Officers on the tile you ended your movement on).
Example: Vinnie moves from the Safe House, through the Industrial and Commercial areas, and to the Store.
He must try to avoid the federal
1Police Officer on the tile where he started, and also the federal2and county2Police Officers on the tile he moved through, but not the Police Officers on the tile where she ended his movement.
If you moved using the Subway or Heliport (and end your move on a different tile), you must avoid the Police Officers from the tile you started on, but not on any tiles in between your start and end points of that particular transportation, since the Subway or Heliport takes you directly to the destination; you do not move through any other tiles.
Example: Scar spends 2MP to move to the Heliport Location, and then spends her remaining MP to fly to the Subway. Using the Subway gives her 1 extra MP this turn, and she also uses a Gas can token to get another 1 MP. This allows her to move to the Exit.
Now she needs to avoid the county
1and the SWAT1Police Officers from the original tile she left (with the Helicopter), then the federal2Police Officer from the first Subway (for leaving the tile). No other Police Officers need to be avoided.
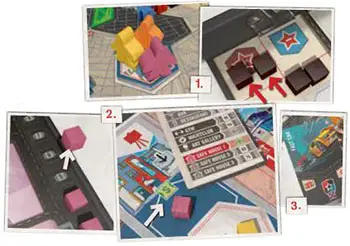
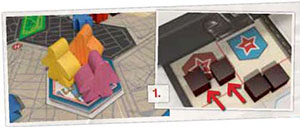
For each Police Officer you are unable to avoid, you suffer a Wound: move one of your cubes in the Green Wounds box to the Red Wounds box.
When your Green Wounds box is empty and you take another Wound, perform the following steps:
-
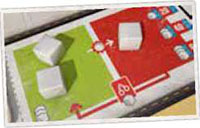
Take a Handcuff card and place it on the rightmost space on the bottom of your Player board that does not currently have a Handcuff card on it. This space is blocked for the remaining of the game; you cannot place a contact card there.
- If the space had an Asset tile on it, discard that tile to the box.
- If the space had an Contact card on it, cover it with the Handcuff card.
-
Move one of your cubes from the Red Wounds box back to the Green Wounds box.
If you take multiple Wounds at the same time, resolve each Wound separately.
Note: At the end of the game, any cubes in your Red Wounds box will reduce your final score.
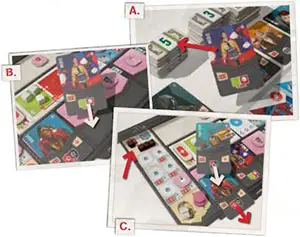
 Step 3: Visit
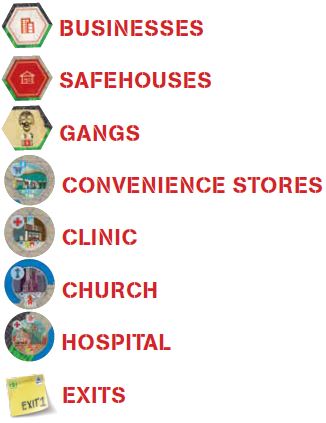
If you end your movement on a Subway or Helicopter Location, skip Step 3. Other than the Subway and the Helicopter, another 8 different Locations can be find in the game:
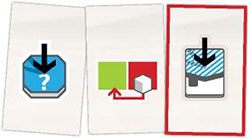
Each Location has a series of steps which are carried out when you visit it.
Each step is carried out in order and must be carried out unless the step includes the word may, in which case it is optional.
Some Locations list possible situations where you cannot visit that Location. This means that you cannot end your movement at the Location.
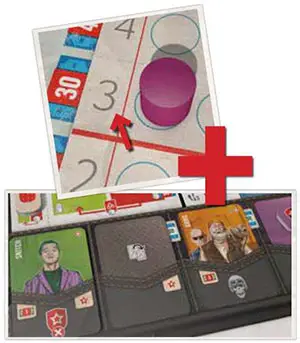
Taking Contact Cards

Contact cards represent services offered by other criminals to help you escape. Some Locations allow you to take a Contact card.
When you do, you must choose one of the Contact cards from the display and then take one of 3 choices:
Return the chosen card to the box
A.Take the chosen card and place it on the leftmost empty Contact card space of your Player board (contains no other Contact card or an Asset tile). If the leftmost space is not empty, you cannot choose this option
B.Take the chosen card and replace any Contact card you already have on your Player board. If you choose this option, gain 1 Notoriety and return the replaced card to the box
C.After taking the card, draw a new card from the top of the Contact deck and place it face up in the display. If the Contact deck is empty, do not draw a replacement.
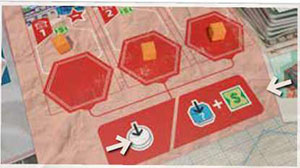
 Businesses
You have invested a lot of the stolen money in businesses around the city.
The amount of money you have in the various Businesses is shown on your Escape Plan card. You can only visit each Business once during the game.
When you visit a Business, do the following:
-
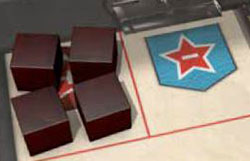
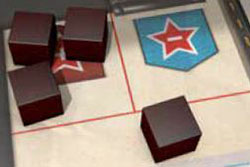
Gain 1 Notoriety for each other player in your current Location.
-
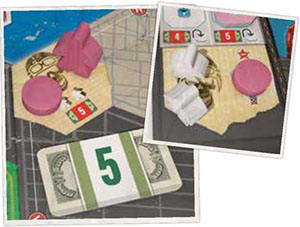
Take the uppermost most cube from your Income track and then look up the Business on your Escape Plan card.
- If an amount of money is listed, place the cube inside the white hexagon without the Income symbol of the corresponding Business display.
- If the Income symbol is listed, place the cube inside the hexagon with the Income symbol of the corresponding Business display. Then, immediately receive Income.
-
Take a Contact card.
Reminder: Whenever you receive Income, take an amount of money from the general supply equal to the lowest visible number on your Income track. In the case above its $5k.
Closing a Business
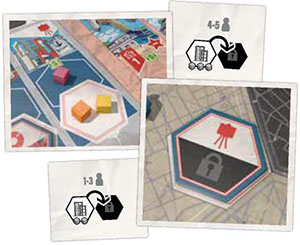
After a certain number of visits to a Business (i.e., a specific number of cubes on the hexagons of that Business), flip the Business tile face down. That Location is now closed and cannot be visited unless you use a key. I.e., you cannot end your Movement at this Location if you cannot get in.
The number of visits needed to cause a Business to close depends on the number of players in the game:
- 2 visits in a game with 1-3 players
- 3 visits in a game with 4-5 players
Important Rule: Any key can open any closed Business (either a master key from an Asset tile or any locker key). Once a key is used, flip the key tile face down.
Visiting all Businesses in a Group
At the end of your turn in which you have visited all the Locations in the same group of businesses (i.e., you have a cube on each of the Businesses in that group), you may immediately choose one of the following bonuses:
Take an Extra Action disc, placing it in its proper space on your Player board.
Lose 1 Notoriety and unlock an Asset tile.
Note: You only get this bonus once in the game for each group of Businesses (at the end of the turn in which you have first visited all of the businesses in that group).
Escape Plan Cards
Each Escape Plan card is unique and depicts different values for each Business, but the total amount is always $450k. Escape Plan cards are revealed only at the end of the game.
Escape Plan cards are divided into three groups: the top two groups are for the Businesses and the bottom group is for the Safe Houses. Within each group are two listings which have an amount of money shown (which adds up to $150k), and one listing which has the Income symbol.

If you visit a Business depicting an amount of money listed, this will be added to your final score (should you manage to escape); you do not get any immediate money.
If you visit a Business depicting the Income symbol, you receive income immediately.
Example: If this is your Escape Plan card, you receive money if you visit Safe House 1, the Bar, and the Art Gallery. All other places are worth money only at the end of the game.
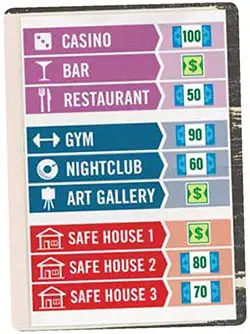
 Safe Houses
The amount of money you have in the various Safe Houses is shown on your Escape Plan card. You can only visit each Safe House once during the game.
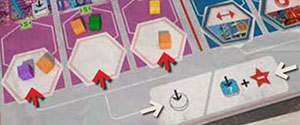
When you visit a Safe House, do the following:
-
Gain 1 Notoriety for each other player at your Location.
-
Take the uppermost most cube from your Income track and then look up the Safe House number on your Escape Plan card.
- If an amount of money is listed, place the cube inside the hexagon without the Income symbol of the corresponding Safe House display.
- If the Income symbol is listed, place the cube inside the hexagon with the Income symbol of the corresponding Safe House display. Then, immediately receive Income.
-
Lose 1 Notoriety.
-
Take one of the available keys above the Safe House display (if any) and place it face up on your Player board in the key slot corresponding to the number of the Safe House.
-
You may buy a Fixer tile.
The Fixer
Choose any one tile from the stack of Fixer tiles, pay the price depicted on the tile, and place it in an empty Item space on your Player board (one not containing an Asset tile). If you place the tile on a space that already contained a non-Asset tile), gain 1 Notoriety and return the replaced tile to the box.
Note: Using the ability of a Fixer tile is an Executive Action.
Visiting All Safe Houses
At the end of your turn in which you have visited all of the Safe Houses (i.e., you have a cube on each of the Safe House displays), you may immediately choose one of the following bonuses:
Take an Extra Action disc, placing it in its proper space on your Player board.
Gain income and unlock an Asset tile (see unlocking an Asset tile on page xx).
Note: You only get this bonus once in the game (at the end of the turn in which you have first visited all of the Safe Houses).
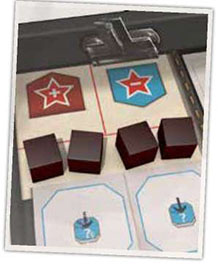
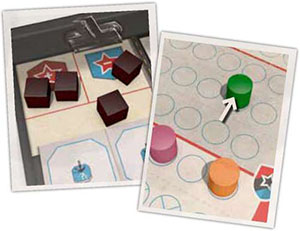
 Gangs
Gangs
You can only visit a Gang Location if there is currently no other player present and no Gang Control marker present (either yours or another player's):
When you visit a gang, do the following:
Pay $5k. If you do not have $5k, you cannot visit this Location.
Take both Gang members from the City tile and place them on your Gang members space on your Player board.
Place 1 of your Gang Control markers on the location.
Note: Gang members can be used as Executive Actions.
 Convenience Stores
When you visit a store, do the following:
Gain 1 Notoriety for each other player at your Location.
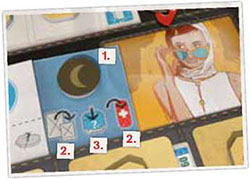
You may take 1 Gas Can token from the store and place it on one of the Gas icons on your Player board (you cab keep up to 2 Gas Can tokens).
You may buy up to 2 different pieces of Equipment. For each piece of Equipment you buy, pay the cost depicted on the board below the tile and place the tile on an available Item space on your Player board (one not containing an Asset tile). If you place the Equipment tile on a space that already contained another non-Asset tile (a Fixer or Equipment tile), gain 1 Notoriety and return the replaced tile to the box.
If you have the right key, you may open one locker.
Reminder: Gas Can tokens can be spent during your TRAVEL step to gain extra MP.
Lockers
You also have a good chunk of money hidden away in safety lockers. Getting it won't be easy though.
The back of the Locker tiles depict the number of tiles of a specific value in each stack, and note that all stacks also have 1 tile in them with a value of $0.
To open a Locker, you must meet the following criteria:
You must have the Key tile with the same color of the Locker or have unlocked the master key Asset tile.
The sum of your position on the Notoriety track, plus the number of Contact cards you have on your Player board must be equal to or higher than the big number on the bottom of the Locker tile. Both face-up and face-down Contact cards count, but not ones covered by Handcuff cards.
If you meet the criteria, do the following:
-
Flip the Key tile used (or the master key Asset tile) face down.
-
Secretly draw a number of tiles from the corresponding stack. The number of tiles you draw depends on the locker. This is depicted below the lockers.
- Green locker: Draw a number of tiles equal to the number of Contact cards you have on your Player board plus one.
- Black locker: Draw a number of tiles equal to the number of Contact cards you have on your Player board.
- Brown locker: Draw a number of tiles equal to the number of Contact cards you have on your Player board minus one.
-
Choose one of the taken tiles and place it face down on an empty Item space on your Player board (one not containing an Asset tile). If you place the Equipment tile on a space that already contained another non-Asset tile, gain 1 Notoriety and return the replaced tile to the box.
-
Return all the other tiles to the stack of Locker tiles and then shuffle those tiles.
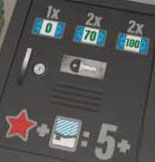
Example: There are 5 black Locker tiles in the game. 2 of them have a value of $70k, 2 of them have a value of $100k, and one of them is worth nothing.
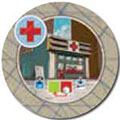 Clinic
When you visit the Clinic, do the following:
Gain 1 Notoriety for each other player at the Clinic.
You may unlock an Asset tile (see Asset tiles on page XX).
You may heal 1 Wound (move 1 Wound cube from your Red Wounds box to your Green Wounds box).
Take a Contact card.
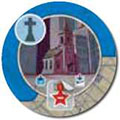 Church
When you visit the Church, do the following:
Gain 1 Notoriety for each other player at the Church.
You may pay $1 to lose 1 Notoriety.
You may unlock an Asset tile (see Asset tiles on page 19).
Take a Contact card.
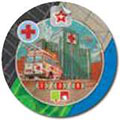 Hospital
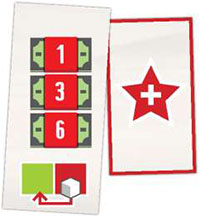
When you visit the Hospital, do the following:
Pay $1, $3, or $6 to heal 1, 2, or 3 Wounds respectively. For each Wound healed, move a cube from your Red Wound box to your Green Wound box.
Gain 1 Notoriety (because doctors always have to report the police when someone arrives with bullet wounds).
Note: Unlike the other Locations, you do not gain Notoriety when visiting the Hospital based on the number of other players there.
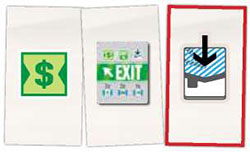
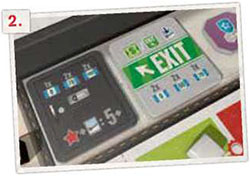
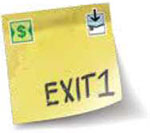 Exits
Exits
When you visit an Exit, do the following:
-
Gain 1 Notoriety for each other player in your current Location.
-
If the Exit is open (there are fewer than 2 Patrol cards on the Patrol space for that Exit):
- You may receive income. Then,
- Take a Contact card.
-
If the Exit is closed (there are 2 Patrol cards on the Patrol space for that Exit):
- You may either receive income OR take an Exit tile. Then,
- Take a Contact card.
If you choose to take an Exit tile:
-
Draw a number of Exit tiles from the appropriate stack equal to the number of Contact cards you have on your Player board (whether face up or face down, but not ones covered by Handcuff cards).
-
Choose one of them secretly and place it face down in one of your empty Item spaces. If you do not have an empty Item space, you must replace a previous non-asset tile.
-
If you do replace a tile, gain 1 Notoriety.
-
Return all other tiles face down to the stack and shuffle it again.
Note: If you visit the open Exit on Day 3 (the Exit which has only 1 Patrol card on the corresponding Patrol space), you may choose to escape the city instead of taking any of the above benefits.
Continue Reading