Components
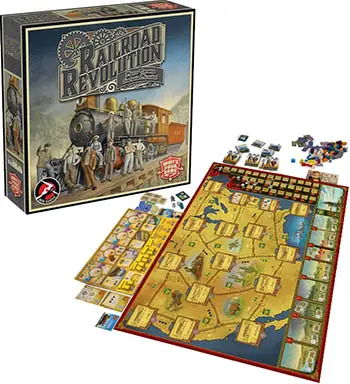
- 1 Game Board
- 48 Telegraph Shares
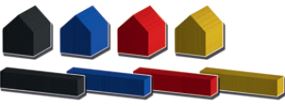
- 4 Player Boards
- 64 Workers
- 6 Telegraph tiles
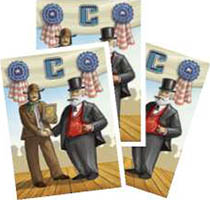
- 13 City tiles
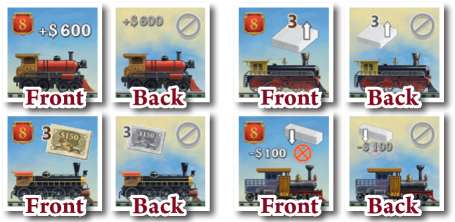
- 24 Train tiles
- 52 Buildings
- 68 Rails
- 38 Milestone tiles
- 9 Deal tiles
- 4 Setup tiles
- 12 Performance markers
- 1 First Player tile
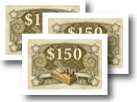
- 52 Banknotes
- Instructions
Setup
All the rules are explained for a 4-player game. Any rule exceptions for a 2- or 3-player game will appear in blue boxes. If the game has fewer than 4 players, put any unused components in the game box.
-
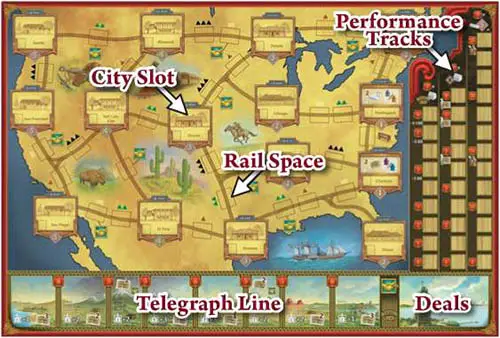
The Game Board
Place the Game Board on the table. The Game Board is divided into several areas.
-
Player Boards, Bindings and Rails
Each Player chooses a color (Yellow, Red, Black, or Blue), takes a Player Board of their chosen color and places it in front of themselves.
Each player then takes 12 buildings and 15 rails in their color and places them onto the top part of their Player Board on the corresponding slots.

Place 1 of the 2 remaining rails of each player in the initial rail slot (on the right side of the Game Board, between the Cities of Washington and Charlotte).
Place the remaining building and rail of each player next to the Game Board (they are needed for the setup tiles, see setup step 12).
-
Money

Each player receives $600.
Place the remaining money next to the Game Board as a common supply.
-

Workers
Each player takes 4 White Workers and places them next to their Player Board to form their personal supply.
In games with fewer than 4 players, return the remaining white Workers to the game box.
All remaining Workers are placed next to the Game Board as a common supply.

-
Telegraph Shares
Each tile represents a share in the Telegraph company.
Each player receives 3 Telegraph Shares which are placed next to their Player Board.
The remaining Shares are placed next to the Game Board as a common supply.
Note: At any point during the game, you can sell one or more of your Shares and gain $150 for each, discarding the Shares to the common supply.
-
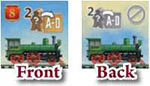
Trains
Each player takes a 'Promote 2 Workers' train (see picture) and places it face up next to their Player Board.
In a 2- or 3-player game, return the remaining 'Promote 2 Workers' trains to the game box.
Divide the other trains according to the icons on the front and form 4 face-up stacks. Place the stacks next to the Game Board.
- 3-Player game: Each stack should only contain 4 trains.
- 2-Player game: Each stack should only contain 3 trains.
Return the remaining trains to the game box.
-
Milestones
Sort the Milestone tiles into groups by the letters and numbers on their backs. Shuffle each group separately, form 5 face-down stacks, and place them next to the Game Board.
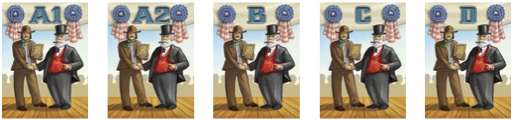
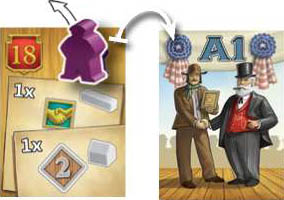
Each player then takes one A1 Milestone tile and one A2 Milestone tile and places them face up next to their Player Board.
In a 2- or 3-player game, return the remaining A1 and A2 Milestone tiles to the game box.
-
Performance Markers
Place one Performance marker of each player in the bottom slot of each of the Performance Tracks (right edge of the Game Board).
-
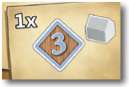
Deal Tiles
Shuffle the Deal tiles, form a face-down stack, and place it in the bottom right of the Game Board.
Turn the tile on top of this stack face up.
-
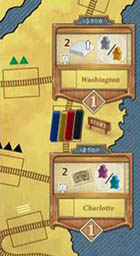
Cities
Divide the 13 City tiles into four groups according to the numbers on their backs.
Then, on each City slot of the Game Board, randomly place face up one City tile of the corresponding number (i.e. a '2' City tile on a '2' slot, and so on).

3 Players: Place a building of the unused player color, in the 'First Station' slot of San Francisco, Bismarck, and Houston.
2 Players: Place a building of an unused player color, in the 'First Station' slot of San Diego, Salt Lake City, Duluth, and Little Rock.
-

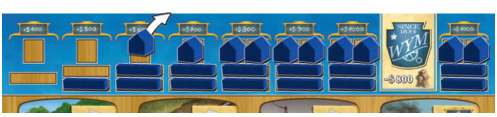
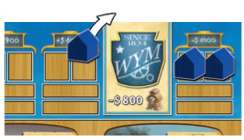
Telegraph
The bottom of the Game Board depicts the Telegraph line divided into 8 sections.
Shuffle the Telegraph tiles and randomly place one face up in each Telegraph section that does not include a Deal icon.

3 Players: Place a building of the unused player color in the 'First Office' slot of the 2nd and 5th section (counting from the left).
2 Players: Place a building of an unused player color in the 'First Office' slot of the 1st, 4th and 7th section (counting from the left).
-
Setup Tiles
From the 4 Setup tiles, randomly choose a number of them equal to the number of players in the game. Place the chosen ones next to the Game Board, each with a random side facing up.
Return any remaining tiles to the game box.
Take 4 Workers from the common supply (one of each color) and randomly place one of them next to each Setup tile.
In games with fewer than 4 players, return any Worker not placed back in the common supply.

Randomly determine a First Player, and give them the First Player tile. Then, starting with the player seated to the right of the First Player and going counter-clockwise, each player selects 1 Setup tile, taking the reward depicted on its visible side (see page 14), and the associated Worker.
The Worker goes to the player's personal supply. If the tile allows the player to place a rail or a building, it is to be taken from the ones placed next to the Game Board.
After the setup, return all the Setup tiles and any remaining buildings and rails that were next to the Game Board back to the game box.
-
Common Supply
Banknotes and Shares in the common supply are not limited. In the unlikely event that the supply of either of these runs out, use another means of tracking them.
Workers are limited. In the event that there are no Workers of a certain color in the supply when you are supposed to gain one, gain a Worker of a color of your choice instead.
When the rules state that you have to pay (an icon of money with a minus sign), it always means you have to pay money, taking the banknotes from your personal supply and placing them back in the common supply.
When you discard Shares or Workers, they are taken from your personal supply or your Player Board and placed back in the common supply. When you gain money (an icon of money with a plus sign), Shares, or Workers they are taken from the common supply and placed in your personal supply.
Player's Supply
Each Player should now have in their personal supply:
- $600
- 3 Telegraph Shares
- 5 Workers
- 1 'Promote 2 Workers' Train
- 2 Milestone tiles (1xA1, 1xA2)
- Any additional Shares or money taken due to the chosen Setup tiles
Game Play
Play proceeds in clockwise order, starting with the First Player, with each player taking a turn. On your turn, you must:
- Take 1 Worker from your personal supply (next to your Player Board),
- Place it on one of the 4 action spaces of your Player Board and
- Perform the depicted main action.
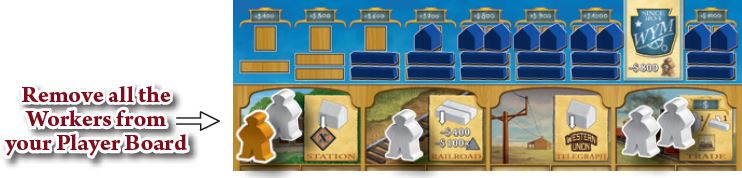
The four available main actions are shown on your Player Board:
- Station: Build a Station in a City you are connected to.
- Railroad: Extend your rail network.
- Telegraph: Build a Telegraph Office.
- Trade: Sell off a company asset to raise money.
There is no limit to the number of Workers (of any combination of colors) you can have on a single action space. At the beginning of your turn, if you have no Workers left in your personal supply (because all of your Workers are on your Player Board), remove all Workers from your Player Board and place them back in your personal supply.
Note: This does not count as your action, so you then proceed as normal to take a Worker from your supply, place it on your Player Board, and perform the chosen action.

All the pieces (buildings and rails) are available during the game.
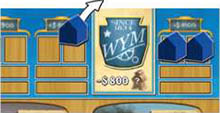
However, when one player completely clears all the sections of their Player Board to the left of their company logo (leaving no buildings and no rails), the game draws to a close, and the value of each company is calculated by means of Victory Points (VP).
The value of a company increases by completing Milestones, making progress on the Performance Tracks, having active trains, and contributing to the infrastructure of the telegraph network. The player with the most VP wins the game.
Actions and Workers
The top part of the action space shows the main action, which must be performed completely. The lower part of the action space shows an additional effect that is Mam Action available depending on the type of Worker that has been placed.
Each Worker always performs the main action, adding an additional effect depending on its type (color). The additional effect is always optional (i.e. you can always decide to perform only the main action, Additional effects regardless of the type of Worker used).
The different types of Worker, and their abilities are:
White (Non-specialized): Allows you to Promote a Worker (Promoting your Workers is needed for completing your company Milestones).
Purple (Foreman): Gives additional bonuses (usually related to gaining VP).
Orange (Accountant): Makes the action cheaper, or gives you money.
Grey (Negotiator): Gives additional bonuses (usually granting in-game benefits).
Turquoise (Engineer): Improves the main action.
Note: The ability of the non-specialized Workers (White) is always the same for all the actions: you may Promote one of your Workers. The ability of the specialized Workers (Purple, Orange, Grey, Turquoise) varies according to the performed action.
Important: You can always use any specialized Worker as if it were a non-specialized Worker.
Therefore, when you place a specialized Worker on your Player Board, you can use it for its own special ability, or you can use it as a non-specialized Worker and perform a promotion.
General Rules
-
Effects resolution: You can resolve the effects of an action (including any additional effect from the lower part of the action space) in any order, including paying the cost to perform the main action itself.
For example, if you want to perform an action, but do not have enough money to do so, and an effect of the action allows you to obtain the money, you can resolve that effect first, gain the money, and then pay the cost of the action.
-
Minimum available Workers: You can never have fewer than 4 available Workers (Player Board and personal supply) at the end of your turn. Therefore, you cannot perform any action or take any bonus or reward which would cause you to have fewer than 4 available Workers at the end of your turn.
-

Selling Telegraph Shares: At any point during the game, you can sell one or more of your Telegraph Shares and gain $150 for each, discarding the Shares to the common supply.
Note: The reverse is not true; you may not simply buy Shares from the supply, only sell them.
-
Extra hiring: At any point during the game, you can hire 1 Worker of a color of your choice by paying $800. Note: There are cheaper ways to gain Workers, but sometimes you need a specific Worker at a specific time and this allows you to gain one.
-
Trains: If you take a Train tile (i.e. each time you take a bonus or reward with this icon), take it from any of the stacks next to the Game Board, and place it face up next to your Player Board (with the side showing the 8 VP icon). Train tiles in the stacks are limited.
You may have multiple trains of the same type, and there is no limit to the number of trains you can have.
Actions
A. Station
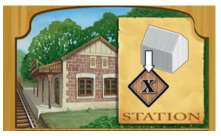
Main action: Build a Station in a City you are connected to
Take the leftmost building from your Player Board and place it on an available City of your choice (see below for Placement rules).
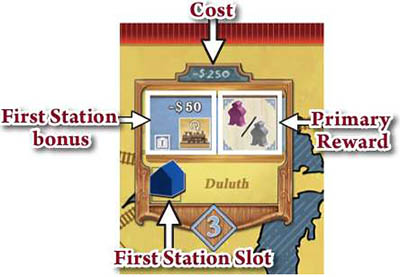
You must pay the cost indicated on the top of the City, and you may take the primary reward depicted on the right side of the City tile.
The primary reward is either advancing on the Performance Tracks or gaining one or two Workers (if there is the '/' symbol, it means you gain one of the two depicted Workers).
Note: For the cities of Washington and Charlotte, the City tile is printed on the Game Board.
Placement rules:
An available City is one which your rail network is connected to (i.e. you have built a rail in a space which is directly connected to that City by track printed on the board).
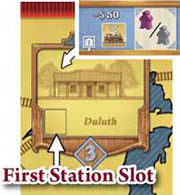
If you are the first to place a Station in a City, place the building in the 'First Station' slot in the bottom left, and you may take the First Station bonus depicted on the left side of the City tile, paying its cost, if any.
If you are not the first, place the building in the area to the right of the First Station slot.
Each City can have exactly one Station of each player.
B. Railroad
Main action: Extend your rail network.
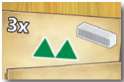
Take the leftmost 2 rails from your Player Board, and place each of them in an available rail space of your choice (see below for Placement rules).
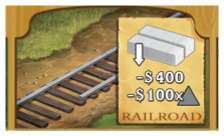
You must pay $400, plus an additional $100 for each 'Difficult terrain' icon (triangle) next to the spaces you build in. The color of the triangles is to help identify them.

If the space you are building in has the 'Plains' terrain icon, there is no additional payment.
Placement rules:
An available rail space is one that is connected to your rail network. Your rail network includes any City that your rails reach, whether or not you have built a station in that City. All players start the game with a network that includes Washington and Charlotte.
Each rail space on the board may hold exactly one rail of each player.
When you place the rails, they do not necessarily have to be connected to each other, as long as they are both placed in available spaces.
Note: You have to place exactly 2 rails. If you cannot pay the cost for placing both rails, or you have no more rails on your Player Board, you cannot choose this action.
The only exception to this rule applies if you have just 1 rail remaining, in which case you can perform the action, paying the full cost ($400 plus additional payment for the terrain, if any) as usual.
Deals:
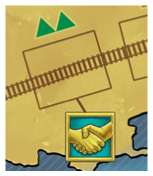
Some rail spaces are marked with a Deal icon.
After you have completed your action in full, if a rail was placed in a space with a Deal icon (regardless of whether it was the first rail placed in that space), the current Deal tile is resolved.
Note: If you place rails in more than one space with a Deal icon during an action, only one Deal tile is resolved.
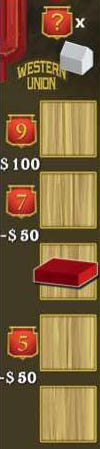
C. Telegraph
Aiming to extend its telegraph network, the Western Union offered its shares to the railroad companies in exchange for access to the railroad telegraph system.
Connection to the Western Union network meant, in turn, that the railroad companies could offer telegraph services to the communities that sprang up along the railway lines. This is represented in the game by placing a building (Telegraph Office) in a section of the Telegraph line.
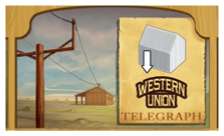
Main action: Build a Telegraph Office.
Take the leftmost building from your Player Board and place it in an available section of the Telegraph line depicted on the bottom of the Game Board (see below for Placement rules).
Immediately take the primary reward of that section: Gain the amount of Telegraph Shares indicated by the brown number in the section you placed in.
Placement rules:
An available section is one that does not already contain one of your buildings. Each section can have exactly one Office of each player.
If you are the first to place an Office in a section, place the building in the 'First Office' slot on the left side, and take the First Office bonus of additional Shares as indicated in that section by the white number next to the 'First Office' icon.
If you are not the first to place a building in a section, place it in the area to the right of the slot.
Telegraph Tile:
Regardless of whether you built the First Office or not, if there is a Telegraph tile in that section, you may discard any one of your Workers (from your Player Board or your supply) to take the bonus depicted on the Telegraph tile in that section.
Note: Taking the bonus does not remove the Telegraph tile; it remains for the whole game allowing anyone who builds an Office in that section to use it.
Reminder: You can never have less than 4 available Workers at the end of your turn
Deals:

Two of the Telegraph sections include a Deal icon.
After you have completed your action in full, if an Office was placed in a space with a Deal icon (regardless of whether it was the first Office placed in that space), the current Deal tile is resolved.
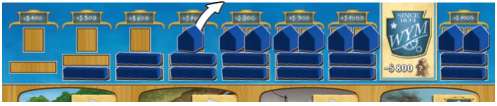
D. Trade
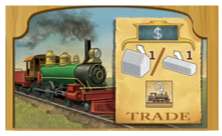
Main action: Sell off a company asset to gain money.
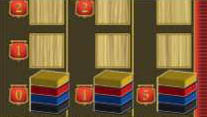
On the top of your Player Board, there are buildings and rails stored in 8 different sections. Each section has an amount of money depicted above it.
Discard a rail or building from the leftmost section of your Player Board that still has a piece in it and remove it from the game (place it back in the box). If there are both rails and buildings in the leftmost section, you can choose which one to discard.
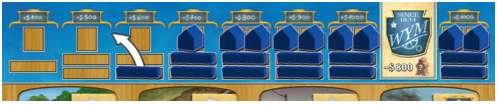
Gain the money indicated above the section from where you took the piece.
Note: You can only sell 1 piece per action.
Train Tile:

Before or after you have made the sale, you may flip one of your Train tiles. If the train is face-up, you receive the bonus depicted on the front and then flip it face down.
If the train is face-down, flip it face up. You don't take any bonus for this, but your train is now ready to be used again.
Note: At the end of the game, each face-up Train tile that you have is worth 8 VP.
Deals
As the rail and telegraph networks expanded, entrepreneurs who were interested in gaining a stake in the burgeoning telegraph businesses would offer to act as subcontractors; recruiting specialists and carrying out work on behalf of the railroad company in exchange for shares in the telegraph company.

After you have completed your action in full, if a rail or an Office was placed in a space with a Deal icon (regardless of whether it was the first rail or Office placed in that space), the current Deal tile is resolved.
Note: Even if you place rails in more than one rail space with a Deal icon during an action, only one Deal tile is resolved.
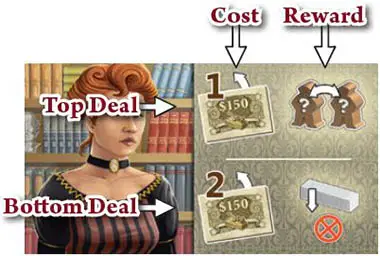
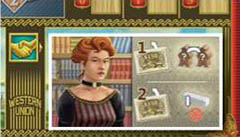
Each tile depicts two possible deals, each offering a reward and costing 1 to 4 Shares. Accepting a deal means discarding the requested Shares and taking the corresponding reward.
The player that just placed the rail or the Office may accept one or both deals of the face-up Deal tile. Then, in clockwise order, each other player may accept one of the two deals of the face-up Deal tile. Note: Accepting a deal is optional.
Once the tile is resolved, place it face down in a discard pile and turn the topmost tile of the stack face up. If the stack is empty, shuffle the discard pile and create a new stack.
Company Milestones
Company milestones are your company's growth targets. As your company grows, it will need workers to manage your extended network of rails and stations. Your company has a policy of promoting from within, so you need to ensure that there is a steady flow of recruits to replace the workers who become managers.
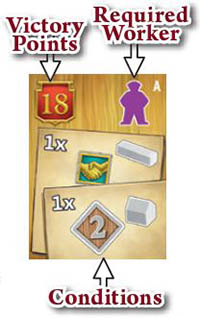
To complete a Milestone, you need to fulfill the depicted conditions and to promote some of your Workers into Managers. At the end of the game, each completed Milestone you have is worth the VP indicated in its top left corner.
Each Milestone has 1 to 3 conditions and requires 1 or 2 Managers (as depicted in the top right of the tile). A, B, and C Milestones require Workers of specific types, whereas D Milestones require Workers of any type.

Promoting a Worker means to move it from your supply or your Player Board (even the one that you just used to perform the main action) and place it on one of your company Milestones.
Note: It is not necessary to have fulfilled any of the conditions on the Milestone before placing Workers on it.
Once placed, the Workers on a company Milestone are now Managers, and no longer considered available (you cannot use them to perform actions).
They cannot be moved nor removed until the Milestone is completed, at which point they are discarded (see below).
You can promote a Worker:
- Every time you perform an action with a non-specialized Worker (White).
- Every time you take a 'Promote Workers' bonus or reward.
Reminder: You can always use any specialized Worker as if it were a non-specialized Worker.
Therefore, when you place a specialized Worker on your Player Board, you can use it for its own special ability, or you can use it as a non-specialized Worker and perform a promotion.
Reminder: You can never have less than 4 available Workers at the end of your turn.
Completing a Milestone:
To complete a Milestone, you need to have the depicted Manager(s) on the tile, and have fulfilled the depicted conditions.
At the end of any turn (after any Deals have been resolved) in which you complete a Milestone, discard the Manager(s) back to the common supply and flip the Milestone tile face down.
Then, you must take a replacement Milestone tile from the stack with a letter one higher alphabetically than the Milestone you just completed. For example, if you completed an 'A' Milestone, you must take a new Milestone from the 'B' stack. When you complete a 'D' Milestone, do not take a replacement.
When taking a replacement Milestone, draw the 3 top tiles from the appropriate stack, choose one of them and place it face up next to your Player Board.
Put the remaining tiles on the bottom of the appropriate stack. If you complete both your Milestones in the same turn, replace them one at the time.
Variant: For a more strategic game, instead of drawing the top 3 tiles from the appropriate stack, look through the whole stack and choose any one of them.
Milestone's Conditions
Milestone tiles show the following conditions:
-
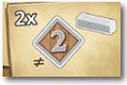
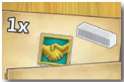
At least the indicated number of different connected Cities of a specific level (you do not need a Station there).
-
At least the indicated number of rails in rail spaces with the Deal icon. Example: You must have rails in 1 or more rail spaces with the Deal icon.
-
At least the indicated number of Cities of a specific level with a Station.
-
At least the indicated number of rails in rail spaces with a specific configuration of terrain icons.
Performance Tracks
There are 3 Performance Tracks on the right edge of the Game Board.
Your company's overall Performance is scored based on the position of your markers on the three Performance tracks.
-

Network: Multiply the number of different 'level 5' Cities you have connected ether or not you have a Station there) by the VP reached by your marker on rightmost track.
-

Stations: Multiply the number of Stations you have built by the VP reached by r marker on the middle track.
-

Telegraph: Multiply the number of Offices you have built by the VP reached by er on the leftmost track.
VP are indicated at the left of each track.
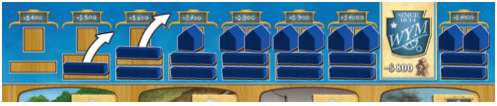
When you gain an advancement on the Performance Tracks, move one of your markers up to the next slot.
If you gain multiple advancements, you can always split the total advancements among the different Performance Tracks.
If there is an icon of money with a minus sign, you must pay the indicated amount of money when your marker passes that point.
Variant: For a more challenging game, pay $500, $500, and $1000 (instead of $50, $50, and $100).
If there is an icon of one or more Shares with an arrow, you must discard the indicated amount of Shares when your marker passes that point.
If there is an icon of a Worker with an arrow, you must discard any one of your Workers when your marker passes that point.
End of the Game
When one player completely clears all the sections of their Player Board to the left of their company logo (leaving no buildings and no rails), continue playing until all players have had the same number of turns (i.e. to the player seated to the right of the First Player).
Then, each player takes 1 more turn and then the game ends.
Note: Milestones can be completed at the end of any player's turn, therefore any Deals resolved in the final round may still allow players to complete Milestones, even after they have taken their last turn.
Victory Points are then totaled using the Scoring pad, and the player with the most VP wins the game.
In case of a tie, the tied player with the most money wins (with Shares counting as $150). If there is still a tie, all tied players share the victory.
VP are scored for:
- 8 VP for each face-up Train tile
- VP for each completed Milestone
- VP for the Performance Tracks
- 5 / 8 VP for each Telegraph connection (see below)
The VP shown between each of the Telegraph sections on the Game Board are awarded to each player who built a Telegraph Office in the two adjacent Telegraph sections.
Continue Reading


