Apple Hill

In Apple Hill mode, apples (Granny Smith - green, and Red Delicious - red) are communal resources, in that any player may gain or spend them, regardless of who gained them last. When you gain them, you increase the value of the respective apple supply track (to the maximum of 6 per kind). When you spend apples, you decrease the value of the respective track.
Note: Apples are not considered "basic resources" and can never be spent in place of food, wood, or stone.
Apple Hill Path Actions
-
Gain Apples

Increase the value of Granny Smith (green) and/or Red Delicious (red) apples on the apple supply board by the number of apple icons shown (to the maximum of 6 each).This is a mandatory path action.
Note: Apples are a shared resource, so any apples you do not spend during your turn will be left on the board for other players to spend.
-
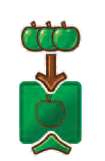
Harvest Apples

Count the number of Granny Smith (green) and Red Delicious (red) apples on orchard cards along your trail, and Increase the value of Granny Smith (green) and/or Red Delicious (red) apples on the apple supply board by the number of apple icons shown (to the maximum of 6 each).
Note: You must increase the apple supply board by the full amount of apple icons in the orchard along your trail. You may skip the action altogether, as it is not a mandatory path action.
Apple Hill Summit Actions
-
Apple Trade
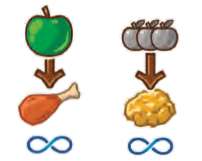
Spend apples of the indicated color(s) and quantities to gain the resource(s) shown.
Note: If the apples are gray, this means color does not matter, and you may spend apples from either track (in any combination).
-
Apple Homestead
Spend apples of the indicated color(s) and quantities to move your marker up on the homestead track shown. If the track indicator is multi-colored, choose either of the apple homestead tracks to move up on.
Whenever moving up on a homestead track gain a reward: a) Granny Smith track: Perform the Fur Trade action or b) Red Delicious track: Gain 2 gold.
If your marker cannot move up anymore on a given track, leave it where it is and gain the reward.
Unlike the regular homestead tracks, the apple homestead tracks do not restrict the number of players that can reach their top spaces.
Apple Hill Extra Scoring
Score points on the red and green apple homestead tracks the same way as the others: Multiply each of your markers' positions by your wagon's position (see Scoring above).
Woah! You are now ready to play the game!
You will still need to look up the functions of the various cabins-but don't hold up the fun: we have conveniently placed them in a reference section at the end of these rules.
For now, you know everything required for the Apple Hill mode. When you decide to play a different mode, simply setup the game using its setup rules, and read the mode-specific rules section. Then you will be ready to experience Sierra West anew!
Boat Banjos

In Boats & Banjos, fish are limited and cannot be gained if the supply is currently empty. Fish are never considered basic resources.
Boat Banjos Path Actions
-
Panning

Take the leftmost resource from each river card along your trail.
Note: If there are no resources left on a card, simply skip it.
-
Banjo Hazard & Dueling Banjos

The banjo hazard is a mandatory path action. It can either be resolved by having your tan-path pioneer activate a Dueling Banjos paid path action or by taking damage.
Note: You may only move your green-path pioneer past a banjo hazard while your tan-path pioneer is still on an activated Dueling Banjos paid path action.
By itself, the Dueling Banjos action has no effect-its only function is to allow your other pioneer to escape the banjo hazard.
-
Double Paddle, Single Paddle, Rapid Paddle:
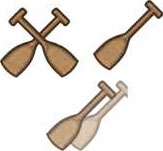
The Single Paddle action allows you to move your canoe to an adjacent river card (or between the Fish Market tile and the first river card).
The Double Paddle action is exactly like using 1-2 Single Paddle actions. You cannot interrupt a Double Paddle action with another action or save one for later use.
The Rapid Paddle allows you to move to any River card or the Fish Market. Note: This action cannot be used to move in more than one direction per use.
Note: You may move your canoe onto cards that are not along your trail, meaning your canoe may move beyond your wagon's position.
-
Go Fish

Gain all the fish shown on river cards left of your canoe, including the card that your canoe is on.
Note: Fish are limited. If there is not enough of a given fish in the supply when you Go Fish, ignore any that are not available at this time.
Boat Banjos Summit
Buy Fish

Spend the two basic resources to gain a fish of any color from the supply (if available). You may do this multiple times.
Actions Fish Market
As long as your canoe is on the Fish Market tile during your Pioneering step, you may exchange fish for resources as shown on the tile:
- 1 fish for a matching colored resource
- 2 different fish for 1 gold
- 3 different fish for 2 gold
- 2 matching fish for 3 gold
- 3 matching fish for 4 gold
Note: Fish spent are returned to the general supply! Therefore they can be gained again later.
Seeding River Cards
Whenever a new river card is first added to the river, it must be seeded with resources. In order to do this, look at the resources depicted on the card, and place the resource tokens following the same left-to-right order on the card.
Boats and Banjos Extra Scoring
There is no extra scoring in this mode.
Note: Leftover fish are not worth any points; and the position of your canoe does not affect anything after the game has ended.
Gold Rush

Mine carts are limited and cannot be gained once the supply is empty. Gold in mine carts cannot be removed once it has been placed.
Gold Rush Path Actions
-
Mining

Count the number of gold pieces on the mine cards along your trail, (ignoring any "dark mine" cards-unless you have the lantern card; see below). This is the tentative number of gold pieces you might receive. Then roll the die.
Based on the result, a number of the gold pieces must be exchanged for stone before your recieve them:
- If you roll a 1-2, exchange 1 gold;
- If you roll a 2-3, exchange 2 gold,
- If you roll a 5-6, exchange 3 gold.
Note: If the number of gold pieces you must exchange exceeds the amount available along your trail, ignore any excess.
In other words, the die result does not affect any gold that was already in your supply before you used the Mining action.
-
Gain The Lantern
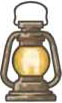
Take the lantern card (from the supply or from another player).
If you use a Mining action while you have the lantern card, gain the additional gold pieces shown on the "dark mine" cards along your trail.
Note: If you already have the lantern card, this action has no effect. The lantern card is worth 3 points at the end of the game.
-
Load a Mine Cart
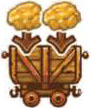
You may choose one of your mine carts and fill it with 1 or 2 gold from your supply. Each mine cart can hold 2 gold maximum. Gold in mine carts is worth 3 points at the end of the game (instead of 1 point).
Note: Gold that has been loaded into a minecart cannot be spent or removed. It must remain in the cart until the end of the game.
-
Gain the Dynamite

Take the dynamite card (from the supply or from another player). While you have the dynamite card, you may exchange 2 stone for 1 gold. You may repeat this process as many times as you like during your Pioneering Step.
Note: If you already have the dynamite card, this action has no effect. The dynamite card is worth 3 points at the end of the game if you have it.
Gold Rush Summit Actions
Purchase A Mine Cart
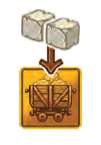
Spend the resources indicated to take a mine cart from the supply (if available) and place it near your player board. It can now be used during the Load Mine Cart action.
Gold Rush Extra Scoring
Each gold piece on a mine cart scores 3 points (instead of 1 point). Note: Empty mine carts have no value.
The dynamite and lantern card are worth 3 points each.
Outlaws and Outposts

There are 10/12 outlaws setup on the outposts. As you remove them, each card uncovered gets flipped into the row below (as a poster with better shooting odds).
After the final outlaw has been removed from the mountain, the outpost card marked "V" is flipped and placed in the row. The 5 extra outlaws from the supply are placed on the mountain base. It is not required that all of the outlaws are removed for the game to end. The end of the game is still triggered as soon as the final special card is added to the row.
Outlaws score you points equal to the multiplier of your wagon's position. For example, if you have 4 outlaws and your wagon is on the x3 space, you gain 12 points.
Note: Frontiersmen on the mountain base are not affected by the outlaws added there - meaning that they do not make players take damage, etc.
Outlaws and Outposts Path Actions
-
Gain Bullets
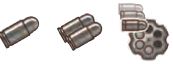
Gain the indicated number of bullets, to a maximum of 6 bullets. The third icon means "fill your ammo": gain bullets until you have 6.
To track how many bullets you have, slide the top bullet supply card to show the correct amount.
-
New Sheriff

Take the Sheriff card (from the supply or from another player).
- While you have the Sheriff card, add 1 to each die result you roll when using the Six-Shooter action.
- If you capture an outlaw (by using the Six-Shooter or Rifle action), gain 1 gold.
Note: If you already have the Sheriff card, this action has no effect. The Sheriff card is worth 3 points at the end of the game if you have it.
Outlaws and Outposts Summit Actions
-
Six-shooter

Spend any number of bullets (one at a time). For each bullet spent, roll the six- sided die.
If the number you roll is equal to any of the die faces along your trail, remove and capture one outlaw from the card with the lowest number (the highest up outpost). Keep the outlaw in your supply, as it will be worth points at the end of the game.
If you have the Sheriff card, increase the value of every die result you roll by 1.
If the last outlaw is removed from an outpost, move the now empty outpost card to the row below the wagon trail, poster side up.
If you successfully captured an outlaw with this action, you cannot use this six-shooter again to target another bandit.
If you did not successfully capture an outlaw with this action - by running out of bullets or by choosing to stop - you must take damage.
-
Rifle

Spend 2 bullets and capture one outlaw from the card with the lowest number (the highest up outpost).
Keep the outlaw in your supply, as it will be worth points at the end of the game.
Outlaws and Outpost Extra Scoring
Multiply each of outlaw you have captured by your wagon's position. For example, if you have 3 outlaws and your wagon is at the "4x" space, score 12 points.
The Sheriff card is worth 3 points.
Continue Reading
