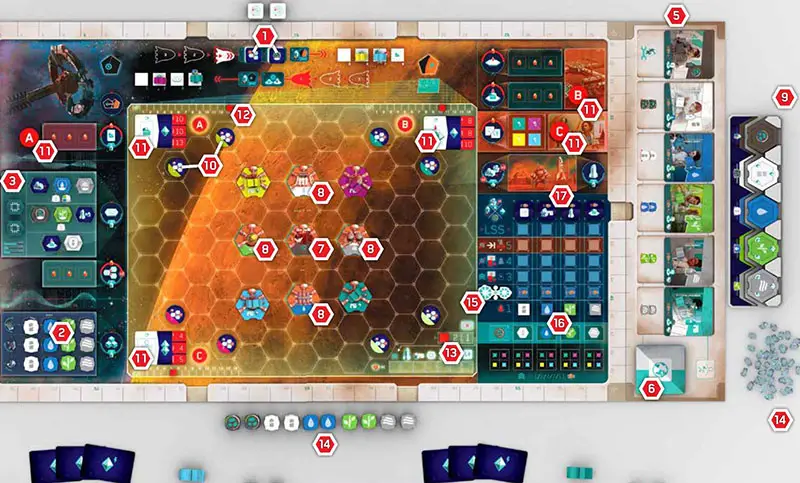
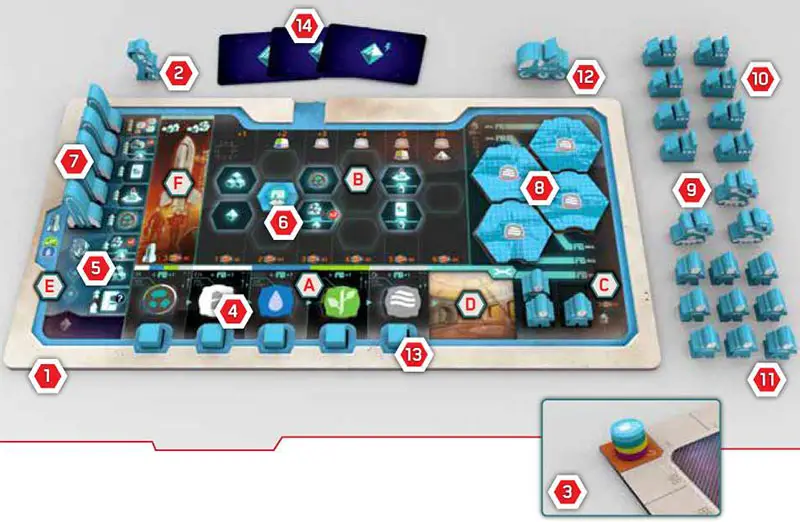
Place the game board in the middle of the table. The board is divided into two sections. The left side of the board represents the Mars Space Station in orbit above Mars [Orbit]. The rest of the board represents the Colony on the planet's surface [Colony].
 The main board represents a computer display where the colonization of the planet can be monitored in real time from satellites in orbit. |
Orbit Side
1 Shuffle the Discovery tiles and place them face down in a stack beside the board. Turn the top 2 tiles face up and place them on the Exploration space.
2 Place 3 of each of the following in the Warehouse spaces, one per space: Crystals, Batteries, Water, Plants, and Oxygen.
Note: In a 2-player game: Place only 2 of each.
3 Take the Tech tiles and set aside those that depict a Shelter (one in each player color).
Separate the rest into two sets based on the color on the back. Shuffle one set and place them at random face up on each of the spaces in the Tech Grid. Shuffle the 8 remaining Tech tiles (not including the Shelters) and place them face down in two stacks next to the Tech Grid.
Note: 2-player game: Use only 1 set of tiles. Remove the 2nd set from the game.
4 Separate the Blueprint cards into two decks based on their backs: Level 1 and Level 3, shuffle each deck separately and place them face down near the board with the Level 1 cards stacked on top of the Level 3 cards.
Take the top 6 cards from the deck and place them face up in a display along the side of the board.
Colony Side
5 Place the Scientist display next to the main board. Place the 6 Scientist cards in the spaces on the board in the following order from left to right: Geologist, R&D Engineer, Hydrologist, Biochemist, Geochemist, and Systems Engineer.
Place the cards on the top part of each space, covering the Crystal icon and leaving the bottom section of each space (showing the cost) visible. Then place each Scientist marker on its matching card.
6 Place the Earth Contract cards face down in a deck on the Scientist display. There is no need to shuffle them.
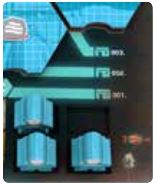
7 Take the starting Mine (the one with an S on the back) and place it in the indicated space in the center of the board.
8 Take the remaining starting Buildings (with an S on the back) and place them at random on the indicated spaces of the board, as per the setup image. Ensure that the orientation of the tiles is the same (the notch should be facing the bottom of the board).
Note: the Shelters will be placed during player setup.
9 Place the Building display board near the Scientist cards. Separate the rest of the Buildings by type into stacks. Shuffle each stack separately and place them with the image of the building face down on the corresponding spaces.
10 Take the Research tiles and separate them by type (color and letter). Place them on the indicated spaces of the map (keeping all of one type together in the same corner of the map).
11 Take the Mission cards and divide them into two decks based on their type: Short and Long. Shuffle each deck separately and choose 2 Short and 1 Long at random (for the short game) or 1 Short and 2 Long (for the long game).
Note: for your first game, it is recommended to use the First Colonists variant. Place the Mission cards face up on the indicated spaces on the board. For each Mission, take the Mission marker for that space and place it near the action relating to the Mission card.
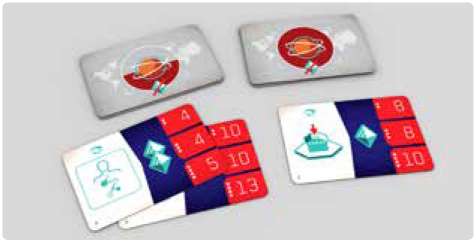 Mission cards chosen for a Short game. 2 Short and 1 Long. |
12 For each Mission card, place a Mission tracker cube near the Mission card, on the appropriate space according to the number of players in the game.
13 Place the Remaining Missions marker on space 3 of the Missions track.
14 Place all Crystals and Resources next to the board to make a general supply.
Life Support System (LSS)
15 Place the Colony level marker on the left side of the second row.
16 Place the LSS Track markers on the appropriate spaces of the bottom row.
17 Shuffle the LSS Reward tiles and place 4 of them at random face up on the top spaces. Return the rest to the box, they will not be needed for this game.
Player Setup
Each player chooses a color and takes the following:
1 1 Player board.
2 1 Player marker.
3 1 OP marker, placed on the 0 space of the OP track.
4 1 Resource of each of the 5 types, placed on the matching spaces of your Storage A.
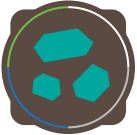
5 1 Crystal, placed in the Depot E.
6 1 Shelter Tech tile (set-aside earlier), placed on the middle space of the 2nd column in your Laboratory B.
7 5 Ships, placed on the top 5 Depot spaces.
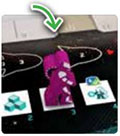
8 5 Shelter Buildings, 4 placed in their positions on the right side of your Player board, and 1 placed building-side up in one of the Shelter starting positions according to the number of players (as per the images to the right and in the indicated hexes on the main board). Shelters should be placed in a position nearest to their respective players for convenience.
9 4 Bots. 3 are placed beside your Player board, and 1 on your Shelter on the main board.
10 8 Advanced Building markers, placed beside your Player board.
11 12 Colonists. 3 are placed in the Living Quarters and the remaining 9 are placed beside the Player board.
12 1 Rover, placed beside your Player board.
13 5 Progress cubes, 1 placed below each of the Resources.
14 3 Private Goal cards: Shuffle the Private Goal cards and deal each player 3 of them face down. Players should look at their own cards but keep them secret from the other players. Place the rest back in the box.
The player who has seen the film "The Martian the most times is the first player.
In clockwise order, starting with the first player, each player places their Player marker in any empty Turn Order space (1-8) and may immediately receive the benefit of that space.
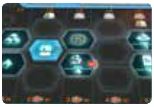
The player whose Player marker is on the highest numbered Turn Order space places the Shuttle on one of the Red Travel spaces (with a number 1 in it), either on the Colony or Orbit side (their choice).

Possible starting spaces for the Shuttle.
Minerals
Minerals are a much needed Resource on the surface of Mars.
They are used for a variety of things, and can also be used instead of any other Resource (not Crystals). The exception to this is completing an Earth Contract.
Player Board
Your Player board represents a display of your main shelter, and it is divided into different sections:

A. Storage
Your Resources will be stored here. There are five different Resources in the game: Minerals, Batteries, Water, Plants, and Oxygen.
The number of Resources of each type you can store on your Player board is equal to the number of Shelter tiles you have on the map plus one. (e.g. if you have one shelter, you can store two of each Resource).
The order in which each Resource appears on your board is very important. A Resource to the left of an arrow is needed to build the Building of the type to the right of the arrow. For example, you need power (the Battery Resource) to build a Water extractor, then you need Water to build a Greenhouse, and so on.
B. Laboratory
Here is where you will place and develop technologies you research.
C. Living Quarters
Your Colonists will go here. At the beginning of the game, you have space for 4 Colonists, and 3 of the slots are occupied. 2 more slots become available for each additional Shelter you build.
D. Working Area
Colonists can be sent here to boost some of the actions you take. There is no limit to the number of Colonists you can have in your Working Area.
E. Depot
There are 8 spaces in your Depot for storing Crystals. At the beginning of the game, however, you only have 3 slots available as your Ships are taking 5 of the slots.

F. Hangar
Your Private Ships are moved from your Depot to here during the game.
Continue Reading

