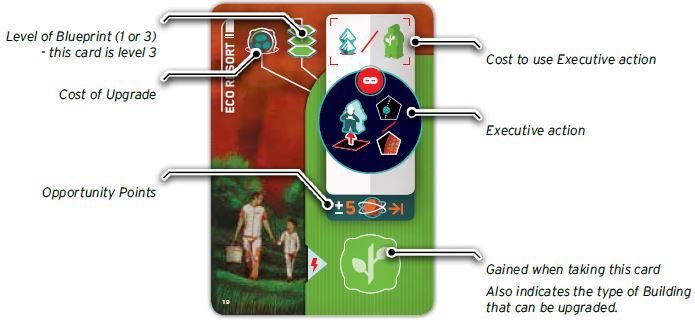
Components
- 1 Main board
- 4 Player boards
- 1 Building tiles display
- 1 Scientists board
- 1 Earth Contracts board
- 130 tiles
- 30 Crystals
- 3 Mission Tracker Cubes
- 48 Colonists
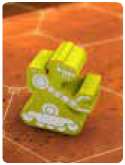
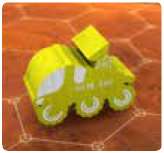
- 4 Rovers
- 20 Ships and 20 Progress Cubes
- 16 bots
- 56 markers
- 79 Cards
- Instructions
Overview
The game is played over several rounds, each consisting of two phases. The colonization phase and the shuttle phase.
During the colonization phase, each player takes a turn, during which they take actions. The actions a player is able to take depends on the side of the board they are on.
If players are on the Space Station in orbit, they can take blueprints, buy and develop technologies, and take supplies from the warehouse.
If players are at the colony on the surface of the planet, they can construct buildings with their bots, upgrade these buildings using blueprints, hire scientists and take new contracts, welcome new ships, and explore the planet's surface with their rover.
In the shuttle phase, players may travel between the colony and the space station in orbit.
All buildings on Mars have a dependency on each other and some are required for the colony to grow. Building shelters for colonists to live in requires oxygen, generating oxygen requires plants, growing plants requires water, extracting water from ice requires power, generating power requires mining minerals, and mining minerals requires colonists.
Upgrading the colony's ability to provide each of these resources is vital. As the colony grows, more shelters are needed so that the colonists can survive the inhospitable conditions on Mars.
Object of the Game
During the game, players are trying to complete missions. Once a total of three missions have been completed, the game ends.
To win the game, players must contribute the most to the development of the first colony on Mars. This is represented during the game by players gaining Opportunity Points (OP). The player with the most OP at the end of the game is declared the winner.
Important Terms
-

Whenever you gain something during the game, it is taken from the general supply.
Only take it from the Warehouse on the Main board if specifically told to do so and the Warehouse icon is depicted.
-
Resources are placed in your Storage (up to your limit).
-
Colonists are placed in your Living Quarters (if there is an available slot). The capacity of your Living Quarters is 4, plus 2 for each additional Shelter you have constructed. Any Colonists that would be placed in the Living Quarters when there is not enough space, are placed next to your Player board instead.
-
Any Crystals gained are placed in the space below your Depot; you cannot spend them on the turn you gain them. At the beginning of your next turn, move these Crystals to your Depot. If there is not enough space, place any excess back in the supply.
-
Whenever you must pay a cost of something (Resource or Crystal), move it from your Player board and place it back in the general supply.
-
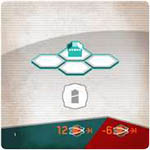
A group of connected Buildings of the same type is known as a Building Complex. The number of Buildings within the Complex indicates its size. A single Building not connected to another one of the same type is not a Complex.
-
Anything that is done in Turn Order means that you follow the order of the Player markers on the Turn Order spaces, starting with 1 and ending with 8.
-
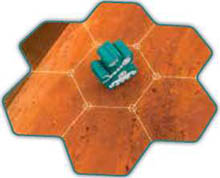
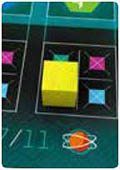
An empty hex is a hex on the board with nothing in it at all.
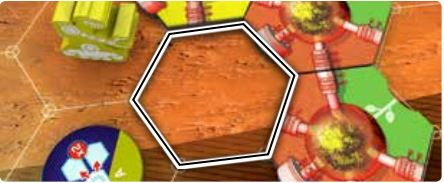
An empty hex.
-
No hex may contain more than one piece at the end of any player's turn. (Pieces are Bots, Rovers, Colonists, or Advanced Building markers).
Game Play
Each round is divided into two phases:
-
Colonization Phase:
In turn order, each player takes a turn during which they perform 1 Main action and optionally 1 Executive action.
-
Shuttle Phase:
The Shuttle either travels between Orbit and the Colony, or it moves closer to traveling.
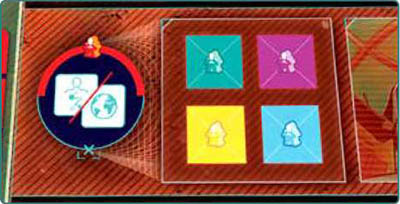
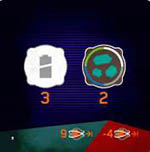
Order of Play:
In the picture below, the order of play would be: Purple, Green, Yellow, and Blue.

Colonization Phase
In this phase, all players take one turn. The order in which players take turns is determined by the order of the Player markers on the Turn Order spaces, starting with the leftmost space on the Orbit side (1) and proceeding right, ending at the rightmost space on the Colony side (8).
On your turn, you must perform one Main action. You may also perform one Executive action either before or after your Main action.
If you contribute to any of the Mission cards, you gain 1 or 2 Crystals as depicted on the card.
When your turn is complete, lay your Player marker down as a reminder that you've finished your turn. The next player then takes their turn.
Main Board Actions
There are a number of different Main actions you can take on the Main board. If your Player marker is on the Orbit side of the board, only the Orbital Station actions are available to you. Similarly, if your Player marker is on the Colony side of the board, only the Colony actions are available to you.
Some of the actions depict a Red Colonist icon and/or a Teal Colonist icon, and/or a Crystal.
Teal Colonist:

This icon can be found at the bottom of some of the action icons and indicates that one or more Colonists may be moved to your Working Area to boost the power of the action.
Any Colonists in your Working Area are returned to your Living Quarters at the end of the round if you travel. See the individual actions for full details on this.
Crystal:

If this icon is printed at the bottom of the action, it means the action can be boosted by spending Crystals. See the individual actions for full details on how the action is boosted.
Red Colonist:

This icon can be found at the top of some action icons and indicates that in order to perform the action, you must place one of your Colonists from your Living Quarters onto one of the Action slots.
If there are currently no Colonists of other players on the Action slots for this action, there is no additional cost to take the action.
Otherwise, for each other player color of Colonists already present, you must either pay 1 Crystal or move a Colonist from your Living Quarters to your Working Area.
The number of Colonists of each color does not matter, only the number of different colors present. If two or more other colors of Colonists are present, you can combine paying Crystals and/or Colonists.
Actions without this icon mean that you may take the action without placing a Colonist. Simply declare that you are taking the action and then resolve it.

Orbital Station Main Actions
Landing Pod
Landings using the pod are slow, painful, expensive, and lonely, but sometimes your best option. Proceed at your own risk!
This action allows you to travel to the Colony. Follow the rules as described for the Shuttle Phase but skip step 1 (placing a Discovery tile).
After you have chosen a Turn Order space on the Colony side, lay your Player marker down to indicate that you have already taken your turn this round. If the Shuttle travels from Mars to Orbit this round, you may travel with it as normal.
Note: This action may seem unusual at first. The use of this action will become clear once you have played a few rounds.
Obtain Blueprint

Earth sends blueprints to improve the buildings and making them more effective. More blueprints become available when the Colony grows in size and more funding becomes available.
This action allows you to take 1 Blueprint card from the ones available in the display. These Blueprints are required for upgrading Buildings which will provide new Executive actions.
Place the card face up next to your Player board and gain the Resource or Crystal depicted in the bottom right of the card. Finally, place one of your unused Advanced Building markers on the card.
If you do not have any Advanced Building markers remaining, you cannot take the Blueprint. Do not draw a replacement card.
Note: As long as the Advanced Building marker is on the card, the depicted action cannot be used. The marker is removed when you upgrade a Building using the Blueprint.
Boosted action: For each Colonist you move to your Working Area when taking this action, you can take an additional Blueprint, following the same rules as above.
Learn New Technology

Technology tiles allow you to perform or enhance certain actions. The more developed they are, the more powerful they become. Tech tiles are also worth points at the end of the game.
Take 1 Tech tile from the Tech Grid and place it on an empty space of the leftmost column in your Laboratory. If both of these spaces already have a tile on them, you may not take this action.
The cost to take a tile depends on its position in the Tech Grid. Taking a tile from one of the bottom spaces is free, taking a tile from one of the middle spaces costs 1 Battery, and taking a tile from one of the top three spaces costs 1 Battery and 1 Resource of your choice. Tech tiles are not refilled until the Colony level increases..
After placing the tile in your Laboratory, you may immediately gain the benefit shown by that graphic printed on that space.
Some of these benefits also show a Teal Colonist icon, meaning that the action can be boosted by using additional Colonists as normal. See the Reference book for an explanation of these graphics.
Boosted action: You may move a Colonist to your Working area when performing this action to take a second Tech Tile following the same rules as above.
Note: Each player may only have 1 Tech tile of each type.
Research and development
All technological developments are carried out on the Space Station orbiting Mars. These technologies will be put into good use on the surface of the planet.
This action allows you to develop Tech tiles on your Player board by moving them to the right. You may develop 1 Tech tile twice or 2 Tech tiles once each. If you develop only 1 tile twice, treat each of the movements separately.
To develop a Tech tile, move it to an adjacent empty space to the right of the tile's current position and pay the cost depicted above the column the tile is moving to.
If you move a Tech tile to a space with a graphic on it, you may immediately gain the benefit of that space (see Reference book).
Note: If a development provides you with Resources, you can use those Resources to pay for another development.
Note: The number above each column is the technology level of each tile in that column. At the end of the game, each of your Tech tiles is worth OP depicted below the column.
Boosted action: For each Colonist you move to your Working Area when taking this action, develop any 1 Tech tile in your Laboratory once.
You may develop the same tile multiple times in this way, and you may develop a tile even if you didn't develop it with the Main action.

Using Tech Tiles: At various times in the game, such as when performing a particular action, if there is a related Tech tile owned by any player, the action can be made more powerful.
The greater the level of that Tech tile, the better the action will be.
Each time you use Tech, you may use any one Tech tile, belonging to you or another player.
If you use another player's Tech tile, that player takes 1 Oxygen from the general supply and places it at the top of their Player board.

At the end of your turn, that player has the option to immediately develop the Tech tile that was used, at no cost (including getting the benefit of a space they move the tile to).
If they do, the Oxygen taken earlier is placed back to the general supply. If they cannot or do not wish to develop the Tech tile, they gain the Oxygen.
Resupply:

Resources from Earth are in short supply and there is limited space in the warehouse. More resources will arrive as the colony grows.
This action allows you to take any 1 Resource or 1 Crystal from the Warehouse and place it in your Storage/Depot.
Boosted action: For each Colonist you move to your Working Area when taking this action, take 1 additional Crystal or Resource from the Warehouse.
Reminder: You have limited capacity for storing Crystals (the number of empty spaces in your Depot) and Resources (equal to the number of Shelters you have, plus one).
Note: You cannot take something from the Warehouse if you do not have the capacity to store it.
Colony Main Actions
Control Center:
The first robotic rover that successfully landed on Mars was Sojourner in July of 1997. Later, the Spirit and Opportunity Rovers landed on Mars in January 2004.
Curiosity landed in 2012 and is still operating. Rovers are responsible for most of the information and data we have gathered from the surface of the planet.
This action allows you to move your Bots and your Rover. You have 2 Movement points to use for moving your Bots and 2 Movement points to use for moving your Rover. You can do this in any order. You could move one Bot 1 hex, then your Rover, then another Bot (or even the same one).
Each Movement point allows you to move the Bot / Rover to an adjacent hex.
Each Crystal you have in your Depot prior to taking this action may be spent to gain 1 additional Movement point for either your Bots or your Rover.
Note: Bots and Rovers can pass through, but not end the turn on, a hex containing an Advanced Building, Colonist, another Bot, or another Rover.
Bots: Bots are cleaners and builders. If a Bot ends its turn in a hex with a Discovery or Research tile, the tile is destroyed and removed from the game.
If a Bot ends the turn in a hex with a Crystal, return the Crystal back to the general supply.
The hex the Bot is in and all adjacent hexes are classed as that Bot's Building Zone.
This is relevant for constructing and upgrading Buildings.
Rover: Rovers travel around the map collecting Crystals by simply passing over them, or Discovery tiles and Research tiles if they end the turn on them.
At the start of the game, although the piece representing your Rover is next to your Player board, your Rover is actually at the starting Mine in the center of the board. When you move your Rover for the first time in the game, first place your Rover on the starting Mine and then count spaces from there.
You can also use a Rover Tech tile to gain additional Movement points equal to the level of the Tech tile.
You may collect any Crystals on hexes you pass through or land on. Take them from the board and place them in the space below your Depot as if you had gained them (you cannot spend them this turn).
After you have performed all your movement, if there is a Discovery or Research tile on the hex where your Rover is, you may remove that tile from the board to gain the benefit as long as you meet the following conditions:
- You must not have already taken a Research tile of that color and letter.
- You must pay any cost associated with the benefit.
- You must be able to take at least some of the benefit. If you cannot, your Rover cannot end its movement on that hex.
If you gain a tile, resolve it immediately by paying any associated cost, then place it in your play area (put Discovery tiles face down). Discovery and Research tiles may be needed to complete a Mission or a Private Goal.

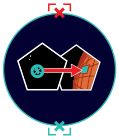
Using Rover Technology
When moving your Rover, you can increase its range by using the related Tech tile.
Construct a Building:
Construction of critical Buildings is essential to the development of the Colony and the arrival of new ships, welcoming more colonists to the planet.
Production levels of power, water, food, and oxygen must be increased to sustain the necessary conditions for the self-sufficiency of the inhabitants on Mars.
Companies that contribute to these improvements will be rewarded with resources and recognition.
This action allows you to add a new Building on Mars. You can either place a Building:
-
Adjacent to an existing Building of the same type (creating a Complex - this requires the use of a Tech tile), or
-
Exactly 2 spaces away from an existing Building of the same type (and not adjacent to another existing Building of the same type).
Note: Your Shelters and your opponents' Shelters are considered to be Buildings of different types.
Follow these steps:
-
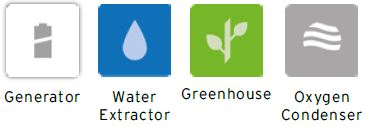
Choose which Building you want to construct. Either one of the tiles next to the board (Mine, Generator, Water extractor, Greenhouse, Oxygen Condenser) or the Shelter in the lowest position on your Player board.
-
Pay the cost as shown on the Building display board. For Mines, see the bullet points below. For Shelters, the cost is 1 Oxygen (printed on the Shelter tiles).
-
Place the new tile face down on a hex (in the same orientation as other already-placed tiles) that currently does not contain a Building and is within the Building zone of one of your Bots (on the Bot's hex, or adjacent to the Bot).
If you placed a Building adjacent to one or more Buildings of the same type (creating or increasing the size of a Complex), you must use a Tech tile of the related type and level.
If you placed a tile exactly 2 hexes away from a Building of the same type, no Tech tile is needed. This does not count as creating a Complex.
-

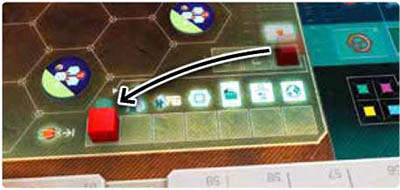
If the Building tile you placed has arrows on it, place 1 Crystal from the general supply in each adjacent empty hex that the arrows are pointing to. Then, flip the tile face up, ensuring the correct orientation is maintained.
-
Gain a number of Resources matching the type of Building equal to the new size of the Complex (i.e. the number of contiguous hexes consisting of tiles matching the tile you just placed). If you placed the Building not adjacent to a Building of the same type, you gain 1 Resource.
If you placed a Shelter, you gain Crystals instead of Resources.
The following rules also apply when Constructing:
-
The first time in the game that you create or increase the size of a Complex, move your Progress cube from the bottom of your Player board for the corresponding Building and place it in an empty slot of the corresponding building in the Progress area.
Note: You only get to move a Progress cube if you create or increase the size of a Complex (2 or more connected buildings of the same type).
Constructing a standalone Building not connected to another Building of the same type does not allow you to move a Progress cube.
Note: Constructing a Shelter Complex does not allow you to move a Progress cube.
Progress Area
In the bottom right of the main board is the Progress area. Progress cubes placed in this area will score points during the first and second Colony upgrade, and at the end of the game.
-

If you placed a Mine, you must place 1 Colonist from your Living Quarters onto the Mine.
If you do not have any Colonists in your Living Quarters, you cannot build a Mine. That Colonist is now considered a Miner and will produce Minerals when you travel to Orbit.
-
If you constructed an LSS Building, move the corresponding marker on the LSS track up by 1 space, if able. This may trigger LSS Rewards.
LSS Buildings
An LSS Building is one of the types which is critical to the colony. These are depicted in the LSS area of the game board.
Displacement Rule:
If you construct or upgrade a Building on top of a Crystal, return it to the general supply.
If you construct or upgrade a Building on top of a Discovery or Research tile, return it to the game box.
If you construct or upgrade a Building on top of a Bot or Rover, that piece must be moved away from its current position by its owner to the closest available hex (either an empty hex or a Building with no other piece on it).
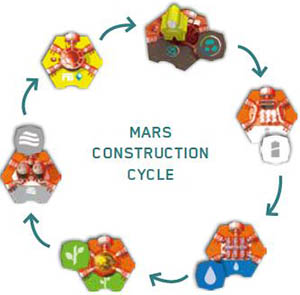
Building Shelters for Colonists to live in requires Oxygen, generating Oxygen requires Plants, growing Plants requires Water, extracting Water requires Power, generating Power requires mining Minerals, and mining Minerals requires Colonists.
Using Technology to Construct
If you construct a Building which creates or increases the size of a Complex (i.e. you are placing a Building adjacent to a Building of the same type), you must use a related Tech tile. e.g.
To place a Greenhouse adjacent to another Greenhouse, you need to use a Greenhouse Tech tile.
The level of the Tech tile used must be egual to or greater than the total number of Buildings that you are connecting to. If connecting to an existing complex of Buildings, each Building in that Complex counts as 1 Building, even if the Building is not directly connected to the new Building.
Mines:
Resource mining will be one of the most lucrative industries on Mars. Private companies will compete for the rights to mine the most profitable regions of the planet.
Mines work in a few different ways. They are not part of the LSS and the Minerals they produce cannot be acquired from the Warehouse.
Mines are built in the same way as other Buildings, but instead of paying a Resource to place the tile, you must place 1 Colonist from your Living Quarters on the Mine after it has been placed. If you do not have a Colonist in your Living Quarters, you cannot build the Mine.
In addition to the Minerals received from placing a Mine, each of your Colonists on a Mine also produces 1 Mineral every time you travel to Orbit.
Creating or Increasing the size of a Mine Complex allows you to place your Progress cube in the Progress area as normal.
Even if a Colonist is working in a Mine, the mine is not owned by any player. Therefore, any player may upgrade a mine with another player's Colonist on it.
Life Support System (LSS)
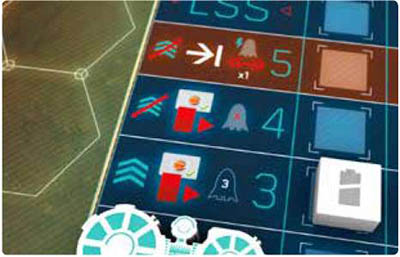
The row occupied by the Colony level marker represents the current needs of the colony. At the start of the game, there is one of each Building on the map and the colony wants two of everything.
Players who help meet that need (by placing the appropriate Building tile) will gain a bonus. However, advancing the marker further before the Colony level marker has advanced will not give you a bonus because the colony does not need that type of Building right now.
The LSS represents the essential buildings needed to maintain survival on Mars and allow more Colonists to arrive. It also shows the current Colony level, which is the row below where the Colony level marker is. At the start of the game, the marker is on the second row, so the Colony level is 1.
Each column represents a subsystem of the LSS and tracks the number of constructed Buildings of the corresponding type on the map. Each time a Building tile is placed on the board, move the marker in its column 1 space up, unless it is already at the top of the column.
The first time an LSS Building of each type is built (i.e. moving the marker from the bottom row to the next row up), the player who built that Building scores 2 OP.
Also, if the marker was below the row where the Colony level marker is before it was moved, the player who advances the marker gains two additional benefits:
-

OP according to the LSS Reward tile at the top of the column the marker is in. Do not remove the LSS tile.
-

One of the benefits shown in the top-left of the LSS.
The LSS Reward tiles and other benefits are all explained in the Reference book.
The current Colony level also determines the frequency of travel of the Shuttle.
Colony Status Update
Whenever all of the markers advance to the row with the Colony level marker (or higher), the Colony Status is updated at the end of your turn.
Follow these steps:
-
Move the Colony level marker up one row.
-
New Blueprint cards may be added to the display.
If the colony has just reached Lvl 2, remove all remaining Blueprints from the display (place them back in the box) add the top 12 cards from the Blueprint deck to the display (this will be the remaining 6 Lvl 1 cards and 6 Lvl 3 cards).
If the colony has just reached Lvl 3, remove all Lvl 1 Blueprints from the display (place them back in the box) add the remaining 6 Lvl 3 cards from the deck to the display.
-
Refill any empty spaces in the Tech Grid with new Tech tiles from the stack (fill spaces from bottom to top).
-
Refill the Warehouse with Crystals and Resources from the general supply until there are 3 of each.
-
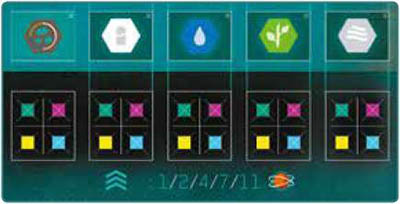
The first two times the Colony Status is updated each player gains 1/2/4/7/11 points for having 1/2/3/4/5 cubes in the Progress area.

-
If the Colony Level is now at 3 or higher, move the Remaining Missions marker one space to the right (see page 19).

Upgrade a Building
The only way to have a self-sustaining colony on Mars is by upgrading the basic buildings to advanced ones using the latest terrestrial and Martian technology.
This action allows you to use a Blueprint you have previously taken to upgrade one of the Buildings on the map into an Advanced Building.
- Each Building can only be upgraded once.
- Each Blueprint can only be used once.
Advanced Buildings produce Resources when you travel to Orbit and also have a special action which can be used as an Executive action.
The icon in the top-left of the Blueprint indicates the type and the minimum size of building that can be upgraded.
A level-1 Blueprint can be used to upgrade any of the corresponding Buildings.
A level-3 Blueprint can be used to upgrade a corresponding Building as long as it is part of a Complex of size 3 or greater.
To upgrade a Building, it must be in the Building zone of one of your Bots. Also, when upgrading a Shelter, you can only upgrade one of your Shelters, not one belonging to another player. To upgrade, follow these steps:
-
Choose a Blueprint and matching Building.
-
Pay 1 Mineral to the general supply.
-
Take your Advanced Building marker from the Blueprint and place it on the Building tile that you are upgrading.
If there was a Bot or Rover on the tile, follow the Displacement rule on page 13.
If there was a Colonist on the tile, move that Colonist back to the owner's Living Quarters. If there is not enough space for them, return them to that player's supply.

If you use an Upgrade Tech tile (yours or another player's) when performing this action, you may repeat this process up to a number of times equal to the level of the Tech tile used. I.e. if you use a level 2 tech, you may perform up to 3 upgrades.
Welcome a Ship

Once sustainable conditions are created on the colony, new ships arrive with the next generation of colonists and machines to help the colony expansion.
This action allows you to move any 1 of your Private Ships from your Depot to your Hangar. The cost of doing this is 1 Plant and 1 Water (there is a reminder of this to the left of your Depot).
When you do this, gain either:
- 1 Colonist and 1 Bot, or
- 2 Colonists.
Place new Colonists in empty spaces in your Living Quarters, if able.
Place a new Bot on one of your Shelters that is currently empty. If none of your Shelters are empty, place the Bot on the closest available empty space to one of your Shelters.
Boosted action: For each Colonist you move to your Working Area when taking this action, move 1 additional Ship. You must pay 1 Water and 1 Plant for, and receive the benefits from, each ship as normal.
Note: You cannot boost this action with Colonists you just gained this turn.
The number of ships in total that can be removed from your Depot is equal to the current Colony level.
Ships in your Hangar are worth points at the end of the game, but you can discard one during the Shuttle phase to travel.
Hire a Scientist or take an Earth Contract:

It's a mistake to try to build a sustainable colony on a distant planet without any scientists. The knowledge and study of the unknown is in their hands. In fact, those will be the leaders of all expeditions on Earth or on any distant planet.
At the start of the game, only the 6 Scientists are available in the display. As they get taken, they will be replaced by Contract cards.
This action has only one available slot per player. You can not take this action if you already have a Colonist there. You still pay any additional cost to take this action based on Colonists of other colors on Action slots.
Note: Unlike other actions, these Action slots do not clear when they are all full. You must retrieve your Colonists by other means (such as when you travel).
-
Choose a card on the display and pay the indicated cost as depicted on the display board. (The cost to take the Geologist is moving 2 Colonists from your Living Quarters to your Working Area).
-
Take the card and place it face up in front of you. If you took a Scientist, also take the Scientist marker on the card.
-
At the end of your turn, refill the slot on the display with a Contract card of your choice. You may freely look through them and choose the one you want. Place the Contract on the lower half of the space (covering over the old Scientist cost, and leaving the Crystal on the space visible).
Earth Contracts
Cost to take: 1 Crystal.
If you complete a Contract at the end of the game, gain the OP depicted. If you fail to complete it, you lose the OP depicted instead.
There are two types of Contract:
Delivery Contracts: Once you have one of these contracts, you may move Crystals and Resources of the depicted types from your Player board onto the Contract at any time during the game.
Anything required by the Contract that you gain can be placed directly on the card, bypassing your Player board. To complete this Contract, all of the depicted items must be on the card at the end of the game.
Minerals cannot be used as another type of Resource for completing a Contract.
Upgrade Contracts: To complete this type of Contract, at the end of the game you must have an Advanced building marker on a Building of the depicted type that is part of a Complex of at least size 4.
 Mars Crystals (Marsinum):
At the start of the game, you have space in your Depot to store 3 Crystals. This can be increased by Welcoming new Ships. Crystals are needed to pay for Executive actions.
Reminder: Any Crystals gained are placed in the space below your Depot; you cannot spend them on the turn you gain them.
Marsinum is a new crystal being found on Mars for the first time. It is made up of radioactive isotopes forming a crystal structure, never seen before.
Its structure allows it to concentrate huge amounts of energy in its crystal lattice, making it not only radioactive but highly unstable as well and thus very dangerous. However, if handled appropriately, it constitutes a great source of energy never seen before.
The main use of Marsinum is to power up Bots and Rovers, but they are also used to trade favors. These Crystals are slowly becoming very valuable on Mars. I chose to create these crystals as a game currency because I believe no money will be used during the first 100 years of Mars colonization.
I like to imagine a power that has not been discovered until we reach another planet, and this is the story that I would like to tell in this game.
If you prefer a more realistic approach, the crystals can represent Uranium, a very radioactive heavy metal, which has been used as a source of concentrated energy and was already found on Mars. It's rare, powerful, and can easily be traded.
Executive Actions
Once per turn, before or after your Main action, you may perform one of the Executive actions available to you.
Your Executive actions are shown next to the slots in your Depot. An action is available to you as long as you do not have a ship on that space (i.e. at the start of the game, you only have access to the bottom 3 Executive actions in your Depot).
Each action has a cost in Crystals associated with it, and you must pay that amount of Crystals to perform the action.
The different Executive actions are described in the Reference book.
Boosting Tech with Colonists
Some Advanced Building actions depict the Teal Colonist icon at the bottom.
This means that you may send Colonists to your Working Area to temporarily add to the level of the tech when taking the action.
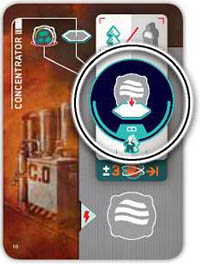
For Example: You are activating the Executive action of the Concentrator.
This allows you to construct a Oxygen Condenser. You want to increase the size of an existing Oxygen Condenser Complex from size 3 to size 4.
This requires a Tech tile of level 3 but you only have a related Tech tile of level 2. You move 1 Colonist from your Living Quarters to your Working Area to count as the level you are missing.
Scientists and Advanced Buildings

One of the Executive actions is to use one of your own Advanced Buildings at a cost of 2 Crystals. However, if you have a Scientist, you can put them to work in an Advanced Building that matches their specialty, even a Building belonging to another player.
You do this by moving the Scientist marker (even from another Blueprint card) onto the Blueprint card immediately before you perform the appropriate Executive action.
As long as a Scientist is working in a Building, both the owner of the Scientist, and the owner of the Building may perform the Executive action of that Building at no cost.
A Scientist must stay working in a building until they are moved out to work in another Building.
Scientists also grant OP at the end of the game based on the number of Advanced Buildings on Mars of the indicated type.
Missions
Missions are sent from Earth which determine the most important steps of colonization.

During Setup, 3 Mission cards are placed on the board. Each Mission card depicts an objective for the colony.
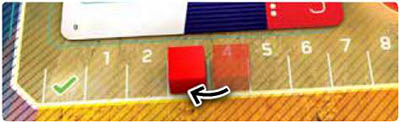
If you contribute to that objective, gain the Crystals shown on the card for each contribution and place them below your Depot. Also, move the Mission tracker cube down 1 space.
Once the requirements of the Mission are fully met (the cube reaches the space with the checkmark), remove the card from the game and move the Remaining Missions marker 1 space. See the reference book for details of the Missions.
Once a total of 3 Missions have been completed collectively by all players, the end of the game is triggered.
Note: The number of Missions required to trigger the end of the game can be reduced based on the Colony Level (see sidebar).

If the Colony reaches level 3, the number of completed Missions required to end the game is 2.

At Colony level 4, the number of completed Missions required to end the game is 1.

At Colony level 5, the end of the game is triggered, even if no Missions have been completed.
In each case, advance the Remaining Missions marker one space to track how many more are still needed.
Private Goals
Each company has its own priorities.

You start the game with 3 Private Goal cards, each of which depicts the requirements necessary to complete it. Each Private Goal is fully explained in the Reference book.
During your turn in the Colonization phase, if at any point you meet the requirements of the card, you may complete the Goal by placing it face up next to your player board and taking one of the rewards depicted.
Each player can only complete one Private Goal during the game.
Also, on your turn, you may discard a Private Goal from your hand (return it unseen to the box) and use it as if it were a Crystal. You may do this before and after completing your Private Goal (or, do not complete any Goal, and use all the cards as Crystals).
Note: You discard the card and use it as if it were a Crystal. You do not discard the card and take a Crystal.
Shuttle Phase
At the start of this phase, move the Shuttle one space towards the middle of the board following the arrows. If the Shuttle is already on the red Travel space closest to the middle of the board, it travels instead.
If the Shuttle travels, move it to the Travel space on the opposite side indicated by the current Colony level.
As the colony starts to become more and more self-sustained and less dependent on Earth's resources, the frequency of the shuttle is reduced.
Then in turn order, all players decide if they will travel or not. All players may travel in this phase, whether the Shuttle itself traveled or not.
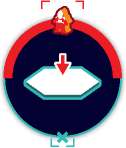
If the Shuttle travels, and your Player marker is on the side that the Shuttle moved from, you can catch a lift with the Shuttle and travel for free. Otherwise, you may still travel, but to do so, you must remove a ship from your Hangar (place it back in the game box).
If you decide not to travel, stand your player marker back up. You do not get the bonus of the Turn Order space again.
Travel to the Colony 
-
Move your Player marker to the Exploration space.
-

Place 1 of the face up Discovery tiles that is on the Exploration space on an empty hex exactly 3 spaces away from your Rover.
If your Rover is not yet on the map, it is counted as being at the starting Mine in the center of the board. If there is no available hex for you to place the tile, it does not get place, skip step b.
-
Replace the tile with a new one from the top of the stack, face up.
-
-
Move your Player marker to the Retrieve Colonists space.
-
Move all of your Colonists from Action slots on the Colony side of the board back to your Living Quarters (If you started the game on the Orbit side, the first time you travel to the Colony, you will not have any Colonists there).
-
Move all Colonists in your Working Area back to your Living Quarters.
Note: When returning Colonists to your Living Quarters, if there are not enough slots for them, return any excess to your personal supply next to your Player board.
-
-
Move your Player marker to an empty Turn Order space on the Colony side.
You may gain any bonus printed on the space (see the Reference book). If the bonus triggers another bonus, gain it also. However, if any bonus has a cost associated with it, that cost must be paid in order to receive the bonus.

Travel to Orbit 
-

Move your Player marker to the Production space.
Each of your Advanced Buildings on Mars produces 1 Resource corresponding to the type of building. Each Advanced Building you have on a shelter produces a Crystal and each of your Colonists/Advanced Buildings on the mines will produce 1 Mineral.
-

Move your Player marker to the Retrieve Colonists space.
-
Move all of your Colonists from the Orbit side of the board back to your Living Quarters.
-
Move all Colonists in your Working Area back to your Living Quarters.
Note: When returning Colonists to your Living quarters, if there are not enough slots for them, return any excess to your personal supply next to your Player board.
-
-
Move your Player marker to an empty Turn Order space on the Orbit side.
You may gain any bonus printed on the space (see the Reference book). If the bonus triggers another bonus, gain it also. However, if any bonus has a cost associated with it, that cost must be paid in order to receive the bonus.
End of the Game
At the end of the Colonization phase, if the Remaining Missions marker has reached the end of its track (which may be caused by completing 3 missions, progressing the colony to a high level, or a combination of both), the end of the game is triggered.
When the end of the game is triggered, play until the end of the current round, and then play 1 more round. Skip the Shuttle phase in the final round.
Each player moves any Crystals they gained in the last round into their Depot as normal.
Then calculate each player's score as follows:

1/2/4/7/11 OP for having 1/2/3/4/5 Progress cubes in the Progress area, as you did when advancing the colony level.

3 OP for each ship you have in your Hangar.

Return all Colonists from the side of the board where your Player marker is, and from your Working Area, back to your Living Quarters.
If there is not enough space, place the excess in your personal supply. You score OP according to the indicated number next to your highest located Colonist.

Each Tech tile in your Laboratory is worth a number of OP indicated below the column it is in.

OP for Advanced Buildings, 3 points for Lvl 1 card and 5 points for Lvl 3 cards. Lose 3 points for every unbuilt Lvl 1 Blueprint and 5 points for every unbuilt Lvl 3 Blueprint.

Each Scientist scores 3 OP for each Advanced Building of the indicated types on Mars, no matter who owns it.

Gain or lose OP for each Earth Contract card as depicted on the card based on whether you completed it or not. (You may transfer any Resources or Crystals to any contracts at this time).
After adding end-game scoring to points scored during the game, the player with the most Opportunity Points is declared the winner.
In the case of the tie, the player with the most Crystals is the winner, if still a tie, the player with the most advanced buildings is the winner, if still a tie, the player with the most Progress cubes in the progress area is the winner.
If still a tie, tied players share the victory.
Continue Reading

