On your turn, you may perform one main action during Phase B of your turn:
City Actions

If your ship is in a city, then you can perform a city ' * action there. A city action always consists of two parts.
-
Deliver a good to the market
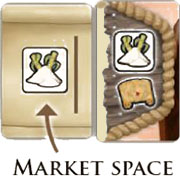
Check to see if there is an empty space left in the city's market.
If there is, then you may discard a hand card with the same goods symbol on it. Remove the disc of your choice from your ship, placing it onto the empty market space.
You can only deliver one good, even if you have more than one matching card in your hand.
If the city's market is full, or you can't make a delivery (because none of your hand cards match), then you skip this part of your city action. You may also choose not to make a delivery.
-
Perform the action indicated in the city.
You can still perform the city*s action even if you did not make a delivery!
Remember that both parts of a city action are optional. However, if you choose to perform them both then they must be completed in this order.
Description of Individual City actions:
Combat
This action allows you to increase your influence with the nations, and obtain a combat bonus.
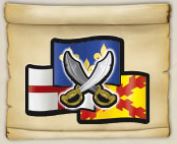
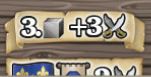
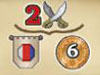
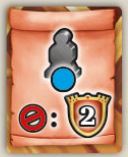
Reveal a combat token from one of the two piles. Each token indicates a combat value for each nation, along with corresponding costs or rewards. In rare cases, should both piles of combat tokens be empty, then each nation's combat value is 3.
Choose which of the three nations is engaging in combat (the fighting nation'), and immediately pay or take the corresponding costs or bonus.

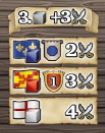
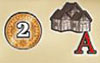
Doubloons: Pay or take the number of doubloons shown.

Influence: Gain 1 influence with this nation. Move your marker on the fighting nation's influence track one space to the right.

Victory Points: Immediately score the number of victory points shown.

Figure: Immediately take a figure of your color from the general supply, provided there is one there. You can use it as part of the current action.
Some combat tokens have additional combat modifiers shown in their topmost section that affect a nation's combat value.
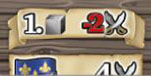
If you choose to fight with the nation that currently has the least ownership markers on locations (cities, villages, and legacy tiles) in the Caribbean, then its combat value is increased by 3 (this modifier is not applied in the case of a tie).
If you choose to fight with the nation that currently has the most ownership markers on locations (cities, villages, and legacy tiles) in the Caribbean, then its combat value is reduced by 2 (this modifier is not applied in the case of a tie).
Then, perform combat actions with your chosen nation. You can perform multiple combat actions during combat, however you can perform each individual combat action only once. All combat actions must involve the nation you chose at the beginning of combat (e. g. France only).
Each combat action reduces the combat value. If a combat action would reduce the combat value to less than 0, then you cannot perform that combat action.
Important: You can pay as many combat points (from your ship board) or return as many of your figures back to the general supply as you like to increase the combat value. Each point or figure you spend or return increases the combat value by 1.
However, you are never allowed to reduce the combat value voluntarily to gain combat points or figures.
The general rule: You can never have more than 8 combat points. If your marker is on space 8 of the combat track and you would receive combat points, you do not receive them.

You can perform the following two combat actions:
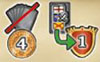
A. Gain Influence
Reduce the combat value by 2 or jl 5 points. Gain 1 or 2 influence with the fighting nation. Move your marker on the corresponding nation's influence track 1 or 2 spaces to the right. You can only choose one of the two options, not both. This combat action is then used.
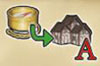
B. Annex or Displace:
Choose a flag on the game board. If no ownership marker is present there yet, reduce the combat value by 4. If another nation's marker is already there, reduce the combat value by 6 and remove the other ownership marker from the game.
Gain 1 influence with the fighting nation.
Take one of the fighting nation's ownership markers from the supply (taking the left-most one available) and place it on the flag's location. You immediately receive the bonus indicated on the flag. You can choose only one of the two options (annexing or displacing). Tills combat action is then used.


Buying certain cards allows additional combat actions. Additionally, new combat actions might enter the game via story cards or legacy tiles.
The same rules apply to these: You can only perform each combat action once per turn. And for all combat actions: You can only displace other nation's ownership markers!
As soon as you no longer can (because the combat value would drop below 0) or want to perform any more combat actions, your main action is over. Take the combat token and place it face-down onto the appropriate location on your ship board. Any unused combat value is lost.
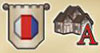
Influence Tracks
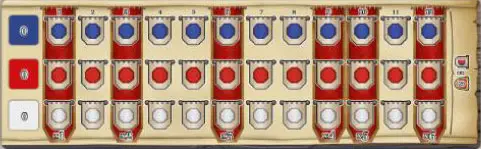
Each nation has an influence track. Each nation's ownership markers are located to the left of these at the start of the game. During the game, you will gain influence with one nation or another at various times.
Each time you gain influence, move your influence marker for the corresponding nation 1 space to the right. Tie levels with red backgrounds indicate the noble ranks you can reach with the different nations. Tie higher your noble ranks, the more victory points you'll score for this nation at the end of the game.
If one of your influence markers ever reaches the right-most space in a track, leave it where it is and instead score 2 victory points for each space your marker would have moved.
Whenever you place an ownership marker, always remove and place the left-most marker from the nation s supply. For each nation, the more spaces are fully emptied of ownership marker, the more victory points players will score for their noble ranks with that nation at the end of the game.
Exploring

Move your explorer on the explorer track up to as many spaces as indicated by the number next to the symbol. The following rules must be followed:
You can never go backwards, but must always follow the path.
No space may have more than one explorer on it. Spaces already occupied by explorers are skipped when moving and do not get counted against the movement limit.
You don't have to move the entire amount, but must move at least one space.
Some spaces let you decide whether you want to take the long way or a short cut.
After finishing your movement, you always receive the reward indicated on the space your explorer stopped on. You don't get anything for the spaces you moved through to get there.
If you end your movement on a space with a quest, you can immediately fulfill it. If you do, take your rewards and add the quest tile to your ship board. Do not replace the quest tile on the game board. From this point on, all explorers skip that space when moving!
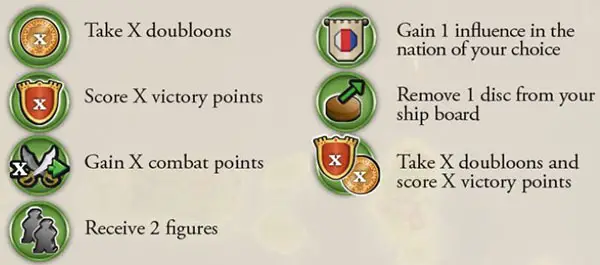
Explorer Track Rewards:
If your explorer crosses the red barrier, you can immediately gain 3 influence with the nation of your choice (you cannot split the influence across several nations). Move your influence marker on the corresponding influence track 3 spaces to the right.
The first player to cross the >ahriet and/or the green barrier with their explorer immediately scores 4 victory points. All other players whose explorers cross these barriers later score 2 victory points.
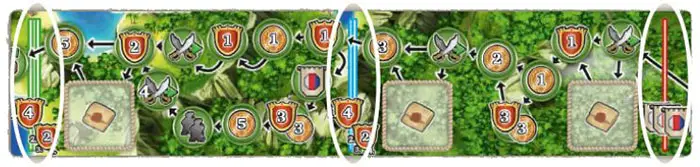
Once your explorer reaches the end of the explorer track, it remains there for the rest of the game. You can immediately perform a village action. More than one explorer may be on the last space of the track.
The first explorer to reach this space scores 10 victory points. The second scores 8 victory points, the third scores 6 victory points, and the fourth scores 4 victory points. If a later action allows you to move your explorer, you lose this movement.
Other City Actions
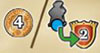
Gain 1 influence with the nation of your choice, then perform a village action.
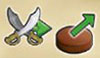
You gain 1 combat point, then remove a disc of your choice from your ship board, removing the disc from the game.
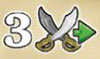
You gain 3 combat points. If you reach the end of the combat track, you do not gain any more combat points.
Take 2 doubloons from the supply then perform a village action.

You gain 1 combat point nd 1 influence with the nation of your choice.
You may perform 1 village action for each compass symbol you have (on your ship board or on project cards in your display).
Score 1 victory point for each combat token on your ship board. You may discard all cards in hand. If you do, take 4 doubloons from the supply.
Take 4 doubloons or score 2 victory points for each assistant (for each of your figures in locations in the Caribbean).
You may pay 2 combat points. If you do, gain 1 influence with the nation of your choice and take 6 doubloons.
Village Actions 
To perform a village action as your main action, your ship must be in a village. Usually, you can only perform one village action. However, if you spent 4 to 6 movement points during movement (Phase A), you can perform two village actions instead.
If you spent all 7 movement points, you can even perform three village actions.
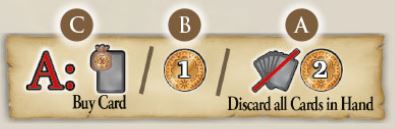
For each village action at your disposal, you can freely choo- se one of the following three options:
A Discard all of your cards in hand. If you discarded at least one card, take 2 doubloons. You do not immediately redraw cards - that will only happen in Phase C,
B Take 1 doubloon.
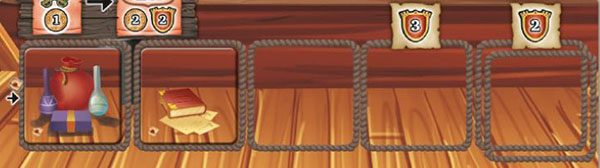
C Choose one of the cards in your hand or in your planning area, a nd buy it. Place the card in your display, next to your ship board. You can use the cards' effects immediately.
Instead of buying a card, you can also choose to invest in a prestige building by paying the necessary costs.
When you have two or three village actions at your ' disposal, you are allowed to choose each of the options above multiple times if you like. If, for example, you can perform three village actions, you can take 1 dou- bloon twice and then buy a project card.
As you remove discs from your ship, other village actions may become available to you. Similarly, certain cards allow you to perform new village actions after you buy them.
Fulfilling a Quest 
You can only fulfill a quest at a location with a quest tile.
To fulfill a quest, you have to pay a cost. Doing so gains you the quest tile along with a reward. If you can't pay the necessary cost, you can't fulfill the quest.
After fulfilling a quest, add the quest tile to your ship board. Turn the tile over and place it on the left-most empty quest track space on your ship board. You immediately score 3 victory points for the fourth quest you fulfill. You immediately score 2 victory points for each additional quest you fulfill after that.
Story Tiles
Most story cards have a quest on them. To fulfill that quest, your ship must be in a location with a story tile (numbered 1, 2, 3, or 4), and you must pay the cost indicated by the story card.
If you fulfill the quest on the story card, take the story tile and add it to your ship board the same way you would any other quest tile. Story tiles count as quest tiles in all ways, for example for prestige buildings or some card effects.
During scoring at the end of the round, you'll read the reverse side of the story card. This not only drives the story forward, it also introduces new quests and usually a new story tile to the game. Sometimes, new locations and rules are introduced.
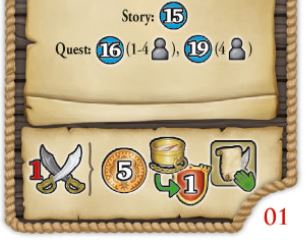
To fulfill this quest, your ship must be in location 15 and you must pay 1 combat point.
Your rewards for doing so are 5 doubloons, 1 victory point for each compass symbol you have, and the story tile, which you add to your ship boards quest track.
Assistance Actions 
Some cards, once you buy them, allow you to place a figure in a specific location. That figure is then referred to as an assistant. The assistant allows you to perform a special action described on the card.
To perform an assistant action, your ship must be in the same location as the assistant. Perform the action as indicated on the assistant's project card. You can only use assistants in your color.
Over the course of the game, it can happen that multiple assistants get placed in the same location. In that case, you can still only use one of your assistants to perform an action, since you can never perform multiple main actions on your turn.
Whenever you choose to forego an assistant action or skip over a location with one of your assistants in it, you score 2 victory points for each unused assistant. This can happen by:
Skipping a location,
Choosing to perform a different main action in that location instead, or
You return your ship to Havana at the end of a round, leaving some assistants in locations your ship did not reach this round.
You will find a reminder about this on your ship board.
Continue Reading
