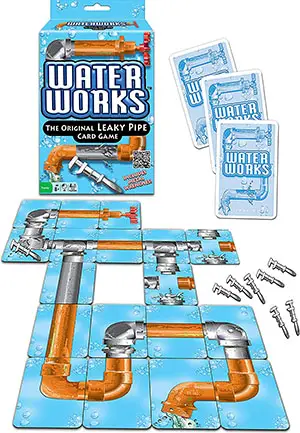
Components
- Deck of 110 cards
- 8 Metal Wrenches
- Rulebook
Object of the Game
To be the first player to build a complete, leak-free, pipeline from your valve card to your spout card.
The number of pipe cards you need to place in between them (but not including them) varies by the number of players:
- 2 players: 12 pipe cards minimum
- 3 players: 10 pipe cards minimum
- 4 players: 8 pipe cards minimum.
Setup
Remove all spout and valve cards from the deck. Give each player one of each. Place out of play any unused spout and valve cards. Give each player two Wrenches.
Each player places his or her valve card face up, in a vertical position, and to his or her right on the playing surface.
You will all build right to left. Set aside your spout card for now-you only play it when you are ready to win the game. Set aside your Wrenches for use during the game.
Shuffle the deck and deal 5 cards to each player, face down. Place the remainder in a face-down stack in the center of the playing surface. This is the "draw" pile.
Game Play
Select a player who will play first. Play passes to the left. Always begin your turn by drawing the top card from the draw pile. Now, you may make any ONE of the following plays, using the six cards in hand:
-
lace a "good" pipe card (which means a copper pipe or a non-"leaky" iron pipe) next to your valve card, to begin your pipeline.
-
Place a "leaky" pipe card next to the valve card of any other player.
-
Discard a card face up to the left of the draw pile (forming the start of the "discard" pile).
You must end your turn with exactly five cards in hand. The player to your left now goes. As play proceeds, other kinds of card plays are possible (see "REPAIRS" and "LEAKS") but only one card may ever be played by a player per turn.
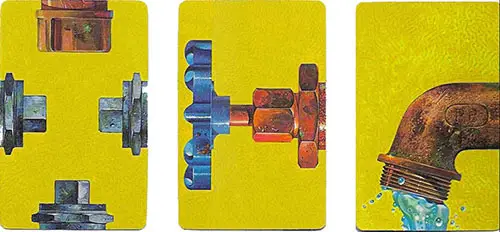
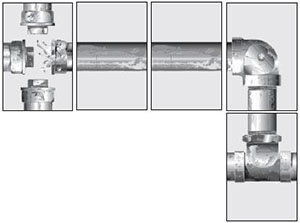
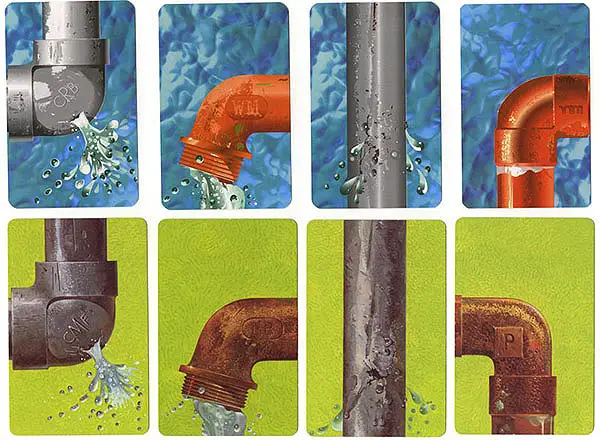 Sample Pipe Cards |
Placing Pipe Cards
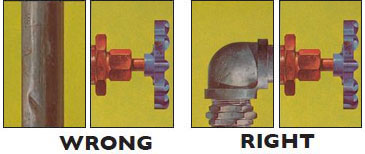
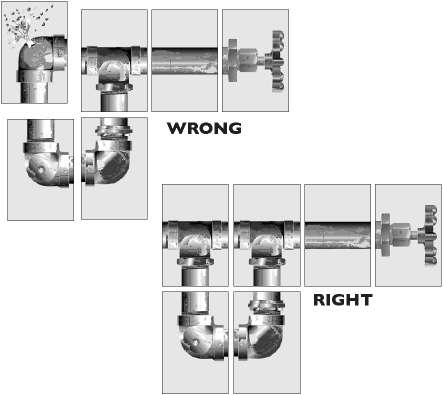
All cards must be placed VERTICALLY and only so that the pipes properly join together.
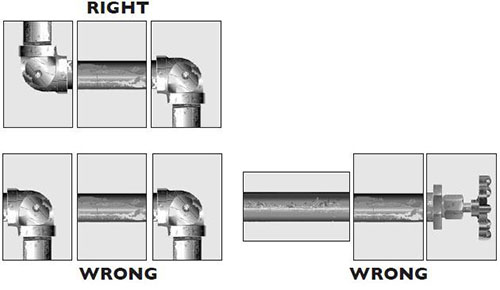
Cards may be turned around as long as they remain vertical. Once placed a card may not be moved. No card may be placed in such a way that it completely blocks a pipeline from continuing.
You can't build your pipeline beyond the edge of the table you're playing on or over an opponent's pipeline. So be sure to play on a big enough table and allow plenty of room between valves when you start to play.
 Start and End Cards |
Leaks
A player may try to delay an opponent's progress by playing a leaky pipe card on their pipeline. A "leaky" pipe card can only be played on top of, or adjacent to, the last card in an opponent's pipeline. If played on top of the last pipe, it can only be played on exactly the same-shaped pipe section.
Remember: You can't make copper pipes leak, only iron pipes. If placed after the last pipe card, the pipe can be of any shape, provided it continues the pipeline according to the rules above.
No more than one leaky pipe or cap can be part of a player's pipeline at any time. Once a leaky pipe has been repaired, it may not be made to leak again. Also, you may not play a good pipe on an opponent's pipeline.
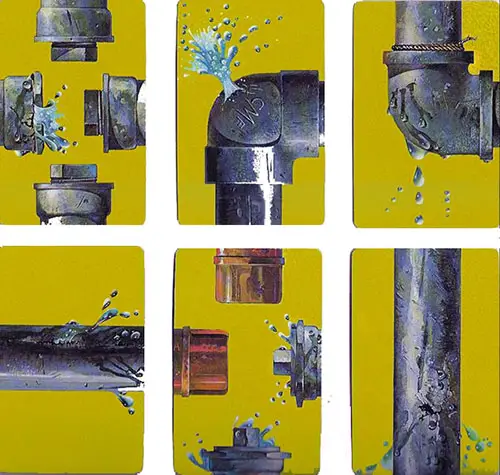 Leaky Pipes |
Repairs
A leaky pipe may be repaired in either of two ways:
-
On your turn, you may cover the leaky pipe card with a good pipe card of the same shape.
-
You may place one of your Wrenches on the leaky pipe card to repair it. Once played, a Wrench may not move. If you place a Wrench on your turn, you may not place a card as well. Instead, you must discard a card to the discard pile.
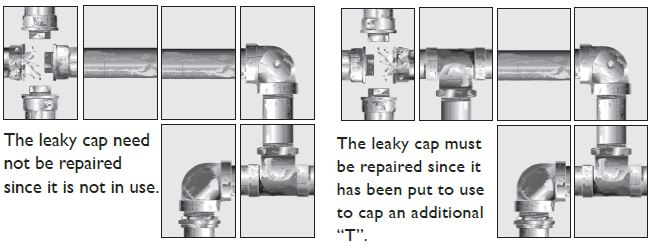
Until a leak is repaired, you may not add a good card to the end of your pipeline. Exception: You may play a good cap on one end of a leaky "T" pipe in your pipeline before the pipe itself is repaired.
"T's" and "CAPS"
A "T" pipe makes it possible for water to flow in two directions in a pipeline. A player must cap one of these directions before he can win the game as water must flow only from the valve to the spout (with no leaks or any second open sections of the pipeline).
It is best to hold onto a good "T" card to place on a leaky "T" played on your pipeline by an opponent. (Of course, it also makes sense to place a leaky "T" on an opponent when the opportunity is right).
A "CAP" card has 4 caps on it. Some may be copper, some iron and some may be leaky. It is best to cap one of the open ends of a "T" on your pipeline as soon as possible, other-wise an opponent could cap your longer section of pipe and ruin many turns' worth of your careful pipe building, as in this example.
When placing a cap card, those caps not connecting to a pipe are simply ignored. If the connected cap is leaky, you have to repair it, not the other caps on the card. A cap card may not be counted as part of the total pipeline for purposes of winning the game.
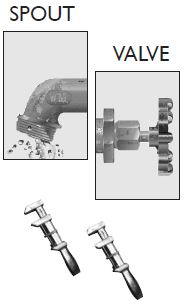
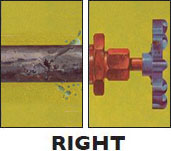
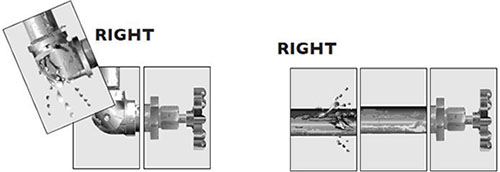
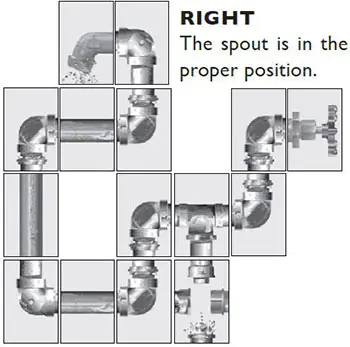
How to add a Spout
Your spout must point away and down from your faucet.

End of the Game
Play continues, turn by turn, until one player succeeds in placing at least the required number of pipe cards from his or her valve to permit him or her to win by placing the spout.
Sometimes twists and turns in a pipeline will require more than the minimum number of pipe cards to be placed before a player can win.
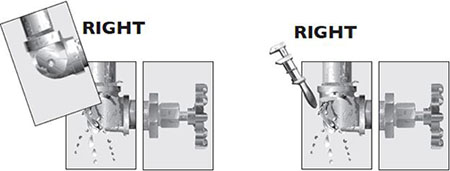
As soon as you have played the required number of cards in one continuous line, you may add your spout card to the end of this line on the same turn and win the game! Make sure the spout is pouring left and down (not up and right).
Continue Reading


