To brew your Potions, take one Ingredient marble from the Dispenser each turn, and make Ingredients of the same color collide to make them explode (and take them too)! The bigger the explosions, the faster you'll brew your potions!
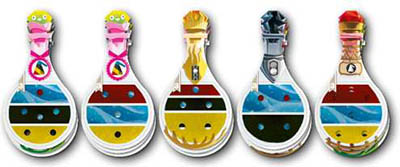
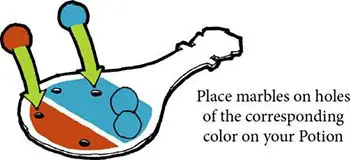
Each Potion recipe may need between 4 and 7 Ingredients. They are represented by the holes on the Potion tiles themselves. Put the marbles of the correct color on your Potion tiles: when all the holes have been filled with a marble of the corresponding color, the Potion is completed.
Each Potion is worth a certain number of points, which depends on the number of Ingredients needed to complete it and the strength of the magical power it grants.
When a player completes 3 Potions with the same power, or 5 Potions with 5 different powers, they receive a Skill token, which is worth 4 points. When the required number of Skill tokens have been awarded, the end of the game is triggered.
The player with the most points is the winner.
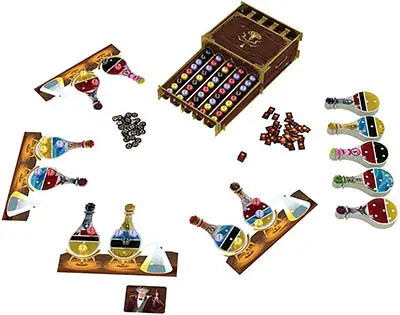
Components
- 1 Dispenser
- 80 Ingredient marbles
- 64 Potion tiles of 8 kinds.
- 15 Skill tokens
- 21 Little Help tokens
- 1 First Player token
- 4 Desk boards
Setup
For your first few games, I suggest you to leave out the Balm of Uttermost Stickiness and Filter of Lavamancing potions. Only the most talented potion brewers possess the necessary expertise to handle them!
-
Each player receives a Desk board and places it in front of himself, leaving some space both above and below it.
-
The player that most recently prepared a drink is the first player and takes the First Player token. This is just a reminder: it won't change during the game. Players play in turns, in clockwise order.
-
Take all the Potion tiles and remove 2 of the 8 different kinds of Potions, either randomly or by choice, and put them back into the box (they won't be used during the game).
-
From the 6 remaining kinds of Potion tiles, take 2 random starter Potion tiles (marked with the symbol
 ) per player, and lay them out in the middle of the table, with the Recipe side (the one with the grey ribbon) facing up.
Starting from the First Player and proceeding clockwise, each player takes one Starter Potion tile. Once all players have taken 1 Potion tile, each player takes a second Starter Potion tile, starting with the last player and proceeding counterclockwise.
-
Each player places their 2 starter Potion tiles, with their Recipe side up, on the two Bunsen burners of their Desk. This will be their Brewing area.
-
Once all the players have chosen their Starter Potion tiles, shuffle the remaining tiles together and divide them into 5 stacks, with the Recipe side facing up.
-
Put all the Ingredient marbles in the "tank" of the Dispenser, and make sure they roll down to completely fill the 5 tracks of the slide.
-
Place all the Little Help tokens and the Skill tokens near the Dispenser. Put some of the Skill tokens in a "countdown" stack. The number of Skill tokens to be put in this stack depends on the number of players (see the following table):
Number of players "countdown" stack 2 4 Skill tokens 3 5 Skill tokens 4 6 Skill tokens
You're ready to go!
Game Play
A game of Potion Explosion" is played in turns. Players take turns in clockwise order. During your turn, you MUST choose and take 1 Ingredient marble from the Dispenser. This may trigger one or more Explosions.
In addition, at any point during your turn, you MAY drink one or more of your completed Potions AND/OR ask for a Little Help from the Professor.
Taking Ingredients
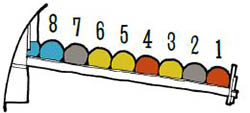
As described above, to take an Ingredient from the Dispenser, you simply have to choose and take one. You can freely choose any marble that is visible on the Dispenser, except for the 9th marble on each slide track (see the diagram to the left). This is your regular pick for the turn.
Triggering an Explosion
As you can easily imagine, when an Ingredient marble is removed from the slide, all the marbles above it with roll down to fill the gap. This is when an Explosion can occur!
If two Ingredient marbles of the same color collide, they explode. When two Ingredients explode, all of the Ingredients of that color connected to them also explode. You take all of the exploding Ingredients, just like the one you directly picked from the Dispenser.
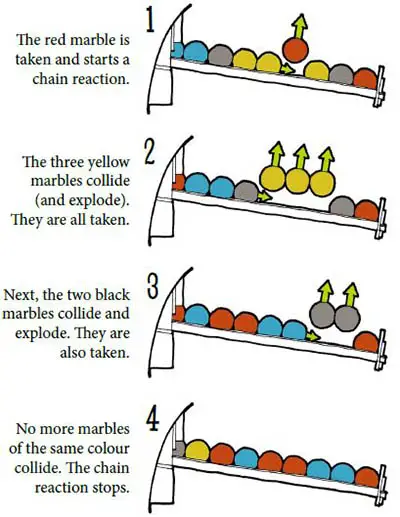
Not all students notice this at once: when there are three or more connected marbles of the same color, if you pick one of those from the middle, you still trigger an Explosion by making the others collide! That's a pretty neat move, don't you think?
If, after removing all of the exploding Ingredients, there is another collision between marbles of the same color, this new collision will trigger another Explosion, and you also take all of those exploding Ingredients.
If, after that, another collision between marbles of the same color occurs, a third Explosion will happen, etc. (see the example to the left).
Note that those two blue Ingredient marbles in the last step of the example - even though involved in a collision-do not explode. An Explosion occurs only when two or more marbles of the same color collide with each other.
Moreover, if you trigger a particularly big chain of Explosions, one or more slide tracks can end up being parti ally empty. This is not a problem.
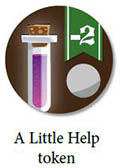
With a Little Help From The Professor
At any point during your turn (and only once per turn), before or after your regular pick, you MAY ask for a Little Help from the Professor -i.e. take a Little Help token and 1 ingredient marble of your choice from the Dispenser.
When you take an Ingredient marble using the Little Help from The professor, you cannot trigger an Explosion, even if you make 2 marbles of the same color collide.
For each Little Help token you lose 2 points at the end of the game.
Its better to ask for my Little Help before you take your regular pick for the turn. If you do it wisely, you can create the perfect conditions to trigger huge chain reactions!!!
Using The Ingredients
After taking Ingredients, either with your regular pick, a Little Help from the professor, or by drinking a Potion, you will have a number of marbles in hand. To use them, you have the following options:
First, you must place any Ingredients in your hand on the matching empty holes of the same color on any Potion tiles brewing on your Desk, if possible (a yellow marble goes on a yellow hole, etc).. Once an Ingredient has been placed on a Potion tile, it cannot be moved until the Potion is complete.
If you have Ingredient marbles in hand that you cannot place on any Potion tile in your Brewing area, you must place those Ingredients in the small retort flask on your Desk. This is called your Ingredient Pool. During your turn, you may freely move Ingredients between your Pool and your hand.
The Ingredient Pool can only hold up to 3 Ingredients at a time. You can only hold Ingredients in your hand until the end of your turn.
It goes without saying that, after you end your turn, you won't be able to move Ingredients out of your Pool until your next turn starts.
Example: Heiko has 7 marbles in his hand: 4 red and 3 black. He has 2 blue marbles in his Pool left from his last turn. He places the 4 red marbles and 1 blue marble taken from his Pool on the Potions on his Desk.
He wants to keep all the black marbles, so he takes the other blue marble from his Pool back into his hand and places the 3 black marbles into his Pool. Then he ends his turn, and discards the blue marble back into the Dispenser.
Completing a Potion
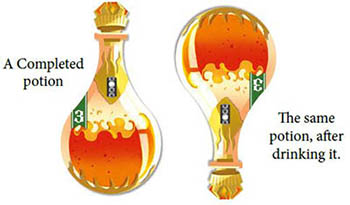
When all of the holes of a Potion tile have been filled with Ingredients, that Potion has been completed. Put all of the marbles from the Potion back into the Dispenser, then flip the Potion tile from its front (the Recipe side) to its back (the Completed side) and move it in the area below your Desk. This is your Potion area.
Potions are worth a certain number of points at the end of the game (as shown on the tile itself), and they can also be drunk to activate special one- time magical effects.

Drinking Potions
At any time during your turn, you may drink one or more of the Potions you have completed to activate their magical effects. Each Potion is a one-use special power: once a Potion has been drunk, it cant be drunk again.
To show that a Potion was used, just rotate it upside-down. Then, you can apply its effects.
When you use a Potion to take marbles from the Dispenser, you never trigger Explosions-Explosions can only be triggered when you use your regular pick for the turn. In the same way, you don't trigger Explosions when you use a Little Help from the professor.
Using a Potion does not make you lose the Potion tile: it still counts as a complete Potion, and it's still worth the same number of points at the end of the game.
You can also drink Potions as soon as you complete them, if you wish. This exam aims to prime your worth as witches and wizards, not to merely test your theoretical knowledge of potions. Being able to make good use of the fruit of your labor and turn it to your advantage is a critical skill!
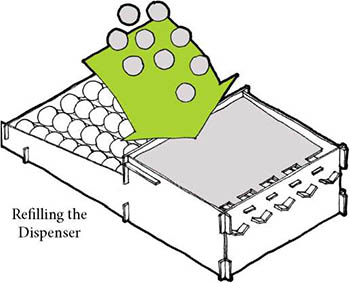
Refilling The Dispenser
When you have to put Ingredient marbles into the Dispenser, you have to follow a couple little rules:
Randomly roll the marbles onto the lid: Do not try to direct them to the entrance hole of any specific slide track.
Fill all the slide tracks whenever possible: If one or more of the marbles end up laying on top of another marble (i.e. the track they ended up going into is already full, and they stick out from the lid), move them into the entrance hole of the nearest slide track with empty space.
You will always have 2 Potion tiles in the Brewing area of your Desk at the beginning of each turn, and you wont be able to complete more than 2 Potions in a single turn. Hah!
End Of The Turn
After you have taken your regular pick for the turn, you asked for the Little Help from the professor if you wanted to, and you have drunk all the Potions you intended to, your turn ends; follow these steps, in order:
-
If you still have marbles in your hand and your Ingredient Pool is already full, you must discard them back into the tank of the Dispenser.
-
If you have less than 2 Potion tiles in your Brewing area, you must choose and draw new Potions from the top of any of the five stacks available and place them on your Bunsen burners.
Note: you may not move Ingredients from your pool to the Potion tiles you just drew, because you already finished your turn.
-
Check to see if you earned one or more Skill tokens.
-
Check to see if the game end has been triggered.
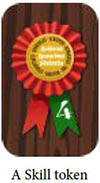
Skill Tokens
Skill tokens are special rewards for students who prove themselves particularly talented... either by mastering one specific Potion, or for being able to brew a lot of different ones!
Whenever a player completes at least 3 Potions of one same kind (i.e., with the same power) and/or at least 5 different kinds of Potion (i.e., completing Potions with 5 different powers), that player automatically receives a Skill token from the "countdown" stack (or from the general pool if the "countdown" stack is empty). Each Skill token is worth 4 points at the end of the game.
I should not have to point this out, but... better safe than sorry:you are awarded a Skill token if you complete at least 3 potions of the same kind.
So, if against all odds, you manage to brew 6potions with the same power,you still only get 1 Skill token.
End of the Game
During the game setup, you placed a certain number of Skill tokens into a "countdown" stack (see table to the right).
If, at the end of any player's turn, the last of the Skill tokens from the "countdown" stack has been taken, the end of the game is triggered. The end of the game is also triggered if, at the end of any player's round, there are no more Potion tiles available.
The game continues, in clockwise order, until the player to the right of the First Player completes their next turn (so that all players will have played the same number of turns during the game).
Even if the required number of Skill tokens have already been awarded, players can still earn more from the general pool, if they are able to do so.
After this, all players add up the points they obtained from all the Potion tiles they completed and the Skill tokens they collected, then subtract 2 points for each Little Help token they have.
The player with the most points is the winner!
In case of a tie, all the tied players (starting from the First Player, in turn order) each take one marble from the Dispenser to try to trigger an Explosion.
The player who takes the most marbles in this way is the winner.
| Number of players | "Countdown" stack |
|---|---|
| 2 | 4 Skill tokens |
| 3 | 5 Skill tokens |
| 4 | 6 Skill tokens |
We suggest these numbers of Skill tokens so that your games last a reasonable amount of time (not too short,not too long).
But, if you have particularly slow or overthinking players at the table, or if you feel confident enough with the basics of the game, feel free to agree on a different number at the beginning of flay, if you'd like to have shorter or longer games!
Continue Reading