At the intersection of northeastern and southeastern Asia, there exists a mysterious and unusual island called Formosa.
Throughout this wonderful landscape, mountains, plains, and hills of all shapes and sizes exist under a subtropical environment especially optimal for growing fruits.
In fact, fruits are available for harvest every season on this island and with the proper cultivation, delicious crops can be produced throughout the year.
In Harvest Island, players take on the role of cultivators, sowing seeds in different types of fields under varying weather conditions in order to maximise their harvests.
Using the knowledge gained from weather forecasting, players must harvest their crops at the proper time in order to become the best cultivator the land has ever seen!
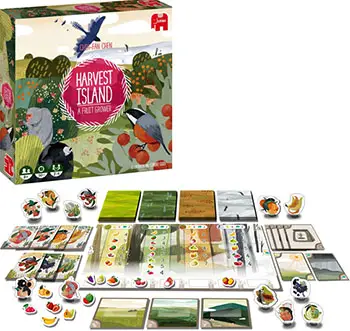
Components
- 1 Season Board
- 12 Fertiliser Cards
- 12 Harvester Animal Medals
- 12 Harvester Markers
- 12 Field Cards
- 135 Cards
- Instructions
Setup
-
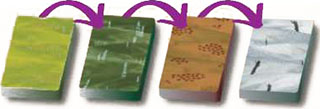
Separate the Fruit Cards and Weather Cards into 4 different Season Piles (Spring, Summer, Autumn, and Winter) as indicated by the color on the back of the cards.
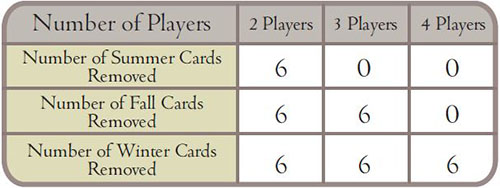
Shuffle each Season Pile, with both the Fruit Cards and Weather Cards combined, randomly remove a number of cards depending on the number of players from each pile as shown in the table.
Put the removed cards back into the game box without looking at them. They will not be used this game.
-
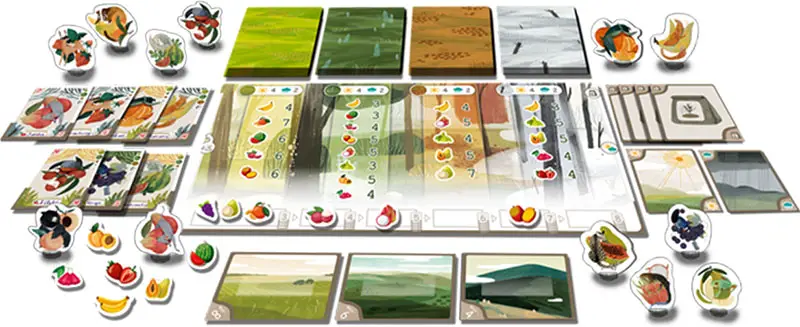
Put the Season Board in the middle of the table as shown in the diagram on page 2/3.
-
Put all the Fertiliser Cards in the Fertiliser Area.
-
Put all the Harvester Markers on the bottom left area of the game board. Place all the Harvester Animal Medals to one side for now.
-
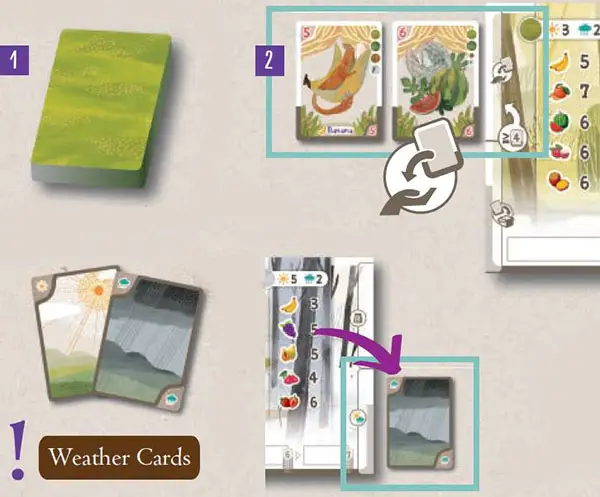
Draw 2 cards from the Spring Season Pile and place them face up in the Supply Area. Do the same for the Storage Area, but draw 3 cards instead.
If any Weather Cards are drawn, place them off to the side for now and continue drawing cards until both areas have the necessary number of cards.
-
-
Each player draws 4 cards from the Spring Season Pile to form their opening hand.
If any Weather Cards are drawn, place them off to the side for now and continue drawing cards until each player has 4 Spring Fruit Cards in their opening hand. Shuffle all the drawn Weather Cards, if any, back into the Spring Season Pile.
-
Each player takes 3 Field Cards of different types (1 Plain, 1 Hill, and 1 Mountain) and places them in front of him or her.
The player who has most recently eaten grapes (the designer's favorite fruit!) is the starting player. Use any suitable random method to determine the starting player if nobody has eaten grapes before.
Game Play
Beginning with the starting player, and continuing clockwise, each player takes a turn performing ONE of the following actions:
- Cultivate (Play 2 cards and refill back to 4 cards in hand)
- Harvest (Harvest fruits from one or more fields)
Players will continue taking actions until the end of the game.

A1- Cultivate
Depending on the type of cards you played, the following actions are possible:
-
Sow
Sow a "seed" by tucking 1 Fruit Card from your hand under any Field Card in front of you that does not already contain a seed. (Each Field Card may only have the seed of 1 fruit at a time. You may not "re-sow" the field before first harvesting it).
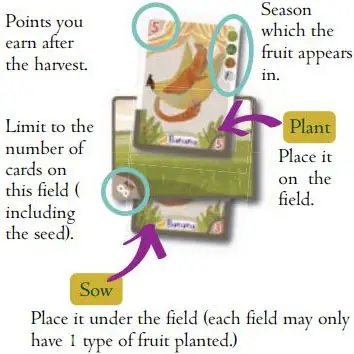
Plant
Plant a fruit by placing 1 Fruit Card on any Field Card in front of you that matches the seed in that field. You cannot plant in a field without a seed.
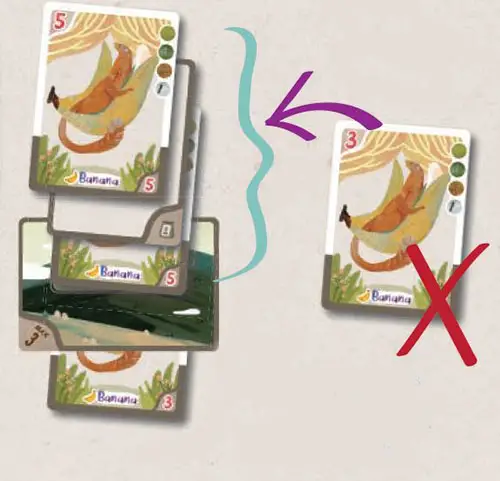
Always place the newly played card on top of any existing Fruit Cards in that field, showing the number in the corner so you can tell how many points you will earn when you harvest.
-
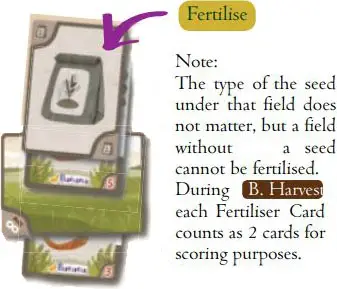
Fertilise
Fertilise a field by placing 1 Fertilise Card on any Field Card containing a seed (See page 28 to learn how to get a Fertilise Card).
-

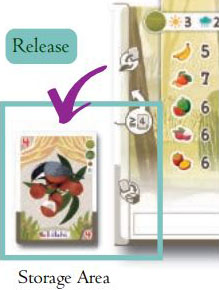
Release
Release a fruit by placing 1 Fruit Card in the Storage Area. (You may not place a Fertiliser Card)
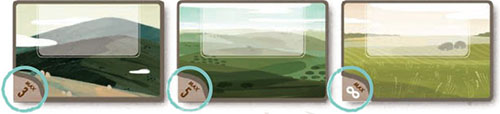
Each field may contain a number of cards up to the maximum capacity as listed on the Field Card (3 for mountains, 5 for hills, and unlimited for plains).
Each Fruit Card, excluding the one used as the seed, and Fertilise Card all count as 1 toward this limit. Once that number has been reached, no new cards may be added in that field.
 Limit of 3 cards reached. May no longer be planted or fertilised. |
A2 - Draw 2 Cards
Once you have played 2 cards from your hand, refill your hand back to 4 cards by drawing from either 1 the current Season Pile, or 2 the Supply Area one card at a time.
You must always draw the Fruit Cards in order (Spring > Summer > Autumn > Winter). Only when the previous Season Pile has run out can you draw from the next Season Pile.
Note: If any Weather Cards are drawn, immediately put them face up on the Weather Area of the Season Board and draw another card as replacement.
Fertiliser Card
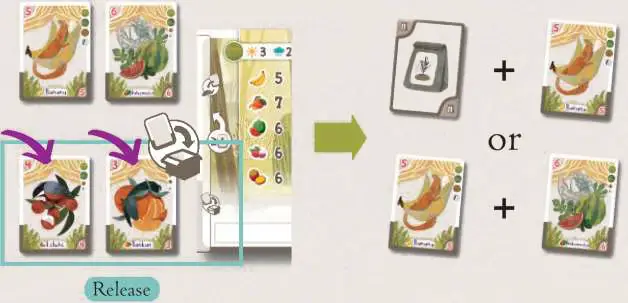
If both cards you played this turn are placed in the Storage Area (via the Release action), you may choose to draw ONE card from the Fertiliser Area when refilling your hand.
Your hand limit is still 4, so you can only draw 1 Fruit Card and 1 Fertiliser Card, not 2 Fruit Cards and 1 Fertiliser Card.
Fertiliser Cards may only be used on Field Cards that contain a seed. During [ B. Harvest I, each Fertiliser Card will count as 2 cards for the purpose of earning Harvester Animal Medals (see page 30 for more details).
Count as 2 cards when calculating the number of harvested cards.
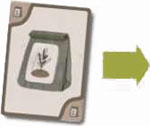
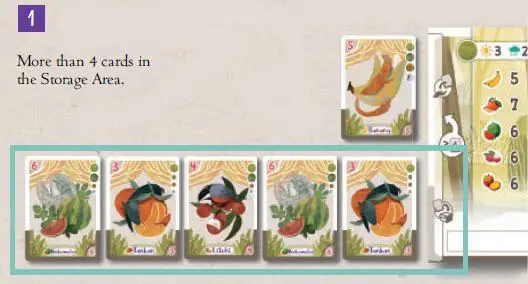
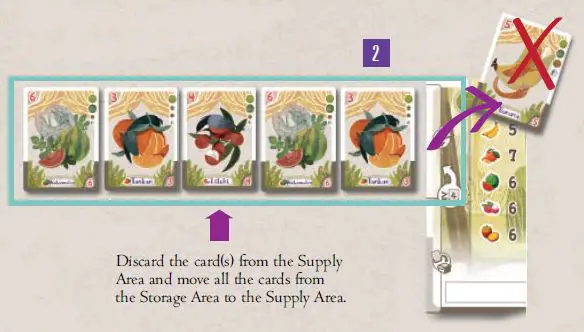
A3 - Check the Storage Area
1 lf there are 4 or more cards in the Storage Area after you have refilled back to 4 cards in hand, 2 discard all the cards in the Supply Area and replace them with the cards in the Storage Area. Put all the discarded cards off to the side, forming a discard pile. Proceed to next player's turn.
Skip this step if there are less than 4 cards in the Storage Area.
B1- Harvest fruits from one or more fields
Choose 1, 2, or all fields in front of you, 1 and place all the Fruit Cards facedown in front of you as points. Fertiliser Cards and the Fruit Cards used as seed will not score. 2 Return the Fertiliser Cards, if any, back to the Fertiliser Area on the Game Board, 3 and place the Fruit Cards used as seed in the discard pile.
Note: You may choose to harvest from a field that only has a seed. It will allow you to sow the Field Card again, although you will not earn any points in the process.

B2 - Gain points and/or Harvester Animal Medals
You might be able to earn Harvester Animal Medals if there are at least 3 cards (the minimum requirement) in your fields. For each different fruit you have harvested, add up the total number of Fruit Cards (excluding the seed) and Fertiliser Cards (count as 2 cards for the purpose of harvesting).
If the sum is greater than the number of the fruit with the Harvester Marker, then you immediately take the corresponding Harvester Animal Medal and place it in front of you (even if this means you take the medal away from another player). Update the Harvester Marker to a new spot on the number row where the number is equal to the calculated sum.
A Field Card that has just been harvested will be empty and available for new fruits. Proceed to next player's turn.
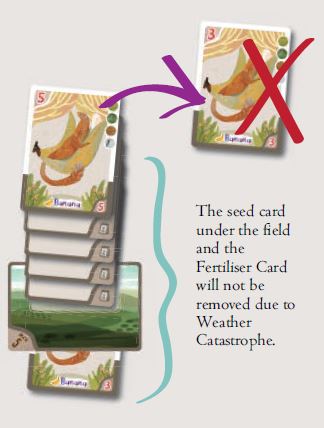
Weather Catastrophe
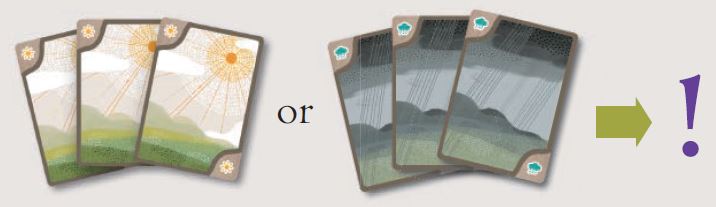
The Weather Cards are separated into 2 types: Blazing Sun and Pouring Rain. Whenever a Weather Card is added to the Weather Area on the Season Board, the following conditions are checked:
-
If both Blazing Sun and Pouring Rain exist, remove 1 card of each type and place them in the discard pile.

-
If there are 3 Weather Cards of the same type (3 Blazing Sun or 3 Pouring Rain), a Weather Catastrophe immediately happens, and the game is interrupted.
When a Weather Catastrophe happens
-
Each player resolves this event individually. Each player checks the Field Cards in front of him or her, and the field with the most cards out (excluding the seed) of the 3 will suffer the consequences.
Discard half of the cards, rounded down, from that field, prioritizing the Fruit Cards with higher point values first. You cannot discard the Fruit Card used as the seed, nor can you discard any Fertiliser Cards.
After everyone has resolved the catastrophe, discard all cards in the Weather Area of the Season Board to the discard pile, and the game resumes as normal.
-
If the number of cards you need to discard exceeds the number of Fruit Cards you have in that field, simply discard all the Fruit Cards from that field.
For example, if Henry has 5 cards in a field (4 fertilisers and 1 fruit card) when a Weather Catastrophe happens, he would need to discard 2 cards (5/2 = 2.5, rounded down to 2). Since he cannot discard the seed and the fertilisers, he only has to discard the sole Fruit Card.
-
If more than one of you fields are tied for the highest number of cards, you may choose the field on which the event will occur.
-
Fruit Cards you have harvested already will not be affected by the Weather Catastrophe.
-
The seed card under the field and the Fertiliser Card will not be removed due to Weather Catastrophe.
End of the Game
When the Winter Season Pile is depleted, the game continues until it is the starting player's turn again, so each player will have an equal number of turns. The game will end and each player's total points are calculated as follows:
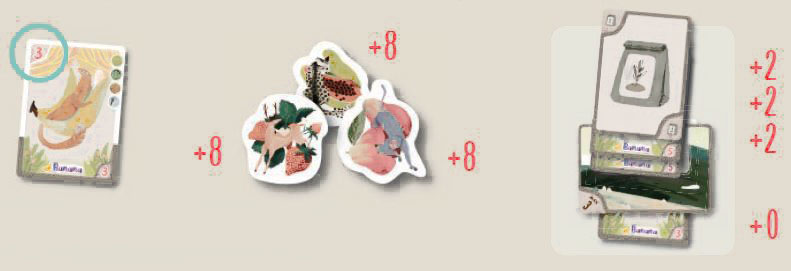
The number on the top left corner of all the harvested Fruit Cards.
Each Harvester Animal Medal is worth 8 points.
Each card (Fruit Cards, excluding the seed, and Fertiliser Cards) remaining on the Field Cards is worth 2 points.
The number on the top left corner of all the harvested Fruit Cards.
The player with the highest number of points is the winner!
Continue Reading