
Expansion 1: The Flagship 
Setup
Place the Flagship token next to the Ship tokens, with the Project side faceup. Roll two dice, rerolling as necessary until you get two different results.
Take the two Factory cards showing the two numbers you rolled and place them faceup in front of you. Return the unused Factory cards to the box.
Factory Cards
The Factory cards give you new abilities that remain in effect throughout the game.
-
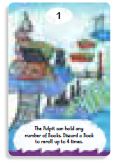
The Library (1)
You can store any number of Book cards in your Pulpit.
When you discard a Book card to reroll dice, you can reroll up to four times instead of three.
-
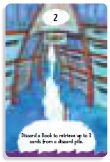
The Archive (2)
When you discard a Book card to retrieve cards from a discard pile, you can retrieve up to three cards instead of two. These cards must come from the same discard pile.
-
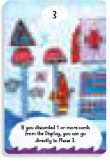
The Security Department (3)
If you have discarded one or more cards from the Display during Phase 1: Roll, you can end Phase 1: Roll immediately, skip Phase 2: Acquire, and go directly to Phase 3: Replenish.
-
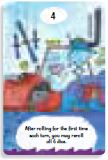
The Research Lab (4)
After your first roll in each Phase 1: Roll, you can reroll all six dice.
You must then either continue Phase 1: Roll as normal, or proceed directly to Phase 2: Acquire.
-
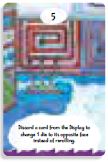
The Logistics Department (5)
When you discard a card from the Display to reroll, you can choose to change one die to its opposite face instead of rerolling any dice.
For example, you can change a 1 to a 6 or a 2 to a 5. You can discard to change a die any number of times during your turn.
-
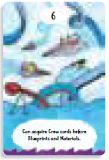
The Game Room (6)
You can acquire Crew cards and place them in a Workshop (or on the Flagship) even if the two other Element cards are not present.
The Flagship
The Flagship token is a Ship token, and you must flip it to its Flying side in order to win the game, like the Ship tokens from the base game. The Flagship differs from the base game Ship tokens in the following ways:
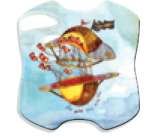
The Flagship requires one copy of each of the three Material cards (Cocoon, Nut, and Helix) and each of the two Crew cards (Incubi and Sognae). The Flagship does not require a Blueprint card.
The Flagship is not built in one of the Workshops. Instead of placing an acquired Element into a Workshop, you can instead place that Element directly onto the Flagship to contribute towards building it.
You must still place the two Crew cards on the Flagship token as the last two cards (unless you have the Game Room Factory card). You can place the two Crew cards in any order.
When all five Element cards have been placed on the Flagship token, discard those cards and flip the Flagship to its Flying side.
Additional Victory Condition
To win the game, you must also complete the Flagship. You can complete the Flagship whether or not you have completed the Ships from the base game.
Two-player Game
In a two-player game, both players benefit from the Factory cards, and both players can place Element cards on the Flagship.
Increasing the difficulty: Expand the Factory
Shuffle the Factory cards into their matching Resource decks. You start the game without any Factory cards.
You can acquire up to two Factory cards during the game with the appropriate roll, the same way you would acquire a Resource card, placing it in front of you when you do so.
A Factory card's effect is active as soon as you acquire it. In a two-player game, both players benefit from a Factory card that has been acquired, regardless of who acquired it.
If a Factory card is in the Display, you can discard it to reroll, as if it were a Resource card. When you discard a Book card from the Pulpit to retrieve cards from a discard pile, you can retrieve a Factory card.
You cannot have more than two Factory cards active. If you would acquire a third Factory card, you can discard one of the two previously acquired Factory cards to replace it with the newly acquired Factory card.
Otherwise, discard the new Factory card.
Expansion 2: The Hourglasses 
Setup
Shuffle the 24 Hourglass cards into their matching Resource decks.
Hourglass Cards
The Hourglass cards are Resource cards and can be acquired in the same way as other Resource cards. Place acquired Hourglass cards next to the Ship tokens.
An Hourglass card in the Display can be discarded to reroll, as with other Resource cards. When you discard a Book card from the Pulpit to retrieve cards from a discard pile, you can retrieve Hourglass cards as if they were Element cards.
At the beginning of Phase 3: Replenish, discard any Hourglass cards remaining in the Display.
Additional Victory Condition
To win the game, you must also acquire six different Hourglass cards, one from each deck. You can acquire the Hourglasses whether or not you have completed the Ships.
Two-player Game
In a two-player game, Hourglasses acquired by either player count towards the six necessary to win.
Increasing the difficulty: Short on Time
Play with only 18 Hourglass cards, three in each deck. Return the six unused Hourglass cards to the box.
Expansion 3: The Stone Clouds 
Setup
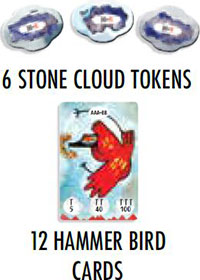
Shuffle the 12 Hammer Bird cards into their matching Resource decks.
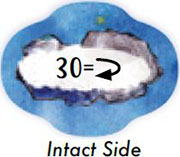
Place the six Stone Cloud tokens near the Ships with the intact side faceup.
Demolition
During your turn, instead of resolving Phase 2: Acquire, you can resolve Phase 2: Demolish.
During Phase 2: Demolish, you can flip or discard Stone Cloud tokens. You gain demolition points equal to the total value of your dice, plus additional demolition points for discarding
Hammer Birds. For every 30 demolition points you have, you can flip one intact Stone Cloud to its cracked side or discard one cracked Stone Cloud. Stone Clouds must be flipped to their cracked side before they can be discarded. Return discarded Stone Clouds to the box.
You cannot acquire cards from the Display during Phase 2: Demolish.
You cannot resolve Phase 2: Demolish if your roll does not total up to at least 30 (with your six dice plus Hammer Bird cards).
Hammer Bird Cards
The Hammer Bird cards are Resource cards, but cannot be acquired. You can discard a Hammer Bird card to either:
Reroll during Phase 1: Roll, as with other Resource cards.
Add to your dice total during Phase 2: Demolish. The more Hammer Bird cards you discard during Phase 2: Demolish, the more demolition points you add, as shown in the table below:
| Discarded Hammer Bird cards | 1 | 2 | 3 |
| Demolition points | 5 | 40 | 100 |
When you discard a Book card from your Pulpit to retrieve cards from a discard pile, you can retrieve Hammer Bird cards as if they were Element cards. You cannot place Hammer Bird cards in the Reserve.
Additional Victory Condition
To win the game, you must also discard the six Stone Cloud tokens. You can discard the Stone Clouds whether or not you have completed the Ships.
Increasing the difficulty: The Flock
During Phase 2: Demolish, if you want to discard Hammer Bird cards, you must discard at least two.
You can still choose to resolve Phase 2: Demolish without using any Hammer Bird cards if your total is at least 30.
Increasing the difficulty: Pinned Down
During setup, place one Stone Cloud token on each of the six Ship tokens from the base game, with the intact side faceup.
In order to turn a Ship token on its Flying side, you must first discard the Stone Cloud token on that Ship token.
Expansion 4: The Piers 
Setup
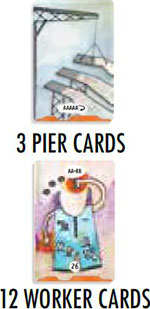
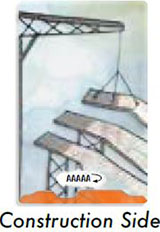
Shuffle the 12 Worker cards into their matching Resource decks. Place the three Pier cards on the table with the Construction side faceup.
Leave room for a new area next to the Pulpit: the Payroll.
Worker Cards
The Worker cards are Resource cards, but cannot be acquired. During Phase 1: Roll, Worker cards can be used in two different ways:
Discard a Worker card from the Display to reroll, as with other Resource cards.
Place a Worker card from the Display into your Payroll to reroll up to three times. You will need to pay this Worker before the end of the game. You can have any number of Worker cards in your Payroll.
When you discard a Book card from your Pulpit to retrieve cards from a discard pile, you can retrieve Worker cards as if they were Element cards. You cannot place Worker cards in the Reserve.
Pay a Worker
During your turn, instead of resolving Phase 2: Acquire, you can resolve Phase 2: Payday if your dice total is least 26.
During Phase 2: Payday, you can discard one Worker card from your Payroll. You cannot acquire cards from the Display during Phase 2: Payday.
Build A Pier
During your turn, instead of resolving Phase 2: Acquire, you can resolve Phase 2: Build if you have at least five of a single number (five of a kind) as your roll.
During Phase 2: Build, you can flip one Pier card from its Construction side to its Built side.
You cannot acquire cards from the Display during Phase 2: Build.
Additional Victory Condition
To win the game, you must also flip the three Pier cards to their Built side, and you must not have any Workers in your Payroll. You can flip the Piers and discard the Workers from your Payroll whether or not you have completed the Ships.
Two-player Game
Each player has their own Payroll and must discard the workers they hired on their own turn. Both players cannot have any Workers in their Payroll in order to win.
Increasing the difficulty: No Debt Policy
You can have only one Worker card in your Payroll at a time.
In a two-player game, both players share one common Payroll, instead of each having a separate Payroll.
Expansion 5: Hammer Bird Eggs 
Setup
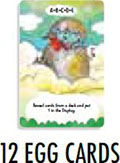
Shuffle the 12 Egg cards into their matching Resource decks.
Egg Cards
Egg cards cannot be discarded from the Display. If an Egg card is in the Display and you roll the appropriate dice result, you can acquire it. Place acquired Egg cards in a pile next to the Ship tokens.
At any time during your turn, you can choose a deck, then return any number of acquired Egg cards to the box. Reveal that many cards from the top of the chosen deck. You can choose one of the revealed cards and place it in front of the corresponding deck in the Display.
If there is already a card in the Display from that deck, shuffle that card, along with any other cards revealed by the Egg cards, back into that deck.
If there are no cards from that deck currently in the Display, place the chosen card in the Display in front of that deck, then shuffle any other cards revealed by the Egg cards back into the deck.
You can use Egg cards any number of times during a turn.
The "save Shell" Rule
After rolling, if your roll does not allow you to acquire any cards from the Display, and there are only Egg cards left in the Display, you can skip Phase 2: Acquire without acquiring any cards (or, when playing with one or more other expansions, without resolving any of the replacement Phase 2 options).
Go directly to Phase 3: Replenish.
Additional Defeat Condition
If there are only Egg cards in the Display at the beginning of your turn, you must acquire one of those cards during your turn. If you do not, you lose the game.
Two-player Game
Both players place the acquired Egg cards in one common pile. They can be used by either player during their turn.
Increasing the difficulty: Fragile Shells
Play without the 'Save Shell' rule: if you cannot acquire a card during Phase 2: Acquire, and there are only Egg cards left in the Display, you lose the game.
Expansion 6: The Hellkite 
Setup
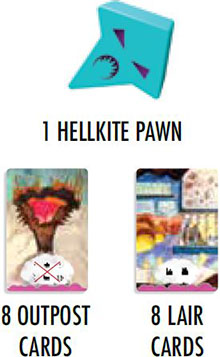
Shuffle the eight Lair cards, return two cards to the box without looking at them, and place the six remaining cards facedown in a row above the Resource decks.
Shuffle the eight Outpost cards, return two cards to the box, and place one of the remaining six faceup on top of each of the Lair cards. Place the Hellkite pawn on the leftmost Outpost card.
Outpost Cards
Each Outpost card depicts a type of Resource card: Book, Blueprint, Material, or Crew. If the Hellkite pawn is on an Outpost card, you cannot acquire the Resource card type shown on that card.
Lair Cards
Each Lair card depicts a type of Resource card: Book, Blueprint, Material, or Crew. When you destroy a Lair card, you can immediately acquire one Resource card of that type from the Display, if available, as if you had acquired it during Phase 2: Acquire.
Hunting the Hellkite
During your turn, instead of resolving Phase 2: Acquire, you can resolve Phase 2: Hunt. Add your six dice together. If the total is 15 or less, you can destroy the Outpost or Lair the Hellkite pawn is currently on.
When you destroy an Outpost or Lair card, return that card to the box. When you destroy an Outpost card, flip the Lair card that was underneath it faceup and place the Hellkite pawn on that Lair card.
That Lair card is now vulnerable, and you can target it with a Hunt action if the Hellkite is on it during a later turn. You cannot target a Lair card if there is an Outpost card on it.
When you destroy a Lair card, move the Hellkite pawn to the next Outpost/Lair card to its right. If the Hellkite is on the rightmost Outpost/Lair card, move it to the leftmost Outpost/ Lair card. If there are no Outpost/Lair cards remaining in play, you have defeated the Hellkite! Return the pawn to the box.
You cannot acquire cards from the Display during Phase 2: Hunt, except by destroying a Lair card.
Moving the Hellkite
At the beginning of Phase 3: Replenish, move the Hellkite pawn to the next Outpost/Lair card to the right. If the Hellkite pawn is on the rightmost Outpost/Lair card, move it to the leftmost Outpost/Lair card. If there is only one Outpost/Lair card left, the Hellkite pawn does not move.
Additional Victory Condition
To win the game, you must also defeat the Hellkite by destroying all Outpost and Lair cards. You can defeat the Hellkite whether or not you have completed the Ships.
Increasing the difficulty: The Impregnable Fortress
You can destroy only the leftmost or rightmost Outpost cards. You can destroy Lair cards only after all Outpost cards have been destroyed. After all Outpost cards have been destroyed, you can destroy only the leftmost or rightmost Lair cards.
You can still destroy an Outpost/Lair card only if the Hellkite pawn is on it.
Continue Reading
