Welcome to the Almost Complete Cities and Knights Strategy Guide. Cities and Knights (CaK) is my gaming group's favorite board game, and as a result, I feel pretty confident about write a strategy guide based on my experiences. Given the level of depth that Cities and Knights adds to the basic Settlers game, I'm surprised this hasn't really been done.
I will assume you are generally familiar with the basic rules of basic Settlers and Cities and Knights.
Probability of Resource Production
Most essential to the game is the basic understanding of probability. If you've played settlers enough times, two primary things become clear:
-
the probabilities for the numbers follows a simple distribution shaped like the ^ (caret) symbol. That is:
- 2 and 12 come up 1/36 times each
- 3 and 11 come up 2/36 times each
- 4 and 10 come up 3/36 times each
- 5 and 09 come up 4/36 times each
- 6 and 08 come up 5/36 times each
- 7 comes up 6/36 times
Each dot on the tile (in the Mayfair version) represents a 1/36 chance of that number being rolled on someone's turn.
-
Although the expected value of each of the numbers being rolled is listed in the above probability chart, in practice, the distributions rarely follow this exactly, particularily over the short term. It is not uncommon to see lots of 9s and 10s rolled, with no 6s or 8s for a while. If this happens to you in the early game, it's a huge boon.
Distribution of Resources on the Board
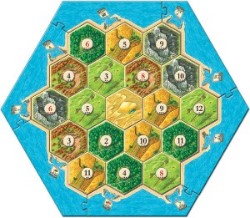
The other essential point to comprehend is the distribution of resources around the board. In other words, which resources will there be a lot of throughout the game, and which will be rare?
The best indicator of this is to count the number of dots for each resource - however, in practice, players tend to cluster around the high production numbers and avoid the low production ones - consequently, a good overall view of the potential supply of a resource can be obtained by noting which resources have marquee numbers on them (5, 6, 8, and 9).
It is particularily important to note which resources have 0 or 1 marquee numbers on them, as those resources will generally be in shorter supply than the others, making them imminently more valuable in the trading market.
Although some resources have more tiles than others (ore and brick are shorted by one tile), in reality, this isn't something you need to consider directly because it's already taken into account by where the marquee numbers end up.
Unlike basic settlers, Cities and Knights throws another twist into the mix: cities produce 2 bricks or 2 wheat like normal - but only produce 1 wood, 1 sheep, or 1 ore. Let's consider the issue from the perspective of each resource. On the sheep side of things, the general uselessness of sheep compared to the other resources means a lower supply doesn't hurt things much. About the only real effect it has on the game is to make the sheep-hoarding-and-trading strategy less useful.
On the wood side of things, less wood generally isn't a problem either for a few reasons. The primary reason for this is that players tend to hoard around the marquee wood spots in order to obtain green cards and the aquaduct.
Consequently, there is usually ample wood supplies to go around, unless there is a general shortage of marquee wood spaces on the board. The biggest effect this has is on the ore market. Ore, which was already in pretty high demand due to it's use in building cities, is now in higher demand as cities have become more important, and ore is needed to build knights.
Consequently, ore is often in short supply in Cities and Knights, and in my opinion, is generally the most important resource to make sure you have a good supply of.
Value of Resources
My thoughts on the relative importance of the resources:
- Cak necessity is a measure of how important this resource is to have _some_ access to (meaning you get at least one or two of them per time the barbarian attacks).
- Cak overall is how important I view that resource in the overall context of the game.
| Resource | Basic Settlers | CaK necessity | CaK overall |
|---|---|---|---|
| Wood | moderate | low | high. |
| Brick | moderate | low | low. |
| Wheat | moderate | high | moderate. |
| Sheep | low | moderate | moderate. |
| Ore | moderate | high | high. |
Let me explain my reasoning for the above:
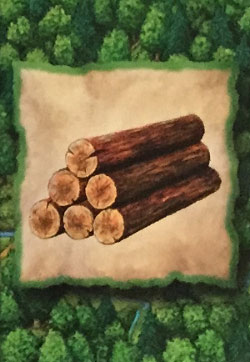
Wood is moderate necessity because it's only useful for roads and settlements, but cities only produce 1 instead of 2. However, it's high importance overall because the best progress cards (alchemist and inventor) are both green, and the importance of the aquaduct can't be overstated, ESPECIALLY if you are missing a 6 or an 8.
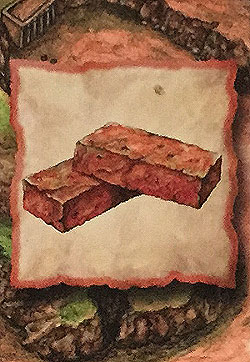
Brick is of low importance and necessity because there's often an ample supply of it. Furthermore, it's one of the two resources that still gets double production from cities, and city walls aren't as useful as the other improvements.

Wheat is of high necessity because it's imperitive to be able to activate your knights before the barbarians attack. However, since it's often in ample supply (due to cities producing 2), it's moderate overall importance. Note that if wheat looks to be in short supply (due to 0 or 1 marquee numbers), other players WILL try and restrict your access to it via trading. In this case, make sure you have an available non-player-trading source of wheat (if you can trade brick at 2 to 1 using a port, that's not a bad option).
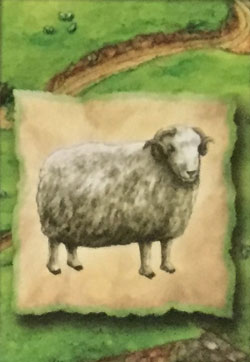
Sheep is of moderate necessity because of it's usefulness in building knights. This is especially true in the beginning of the game when you need to get your first knight built. In the overall scheme of the game, sheep is still a fairly weak resource. However, the yellow progress track can be imminently useful to get more resources, and this makes good sheep spots worth more than they would be otherwise.
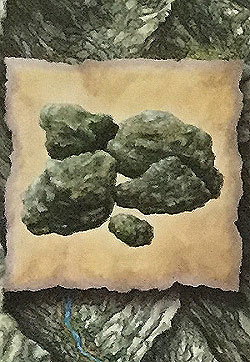
Ore is of high necessity because of it's usefulness in getting that first knight built and it's low overall supply (due to cities producing only one instead of two). Even though the blue progress track is the weakest of the three progress tracks, it still can be useful (especially the bishop and the spy cards).
Sheep, Brick, and Wood are the most likely candidates for good 2 to 1 port trading. Wheat is often useful for trading to other players, and ore is important to keep for yourself for upgrading to cities and building knights.
Progress Tracks
Unlike basic settlers, where development cards were largely an optional route, the progress cards in cities and knights are an integral part of the game, and you WILL lose if you don't consider them an essential part of your strategy.
The general thoughts on the tracks:
Yellow: The yellow track is primarily focused on production and trading of resources and commodities. The yellow track is most useful early in the game, when resources are rare and harder to obtain.
As the game progresses, the yellow track becomes less useful, but certain cards are still very powerful (eg. the master merchant, which lets you trade anything at a 2 to 1 rate for one turn - great when you have 18 cards in your hand!). The special ability of being able to trade any commodities at a 2-1 rate can be useful in making a push for a metropolis of another color.
Blue: The weakest of the tracks. The blue track is primarily focused on knights and "military" (which largely consists of moving the robber and stealing cards). The special ability of this track (building level 3 knights) is the least useful of the three special abilities.
Green: The strongest of the three tracks. The green track is primarily focused on science, and the two best cards in the game (alchemist and inventor) are in this track. The aquaduct is also the strongest special ability, especially if you are lacking a 6 or and 8.
One consideration that a lot of people miss is how important the progress tracks really are - particularily at the start of the game. The progress cards can have a huge effect on how well you are doing, and the earlier you can start getting progress cards, the better off you'll be.
It's worth your time to make a trade that will allow you to flip the first page of something, even if you have to trade 2 to 1 or worse -- you only need one commodity to flip that first page, and the benefits are immense. Consider:
By flipping the first page, you go from a 0% chance of generating a card to a 5.5% (2 in 36) chance of generating a card. Subsequent pages only increase your odds by about 2.75% per page, and since they cost more commodities, aren't nearly as good a value. If you can flip the first page of all three tracks early, you will have a 15% chance of getting a card PER ROLL!
When playing with 6 players, this means you can expect to get 1 card between every turn of yours. This pays for itself very quickly. Generally, if I have 4 extra resource, I'll trade them with the bank for a commodity I don't have so I can flip that first page.
On the flip side, it's very important NOT to give initial commodities to players who haven't flipped those pages yet.
Build Strategy
The most important move you will make in the game is where you place your initial settlement and city. Do not rush this. For optimal placement, it is important to consider the following items (in order of importance, in my view):

-
Importance of resources
Some resources are more important than others. In particular, ore is of extremely high value. My first spot will almost always be on a marquee ore number (because there's usually only one), unless there are no marquee ore numbers or there is only one but it is surrounded by total garbage.
A marquee ore spot surrounded by garbage still makes an excellent second spot, especially if that garbage is a sheep and a wheat (= activated starting knight). Second, don't forget about wheat -- you don't want to get stuck hoping for an 11 to activate your knight before the barbarians attack.
It's also very important to consider other resources that will be in short supply. If there's only one marquee brick number with only one good side, take it, even if another spot might give you a couple more dots. Finally, it's never a bad idea to take a marquee wood spot, as the green cards (and aquaduct) will serve you well.
-
General productivity
It is important to pick a spot that will produce a lot of resources for you. Even if they aren't precisely what you need, maybe you will be able to trade for what you do need. It is often better to take a 6 or an 8 on a resource you don't need more of than a 2, 3, 11, or 12 on one you do.
-
Distribution of numbers
It's generally better to have a wide distribution of numbers than have duplicates of the same numbers. First, it's less frustrating to be constantly getting small amounts of resources than occasionally get a huge boon.
Especially given how streaky the dice can be over the short term - having duplicates of more than one number can be painful when that number doesn't show up for a long time. Second, if you get all your resources at once, you're more likely to overflow your hand size and get hit by the robber. The aquaduct somewhat mitigates the problem of being only on a few numbers, but it takes a while to get there!
As a side note, I once played a game where I put my settlement and city with the intent of going for the aquaduct as fast as possible, and then using it to draw resources I need - it made for a slow start (before I got to the aquaduct), a fast middle of the game (when I could pick up the cards I needed), and a slow end of the game (when other players were drawing 2-3 cards per roll, and I was only getting 1).
I didn't do badly, but I didn't do great either. Keep in mind that the more numbers you have duplicated, the more likely you are to either totally dominate, or totally lose.
-
Distribution of resources
You want to make sure you have an adequate distribution of resources. In reality, this means that you have good production on at least 4 of the 5 resources.
It's also important to make sure that either wheat is generally plentiful, or you have good access to it - otherwise, you will be at risk for losing your city. Likewise, try to position your city so it's on at least two resources that generate commodities. Even if the commodity only comes up once, flipping that first page is HUGE.
-
Space for expansion/Spread yourself out
Make sure you aren't totally boxed in. In CaK, it's often better to take two good numbers on the coast than three mediocre ones in the middle -- in fact, with the aquaduct, it's often better NOT to have any 2s, 3s, 11s, or 12s. Do not put both of your starting settlements on the same hex - it's too easy to box you in, and you'll also be susceptible to the robber.
-
Generating Bonus Points
Since you need to get to 13 points to win, it's almost impossible to do without a metropolis and/or the longest road card. Plan on getting at least one of them.
-
Blocking your opponents
If you are considering two approximately equal spots, take the one that blocks your opponent. This is especially fun to do in conjunction with #5 -- take a spot on the coast with 2 good numbers that your opponent was planning to expand to.
-
Trading ports
Unlike basic settlers, where trading ports are imminently important, in CaK, they're not as important. There's more to do with your resources, and there are less resources (due to commodities), so don't sweat the port situation too much. But if you can use it to your advantage, definitely do! Especially if there is an abundance of brick or wood.
Important Points when Playing
Let me re-outline all of the most important points, some summarized from above:

-
Your first build priority is to get a knight, and you have to do this before the barbarian attacks or you will likely lose your initial city. Consequently, be cognizant of what resources you are likely to generate (those on marquee spaces), what resources you can gain from your starting hand, and what resources are likely to be so scarce that other plays will not trade to you.
-
The aquaduct is incredibly powerful, especially if you are missing a marquee number (or two!). The green progress track is also very useful in general. Don't underestimate the power of the yellow progress track, especially early in the game.
-
You need 13 points to win. That means you will likely need either the longest road, or a metropolis.
-
When the barbarians are close to attacking, consider the following: Can you get a victory point if you build one more knight? Can you prevent an opponent from getting a victory point by building one more knight? If so, definitely consider building another knight.
-
If you have at least 2 more knights than another player, consider deactivating 1 if it makes the difference between winning and losing to the barbarians. Sometimes you can make opponents lose their cities (if they were riding your coattails), or prevent a player from getting a victory point from defeating the barbarians.
-
Don't telegraph your moves too far in advance. For example, many players build a road to where they want to build a settlement before they have the resources to build the settlement.
This is only a good idea if wood or brick are exceedingly rare and your opponents are likely to steal the resource out of your hand, or if there's no competition for the spot and you're exceeding your card limit. It's a better idea to build the road and settlement together if possible.
If you can't do that, get your settlement up as soon as possible. Besides collecting more resources, unscrupulous opponents have been known to play two roads (or a road building card) and build a settlement on the spot you were wanting to build on!
-
Don't let players know you're close to winning if possible. If realistic, don't grab the longest road until you're ready to win (road building cards are great for this). It's better if players don't know you're in contention for it.
If you build to the point where you have 12 points, players will embargo you and you will become public enemy #1. It's better to build to the 11th point, and then get 2 victory points on one turn (build a settlement and/or city, grab the longest road, flip up a merchant card, steal a metropolis, etc..).. You can often catch players unaware this way.
-
Do anything to prevent the loss of your first city. It's almost impossible to win if this happens. Cut a horrible deal if it gives you the cards you need. Give your significant other the "you're sleeping on the couch tonight!" look. Do whatever it takes.
-
Don't forget you can use your knights to chase away the robber! Place your knights adjacent to wherever you think the robber is most likely to show up.
-
If absolutely necessary, you can move a knight to a spot where you want to build a settlement but don't have the resources for yet. However, you can only move the knight away on your turn. Also, don't forget that you can displace knights, although with my group, this is rarely done.
-
I'm still not sure why, but my observation is that when the desert is near the center of the board, it slows the game down. I'm not sure if there's any way to work that to your advantage, but whenever I've seen a player lose his initial city and come back and win, it's always been when the desert is in the middle of the board.
Rules and House Rules

There are two primary rules that are often missed by new gaming groups. The first is an official errata rule change:
"When playing with the Cities & Knights expansion, the Robber cannot be moved at all until the barbarians reach Catan for the first time. When a 7 is rolled, players only check to make sure that nobody has too many cards in hand.
The Robber stays put and no card is stolen. The Robber is also unaffected by any cards or Knights. This counts for the Pirate Ship as well, should it also be used in the game".
This is because it's too harsh to have your production stopped and cards stolen when you're trying to get that first knight up.
The second rule involves the robber and the aquaduct. The aquaduct allows you to draw a card if you get no production on any roll that isn't a 7. But what happens if your production is smooshed by the robber? The official Kosmos ruling is that if the robber smooshes your production, and you have the aquaduct, you can use the aquaduct to draw a card of your choice.
My group plays with three house rules (and the official errata rule mentioned above):
-
We changed the robber/aquaduct rule. The robber isn't a very useful tool if you can't stop a player's production, and the aquaduct is powerful enough even with the robber as a counterbalance.
Consequently, we play that the robber steals your production, but it still counts as production, so you would not get to use the aquaduct if your only production is stolen by the robber.
-
We remove the intrigue card from the blue deck. It's so situational as to be useless (in over 40 games, I've seen it used once).
-
If you draw a victory point, you normally have to flip it up. Because the table is normally scattered with cards (and food/beverages), it's often hard for players sitting on one end of the table to see if someone draws a victory point.
Accordingly, our house rule is that if you draw a victory point, you have to announce it, and make sure that you have everybody's attention when you do. That way, table clutter doesn't give some players unfair advantages over others.
You should feel free to make your own house rules for the game -- just make sure new players understand they are not official rules. And especially don't forget to tell veteran players about them - that's a great way to make them mad.
Downsides
Cities and Knights comes with two primary downsides, one of them inherited from the basic Settlers game.
-
Settlers has a strong element of luck. Probably the worst game I ever saw was a game where probably 40% of the rolls were either 9 or 10. And one player was doubled up on both.
She cleaned us out, despite having a pretty sub-par starting spot! So don't sweat the losses, because inevitably, there will be many. That said, it's not so strong as to be random, or effectively prevent you from executing a strategy. But if you like deterministic games, Cities and Knights isn't any better than basic Settlers in this regard.
-
Cities and Knights can bog down heavily in certain circumstances. This typically happens when three different players grab the metropolises, and another player grabs the longest road.
You end up with a bunch of players sitting at somewhere between 8 and 11 points. What really kills the game at this point is the progress cards -- generally by the late game, players are collecting a lot of them, and it's not uncommon to see each player play between two and four of them.
When multiplied by 6 players, this can really bog down the game significantly and extend the game out to the 3 hour point. I'd say we see this on about 20-25% of the time we play.
Continue Reading