
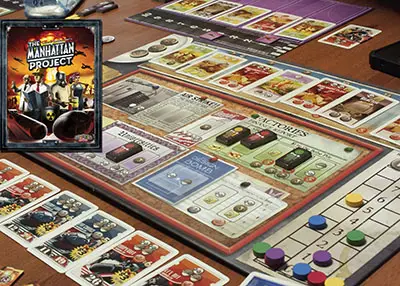
A revolutionary new technology has been discovered! Immediately, every major military power recognizes its destructive potential. Can your nation take the lead in this new arms race and become the world's dominant superpower?
In The Manhattan Project, you are the leader of a great nation's atomic weapons program in a deadly race to build bigger and better bombs. But this is no peaceful race! You must not hesitate to use clever espionage and military force to advance your plans and secure your nation's rightful place!
Components
- Main Board
- 50 Building cards (6 Starting Buildings and 44 regular Buildings)
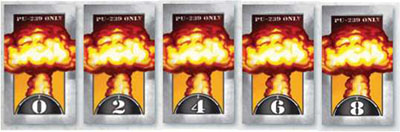
- 30 Bomb cards
- 5 Fighter counters (1 per player color)
- 5 Bomber counters
- 48 Money coins
- 5 Player Boards
- 5 Implosion Test counters
- 15 Player color discs
- 10 Loaded Bomb markers
- 16 Damage markers
- 40 Yellowcake cubes
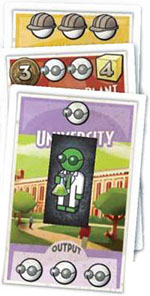
- 72 Workers: 24 Laborers, 24 Scientists, 24 Engineers
Object of the Game

You score points by building, testing, and loading nuclear bombs. The first nation to reach the victory point goal becomes the world's dominant super power and wins the game!
The victory point goal depends on the number of players:
- 2 Players: 70 points
- 3 Players: 60 points
- 4 Players: 50 points
- 5 Players: 45 points
Setup
1. Prepare The Board & General Supply
Place the Main Board in the center of the table. Place one token of each player's color on the bottom space of the Plutonium Track, Enriched Uranium Track, and Espionage Track.
Create the General Supply near the board with the following items:
- 50 Building cards
- 30 Bomb cards
- 10 Loaded Bomb markers
- 16 Damage markers
- 48 x Coins (38 x $1 and 10 x $5)
- 40 Yellowcake cubes
- 12 grey Contractors
- 4 Engineers of each player's color
- 4 Scientists of each player's color
Sort the Implosion Test counters by value. Only some of these counters are used, based on the number of players. The back of each counter shows the number of players:
- For 2 Players, use "0" and "6"
- For 3 Players, use "0", "4", and "8"
- For 4 Players, use "0", "2", "4", and "6"
- For 5 Players, use all five counters
Add the appropriate counters to the General Supply and return the others to the box.
Note: If you are playing with less than five players, any excess components can be returned to the box.
2. Prepare The Building Market
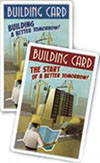
The Building Market on the main board holds the Buildings that are available for construction. Shuffle the six Starting Building cards (with the red backs) and place one card face up in each of the first 6 spaces of the Building Market (starting with the $2 space).
Shuffle the 44 regular Building cards and place the top card face up on the $20 space. Return the rest of the cards face down to the General Supply.
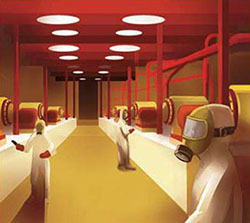
What Is "yellowcake?"

Natural uranium ore is often referred to as "yellowcake" because of the yellowish color of the concentrated uranium powder extracted from the ore. You will need to collect Yellowcake, represented in the game by the yellow wooden cubes, and then process them into the fuel you need for your bombs.
3. Prepare The Bomb Cards
Shuffle the 30 Bomb cards. Draw a number of cards equal to one greater than the number of players and place them face up in a row next to the General Supply (i.e., four cards in a three player game, etc).. These are the bombs currently available for development. Return the rest of the cards face down to the General Supply.
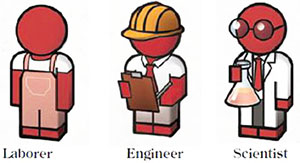
4. Prepare The Player Supplies
Each player chooses a color and sets the matching Player Board in front of him. It is important that all players can clearly see each others' boards, and should be able to reach them. Each player also takes:
- 4 Laborers in his chosen color
- $10 in coins
- 1 Fighter counter in his color - placed on the "1" space of his Fighter Track
- 1 Bomber counter in his color - placed on the "1" space of his Bomber Track
Your Laborers and Money are placed in your own personal supply. Only you can use resources from your personal supply. Your resources (coins, Workers, Yellowcake, etc). are always public information and must be kept in sight of all players.
5. Give each Playe a Starting Bonus
Choose a starting player randomly, with play continuing clockwise. Give each player a starting bonus from the General Supply, based on turn order:
- Player 1 receives no bonus
- Player 2 receives $2
- Player 3 receives $4
- Player 4 receives $2 and 1 Scientist or Engineer of his color (player's choice)
- Player 5 receives $4 and 1 Scientist or Engineer of his color (player's choice)
Game Play
The Manhattan Project is played in turns, starting with the first player and continuing clockwise. Players continue taking turns until someone earns enough points to reach the victory point goal.
On your turn, you must choose one and only one of these two options:
- Place Workers or
- Retrieve Workers
Important: If you have no Workers in your personal supply to place, you must choose to Retrieve Workers.
What you do on your turn depends on which option you choose:
Place Workers
If you choose to place Workers on your turn, you must follow these two steps, in order:
Step 1: You may place one Worker on the Main Board, then
Step 2: You may place Workers on any number of Buildings on your Player Board. You may repeat this step as many times as you wish, until you run out of Workers or Buildings to place them on.
Both Steps are optional, but you must place at least one Worker during your turn.
When you place a Worker on the Main Board or a Building, that Worker may immediately perform the Worker Action indicated.
In addition, at any point during the turn, you may perform any number of Bomb Actions.
Retrieve Workers
If you choose to retrieve Workers on your turn, you must follow these three steps, in order:
Step 1: Return all of your permanent Workers from the Main Board and all Player Boards to your personal supply. Do not collect any Workers from the General Supply at this time.
Step 2: Return all Workers on your Buildings, Bombs, and Implosion Test counters to their appropriate supplies. Contractors return to the General Supply. Permanent Workers return to their owners' personal supplies.
Step 3: Return all contractors on the Main Board and your personal supply to the General Supply.
Note: At the end of your turn, there should be no Workers on your Buildings, Bombs, or Implosion Test counters. All 12 of your permanent Workers should be in your personal supply or the General Supply, and there should be no Contractors on the Main Board or in your personal supply.
Worker retrieval must result in at least one of your permanent workers being retrieved. If it would not, then you must choose to Place Workers on your turn.
Example: On her turn, Red decides to retrieve her Workers:
All red Workers come back to her personal supply. (But not Workers in the General Supply that she has not acquired yet). Note that she already had one red Worker in her personal supply when she started.
All Workers on Red's Buildings, Bombs, and Implosion Test counters go back to their appropriate supplies (regardless of owner).
All Contractors on the Main Board and Red's personal supply go back to the General Supply.
Worker Placement
There are three types of Workers: Laborers, Engineers, and Scientists. All three types are used in the same way: They can be placed in Worker Spaces on the Main Board or on Building cards. When a Worker is placed, it may immediately perform a Worker Action.

Workers may be permanent Workers (in your color), or they can be Contractors (grey).
You can use either or both kinds of Workers on your turn.
Permanent Workers and Contractors have exactly the same effect when placed in a Worker Space or on a Building, and can even be used in combination.
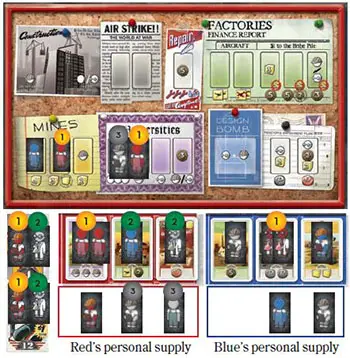
Placing Workers On The Main Board
The Main Board is divided into a number of sections representing various activities you can assign Workers to. Each section shows one or more Worker Spaces.
On your turn, you may place one Worker on one Worker Space of the Main Board. Each Worker Space can hold only one Worker at a time (exceptions: the Construction space can hold any number of Workers, and the Design Bomb space holds exactly two). You may not place a Worker in a space that is already occupied by a Worker (exception: the Construction space).
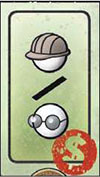
Placing Workers On Building Cards
Each Building card can hold one, two, or three Workers, as indicated at the top of the card. If you place Workers on a Building card, you must place exactly the number of Workers shown on that Building.
You may place Workers on your Buildings in any order you choose. You may never place a Worker on a Building that is already occupied by a Worker.
On a Worker Placement turn, you may place Workers on as many Buildings as you wish. You may only place Workers on your own Buildings (unless you took an Espionage Worker Action in Step 1 of your turn.
During the game, it is possible that some Buildings will be damaged by an Air Strike. You may never place Workers on a Building that is damaged.

Worker Requirements
Some Worker Spaces on the Main Board have a requirement that you must fulfill in order to place a Worker there. These requirements are shown inside the Worker Space.
If a Worker Space shows a Scientist or an Engineer, then you may only place a Worker of that type in the space. If no Worker is shown, then any Worker may be placed in the space.
Some Worker Spaces show two different requirements, separated by a slash (/). When you place workers on one of these, you must fulfill either of the two requirements (not both).
For example, the right Worker Space in the green Factories section of the Main Board shows an Engineer and a Scientist separated by a slash. Either an Engineer or a Scientist can be placed here (not both).
Buildings also have Worker requirements, which are shown at the top of each Building card.


If a question mark appears at the top of a Building, you may place any type of Worker on the card. If multiple question marks are shown, then any combination of Workers can be placed on that card, provided the number of Workers placed matches the number of symbols shown.
If a Building shows Engineers or Scientists at the top, only the type of Worker shown may be placed on the card. Again, the number of Workers placed must match the number of Workers shown at the top of the card.
Worker Actions
When you place Workers on a Building or Worker Space, you may immediately take the Worker Action shown.
You do not have to take the action. You may place a Worker on a space or card without taking the action (or even if the action is not possible - due to a lack of Contractors in the General Supply, for example) just to block that space or card. But you must still fulfill all requirements to place there (including payment of resources).
Important: Money and Yellowcake are both unlimited resources. If the General Supply runs out of either, simply use any suitable substitute. Other resources, such as Bomb Fuel or aircraft, are limited by the values shown on the appropriate tracks.
Workers (both permanent and Contractors) are limited by the supplies included in the game. You may use a Worker Action even if you can only receive a portion of the resources it creates - simply take what resources there are available or move your counter to the top of the matching track.

Three of the spaces in the Building Market and three spaces in the green Factories section are marked with a red dollar sign in the Output. When a player constructs one of these Buildings, or places a Worker on one of these Factory spaces, a $1 coin from the General Supply is added to the
Bribe Pile (located to the left of the Building Market, in the ashtray). There is no limit to the amount of money in the Bribe Pile.
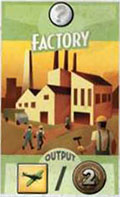
Some Worker Spaces and Buildings show two different Outputs, separated by a slash (/).
When you place workers on one of these, you must choose one of the two Outputs (not both).
For example, this Factory can be used to produce 1 Fighter or $2.
Main Board Worker Actions
If you place Workers on a Worker Space of the Main Board, you get to take the action(s) shown at the bottom of the Worker Space. Often, this action will be to produce resources or Workers.
This is called the "Output" of the Worker action. Other Worker Spaces may allow you to construct buildings, launch attacks against other players, or design bombs.

Some spaces show a resource or action with cycling arrows around it. This is a benefit that all of the other players receive if you place a Worker in that space. The other players receive this benefit even if you do not take the action shown at the bottom of the Worker Space.
Construction: Across the top of the Main Board is the Build- ing Market. This holds the seven Building cards that are avail- able for purchase. You can only construct these Buildings.

You can place any type of Worker in the Construction space to build a Building. You must then pay the cost shown above the Building card you wish to purchase.
If you place an Engineer in the Construction space, you can build one of the two cheapest Buildings for free (in the $2 or $3 spaces - an Engineer symbol appears above these spaces as a reminder).
Take the Building card and place it on your Player Board. You are not limited by the spaces on your Player Board. Simply place any additional Buildings next to your Player Board.
After taking your Building card, slide all the other Buildings in the market to the left as far as they can go to fill the empty space. Draw a new Building card form the deck and place it on the $20 space. If the deck runs out, no new Buildings will enter the market.
If you build one of the three most expensive Buildings (at the right end of the Building Market), remember to add a $1 coin from the General Supply to the Bribe Pile.
If you build the cheapest Building (in the $2 space), you get to take all of the Money in the Bribe Pile and add it to your personal supply. This money cannot be used to pay for the Building (i.e., you must have $2 on hand, or place an Engineer in the Construction space).
Main Board Worker Actions
Important: Unlike other Worker Spaces, there is no limit to the number of Workers that can be placed in the Construction space, and you may place a Worker here even if it is already occupied.
Factory spaces produce Money: When you place a Worker on one of the green Factory spaces, you receive the money shown from the General Supply. The left space requires a payment of three Yellowcake.
The middle space also pays $2 from the General Supply to each of the other players. The right space requires an Engineer or Scientist.
If you place a Worker on a Factory space, remember to add a $1 coin from the General Supply to the Bribe Pile.
Aircraft Factory spaces produce Fighters or Bombers: When you place a Worker on one of the green Aircraft Factory spaces, you receive the aircraft shown (added to the tracks of your Player Board). The left space produces 2 fighters.
The right space produces 2 bombers. You can have a maximum of 10 Fighters and 10 Bombers at a time, as indicated by the tracks on your Player Board.
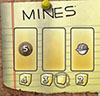
Mine spaces produce Yellowcake: When you place Workers on one of the yellow Mine spaces, you receive the Yellow- cake shown. The left space requires a payment of $5. The middle space also gives one Yellowcake from the General Supply to each of the other players. The right space requires an Engineer.
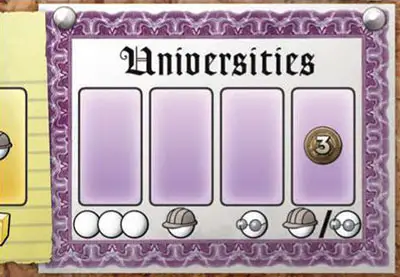
University spaces produce Workers: When you place Workers on one of the purple University spaces, you receive the Workers shown. The left space produces three Laborers. The second space produces one Engineer.
The third space produces one Scientist. The right space produces either an Engineer or a Scientist at a cost of $3.
You must take these Workers from the General Supply. You may choose permanent Workers or Contractors (subject to availability).
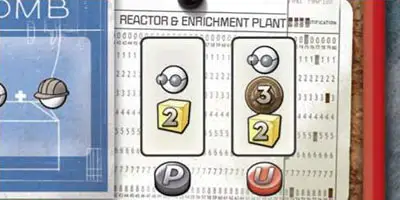
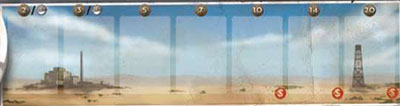
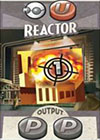
The Reactor space produces Plutonium: You must place a Scientist here and pay two Yellowcake to the General Supply. Raise your token on the Plutonium Track of the Main Board one space. You cannot store more than eight units of Plutonium at a time.
The Enrichment Plant space produces Enriched Uranium: You must place a Scientist here and pay two Yellowcake and $3 to the General Supply. Raise your token on the Enriched Uranium Track of the Main Board one space. You cannot store more than eight units of Enriched Uranium at a time.
Air Strikes Take Their Toll

Air Strike spaces allow you to attack other players with your aircraft: When you place a Worker on one of the Air Strike spaces, you may launch any number of Air Strikes against the other players, up to the number of aircraft you own. The two Air Strike boxes are identical.
Your Air Strikes can target the same or different opponents as you choose. There are two types of Air Strikes:

Fighter Attack: Spend one Fighter to destroy one enemy aircraft (Fighter or Bomber). Reduce the Fighters on your Fighter Track by one, then choose an opponent who must reduce his Fighters or Bombers by one (your choice).

Bombing Run: Spend one Bomber to damage an opponent's Building. You may not make a Bombing Run against an opponent if he has any Fighters on his Fighter Track.
Reduce the Bombers on your Bomber Track by one, then place one Damage counter (with the "1" up) from the General Supply on the target Building (or flip a counter already on the building to the "2" side).
There is no limit to the number of Damage counters you can place on a Building. Damage counters are not limited: if the General Supply runs out, use any suit- able substitute.
The Effect of Damage: A dam- aged Building cannot be used by any player.
No Workers can be placed on any damaged Buildings.
Any workers already on the damaged Building have heard the air raid sirens and have safely escaped into underground bunkers. Thus, they can be retrieved as normal.
Negotiations: Before taking an Air Strike action, you may wish to make deals with other players (such as using both Air Strike spaces to attack a common opponent, or refrain from attacking each other).
These deals can only involve the current round of play (until the beginning of your next turn), and can only involve the use of the Air Strike spaces on the Main Board or Fighter Attacks and Bombing Runs.
Deals may not involve any exchange of resources or other types of actions. An Air Strike agreement must be honored by all players involved in the agreement.
Repair Buildings, Design Bombs
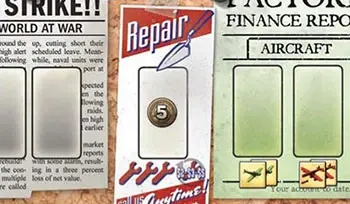
The Repair space allows you to repair damaged Buildings: When you place a Worker on the Repair space, you must pay $5.
You may remove up to three points of damage from your Buildings.
You may remove multiple points of damage from a single Building (flipping or removing Damage counters), and/or remove damage from multiple buildings. Damage counters are returned to the General Supply. You do not pay any additional costs to make these repairs.
After you finish your repairs, the other players may also repair their Buildings (in turn order).
The first point of damage repaired by another player costs him $2, the second costs $3, and the third costs $5 (so if another player removes three points of damage, he must pay $10 in total). Each player may remove up to three points of damage.
The Design Bombs space allows you to take Bomb cards from the General Supply: You must place one Engineer and one Scientist in this space to Design Bombs (this is the only time you can place more than one Worker on the Main Board in the same turn).
When you place Workers here, all players will take Bomb cards. Only the face up Bomb cards in the General Supply are available.
When you Design Bombs, follow these steps:
Take all the face-up Bomb cards but do not combine them with any Bomb cards in your hand.
Secretly choose one of the Bomb cards and add it to your hand.
Pass the remaining Bomb cards to the player on your left.
Each player, in turn, secretly chooses one Bomb card and passes the rest to the left.
The last card returns to you, and you add it to your hand (so you'll get 2 Bomb cards total).
Replenish the supply of face-up Bomb cards from the deck. The number of new Bomb cards drawn is always one greater than the number of players (i.e., four Bomb cards in a three player game, etc).. If there are not enough Bomb cards left in the deck, do not replace any Bomb cards - the Design Bomb action will not be available for the rest of the game.
Espionage Uncovered


The Espionage space allows you to recruit spies and send Workers to your opponents' Buildings: When you place a Worker here, you must pay $3 to the General Supply. Move your token up one space on the Spy Track on the Main Board. You can have a maximum of six spies.
During Step 2 of this turn, you may place your Workers on your opponents' Buildings in addition to your own. When you place workers on an opponent's Building, you must satisfy all of the placement requirements of the building as if it were your own.
Your Workers can take actions using those Buildings as if you owned them. You may place Workers on a number of your opponents' Buildings equal to the number of spies you have on the Spy Track.
You may place a worker in the Espionage Space even if you have already collected all 6 spies. You will not be able to collect another spy, but you will still be able to use the Espionage during Part 2 of your turn.
Important: All the spies you collect remain under your control for the rest of the game. But, you cannot place Workers on other players' Buildings every turn! You can only place Workers on your opponents' Build- ings on the same turn that you place a Worker on the Espionage space.
Building Worker Actions
Read here all detailed information about the building worker actions.
Bomb Actions
Read here all detailed information about the bomb actions.
End of the Game
The game ends immediately when any player reaches the target number of victory points set at the beginning of the game:
- 2 Players: 70 points
- 3 Players: 60 points
- 4 Players: 50 points
- 5 Players: 45 points
The player who first collects the required victory points raises his nation to superpower status and wins the game!
Continue Reading


