
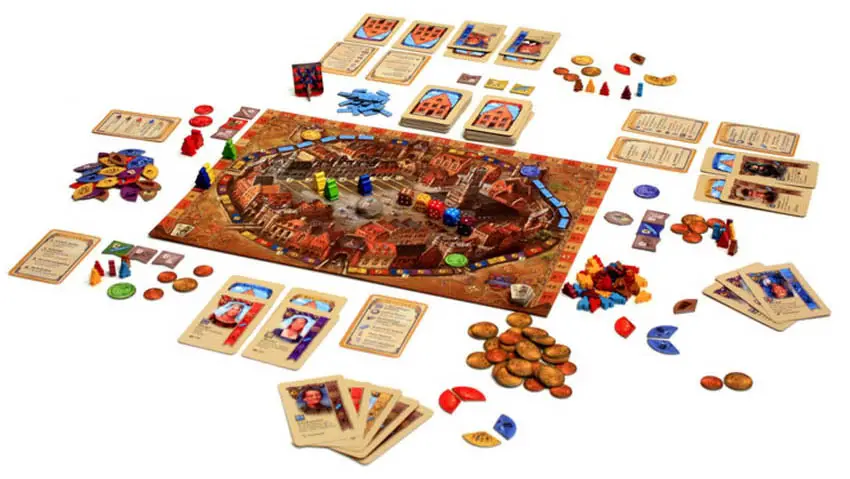
Components
Setup
Board
The board is placed in the middle of the table, so it is easily visible and accessible for all players. The 50/100er - tiles place next to the 49 space of the scoring track on the game board.
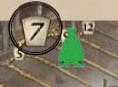
The statue octagonal tiles are placed low to high face up on the statue space of the game board so that the tile with the 2 is at the bottom, then the 3 etc.
On top of the stack is then the tile with the 7.
Cards
Of the 165 cards, the number used depends on how many players there are.
First, all cards (regardless of their back) are mixed together and divided into 5 roughly equal stacks. Of these 5 stacks as many are taken as the number of players, and again mixed together.
(so for 3 players 3 of the 5 stacks are merged). Then, this new stack is divided into two approximately equal halves. These are accessible to all players and the decks are placed next to the board.
All other stacks (so 3 players 2 stacks) are now merged and form an extra stack which is set aside. This extra stack is required only at the end of the game.
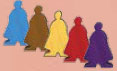
Henchmen
The 60 henchmen are placed as a common stock for all players readily accessible. (The colors of the Henchmen have nothing to do with the player colors).
Guilders
The guilders (20 1's and 24 of 3 coins) are placed as a general stock for all players and easily accessible.
Threat Markers
The 45 Threat Markers for all players are placed easily accessible.
Canal Tiles
The 40-canal tiles are placed easily accessible to all players.
Player set up
Players need room during the game to play cards and other material. This space we call the display area. Each player chooses a player color.
Now, each player takes a further 1 henchman of each of the 5 colors and 5 guilders from the stock and puts everything in his display area.
Then, each player takes 2 overview cards (one for each round and one for round actions). The overview card for the starting positions serves only to facilitate later games.
The players do not have any cards in hand, they draw these at the beginning of the first round.
-
Start Player
The player who last fried something will start. He puts the first player emblem in front of him and takes the 5 dice.
Tutorial Video
Gameplay
The game runs over several rounds. Each round consists of the following 4 phases:
- Phase 1: Draw Cards - Used during Phase 3
- Phase 2: Dice - Distribute Threat Markers and Advance 1 Reputation Step
- Phase 3: Play Cards and Perform Actions - This is the main part of each round.
- Phase 4: Verify the 3 Majorities and Change Start Player
Phase 1: Draw cards - Used During Phase 3
At the beginning of each round, the players draw cards to refill their hand.
The start player begins and may draw from either of the two piles. The Player takes the card without looking at the front. He repeats this until he holds 5 cards in hand. With each new card he must decide which of the two decks he will draw from (only the different colored card backs are visible). Once the player has replenished his hand, he may of course look at his cards.
Play proceeds clockwise as the remaining players fill their hand to 5 cards in the same way.
If one of the draw piles run out… this will be the final round.
When one of the two draw piles runs out of cards, that pile is immediately replaced with the extra draw pile set aside at the beginning of the game. The players continue refilling their hand, as described above.
If the other pile runs out, split the remaining pile in half creating 2 roughly equal piles. Keep doing this so that the players always have 2 piles to draw from.
Note: This extra-pile will only be divided in half when the other pile would also run out in the same round or phase. So, to end the game only one redraw pile has to run out, not both of them!
The round in which the extra draw pile enters play is the final round.. After completing that round, the game ends and players proceed with final scoring.
Exception: Usually, a pile will run out during Phase 1 of a turn (when you draw cards). However, some cards allow you to draw cards during Phase 3. In those cases, the extra draw pile enters play immediately, and the following round will be the last and final round.
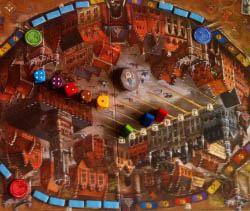
Phase 2: Dice - Distribute Threat Markers and Advance 1 Step
The starting player rolls with the 5 colored dice. Then he places the dice on the board in the designated dice area. Ideally, place the dice in ascending order to let players easily see which values are present.
After rolling, the following two steps are performed in the order listed.
First Step: Distribute Threat Markers

For each die showing a 5 or 6, each player (without exception) receives 1 Threat Marker of those colors (the color of the dice showing a 5 or a 6).
All threat markers should be arranged by color in front of each player, and should be visible to all other players.
Whenever a player acquires the third threat marker of a particular color, then the corresponding hardship from this threat occurs.
Second Step: Advance 1 Step
Each player now has the opportunity of advancing 1 step on the reputation track. The price to advance is determined by the dice.
The price to pay, in guilders, is equal to the total sum of every die showing a 1 or a 2.
The starting player goes first. If she wishes to advance, then she must pay the cost in guilders to the bank, and she advances her marker one step on the reputation track. A player may not advance without paying.
Note: The first time a player advances, he moves his marker from the town hall onto the first step of the reputation track.
In clockwise order, all other players decided whether they want to advance on the reputation track.
If a player does not have enough guilders to pay the cost to advance then he cannot advance. If a player does not want to advance, despite having enough guilders in order to pay the cost, then he pays nothing and does not advance.
Each player can only advance 1 step each round. If none of the dice in this round show a 1 or 2, then players may not advance this round.
Note that dice values of 3 and 4 have no meaning in this phase.
Phase 3: Play Cards and Take Actions
This is the main part of each round.
General rules for this phase
- Players start this phase with 5 cards in hand.
- The players take turns playing 1 card from their hand, and select from 1 of the 6 possible actions.
- This goes on in turns, until each player has played 4 cards from his hand, and executed the 4 corresponding actions.
(These may be different actions, the same actions several times, or even the same actions as the other players).
- Then this phase ends.
The start player begins by playing one card from his hand. With the played card he may take exactly one of the following six actions:
- Take 2 workers
- Take 1-6 guilders
- Discard 1 threat marker
- Build 1 canal token
- Build 1 house
- Recruit 1 person
After the start player played 1 card and has executed the corresponding action, the remaining players follow in clockwise order and play 1 card and take the corresponding action.
This goes on in turns, until each player has played 4 cards from his hand, and taken the corresponding 4 actions.
This phase then ends. Each player should have 1 card remaining in her hand.
Note: Any of the 6 actions may be performed with any card. As such, there are no cards that allow you to perform a specific action.
Before we explain the various actions, let's look at the cards a little closer:
Anatomy of a Card
Card Color
There are 5 different card colors (blue, brown, yellow, red and purple). Each card has the same color on the front and back.
Actions
The first 5 actions are depicted on the banner found on the right hand side of each card. With the exception of the color, these 5 actions are always the same.
Person
The person section of each card shows a different character. Each person has a different price, special effect, and group.
Now to the description of each action:
Take 2 workers
The player places one card face up on the discard pile and takes 2 workers in the color of the played card. He puts his workers in his display (in plain sight).
The workers are not limited. Should one run out a color, the players may make do with other materials.
Take 1-6 guilders

The player places one card face up on the discard pile to take a number of guilders from the bank equal to the value shown on the die of the color of the played card.
The player then places her guilders in her play area.
The guilders are not limited by the components. Players can make change at any time.
Discard 1 threat marker and get 1 point.

The player places one card face up on the discard pile and discards 1 threat marker in the color of the played card from his display back into the supply. Each threat marker discarded this way gets the player 1 point; advance your pawn 1 space on the scoring track to show this.
Note: Every time a player discards 1 threat marker, she gets 1 point. This also applies when discarding threat markers with the help of a person.
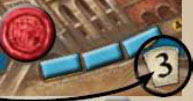
Build 1 canal token

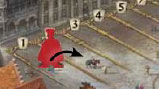
Each player has a small seal in his color that is placed on his gatehouse. Canal sections extend to the left and right from the seal, and each section consists of five individual canal spaces. These 10 canal spaces (= 2 channel sections) are available to the player (and only that player) to build canal tokens.
A player's first built canal will always be one of the 2 spaces next to her seal. On subsequent canal building actions, the player may continue in the direction she started, or not.
The player always has 2 canal spaces to choose in order to build a canal token, unless a section is complete.
In order to build a canal token, the player discards 1 card in the color of the canal space she wishes to build on. Additionally, she must pay the number of guilders specified on that canal space. She then places a canal token on that space.
If the player has built a canal token in the 3rd space from his seal (in either direction), then he will take 3 points at game end. If a player has built up one of his two canal sections completely, he immediately takes the top Statue tile from the board which will be worth the printed points at game end. Each player may earn a maximum of 2 statues.
Build 1 house

The player places 1 card face down in front of herself to show that you have built a house. To build a house, he must pay one worker in the same color as the house he wishes to build.
Return the paid worker to the supply. Each house scores its owner 1 point at the game end, and can also accommodate one person (see next action).
Recruit 1 person
Play 1 card onto one of your empty houses; place the card in such a way that the color of the house remains visible. Your must pay the price of the card, shown in the top left corner.
Paid guilders are returned to the bank.
Each house can accommodate exactly 1 person. The person may be of a different color than the house.
The player can activate his designed people to make use of various advantages. Before we explain how a Person card is activated, let's take a closer look at the person section of a card.
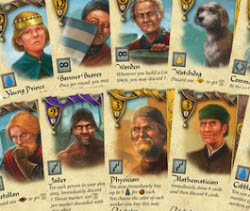
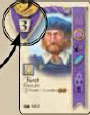
Explanation of the Person Cards
Price: At the top left of the card is the price to recruit this person, expressed in guilders.
Points: The small number directly below the price indicates how many points the player will receive when the game ends if the person is still in his display. (The score is always a third of the price).
Activation Icon: The icon located under the portrait to the left shows when and how this person can be activated.
Name and Benefit: The text below the activation symbol is the name of the person, and the benefit you get when activating the person.
Group: There are 11 different groups of people by which a card may be associated. Some cards and the associated benefits refer to the group. When that is the case, only those cards belonging to that group are considered. (The 11 different groups of people: Noble, Entertainer, Craftsman, Church, Protector, Scholar, Bureaucrat, Merchant, Castle, Artist, Underworld).
Activate People
On his turn, the player may activate one or more of their placed person cards.
People with the "arrow" icon are activated immediately after being played.
People with any of the five "worker" icons or the "infinity loop" icon may each be activated during the player's turn.
Finally, people with the "laurel" icon are only activated during the final scoring.
To activate a person means to execute the text on the person card.
The 4 symbols are as follows:
Arrow: People with the "arrow" icon have a one-use effect that is activated immediately after being played. These people may not be activated again during the game, unless they are returned to a player's hand and played again.

Worker: People with a "worker" icon can only be activated once per round during a player's turn (in phase 3 "Play cards"). You must pay a worker of the depicted color (which is not necessarily the color of the person). That worker is returned to the supply. You then benefit from the text shown on the card. To indicate that the person has been activated in this round, the player rotates it 90 degrees.

Infinity Loop: There are 3 types of people with the "infinity loop" icon.
The first type can be activated once per round (similar to people with a worker symbol). The text on these cards typically begins with "Once per round.."..
The activation of these people does not cost anything. To indicate that the person has been activated in this round, the player rotates it 90 degrees.
The second type improves an action for that player. People of this type are automatically activated for free every time the player performs the corresponding action (even more than once per round). They do not cost anything extra to use. The third type is similar to the second. These people give players advantages in different game situations (i.e. when "drawing cards" or "Advancing").
People of this type are automatically activated for free each time any time the situation occurs during the game. (If the situation can occur several times per round, the card is activated more than once per round).
Note: Persons of the second and third type are not rotated by 90 degrees after they are activated since their use is not limited.

Laurel: People with "laurel" icon are used during the final scoring. It is at that moment, and only then, that they are automatically activated. The player receives the number of points indicated on the card.
General Note:
The player can activate people (with the symbols "worker" or "infinity loop" icons) before or after playing a card on his turn. He can activate some before and others after playing his card. I.e. He can even activate the person just placed (with the "worker" or "infinity") on the same turn.
Activating a person can alter the normal rules.
Note: Most people are self-explanatory. We've explained some cards in the addendum since questions may arise in some special cases or in certain combinations of cards.
Phase 4: Examine 3 majorities and change starting player
Check whether one or more players have the majority in any of the specified areas. Players with a majority in one of the areas will flip the associated majority marker to the colored side. Players check for majorities in the following 3 areas.
Reputation
If a single player is further along than all other players on the reputation track, then the player may turn his reputation track majority marker to the colored side.
People
If a player has more people than any one of his opponents in his play area, then he turns his people majority marker to the colored side. He compares the number of people with every other player individually. Therefore, a player need not have more people than every other player combined, simply more people than each other player.
Canal
If a player has built more canal tokens than any of his opponents (combining both of his two canal sections), then he may turn his majority canal marker to the colored side.
These rules apply to all 3 majorities:
A player must have a clear majority in order to turning his marker to the colored side.
Once flipped, a marker will stay on its colored-side for the remainder of the game. Therefore a marker flipped to the colored side indicates that the player held the majority in that are at least once during the game.
If a player surpasses another player in a later round, then the player that now currently has the majority also turns his majority marker to the colored side. Thus, it is possible that several players will have turned the same majority marker flipped to the colored side.
Start Player Changes
After the 3 majorities have been checked, the start player rotates to the next player clockwise, and a new round begins. Players also straighten the cards they rotated (if any) to indicate that they may be activated again next round.
End of the Game
At the end of the round in which one of the decks was emptied, the game ends and final scoring occurs.
Each player scores the following:
People
The player takes the points from all his displayed people (top left).
House
For every house in his display the player takes 1 point. It does not matter whether a person is on the house or not.
Benefits (of people)
For people with the "laurel wreath" the player takes points according to their cards texts.

Majority Marker
For each majority marker that the player has turned to the colored side, he takes 4 points.
Canal
For each canal tile built in the 3rd space from the player's seal, the player takes 3 points. For each collected Statue tile, he takes the printed points.
Reputation
The player takes points for the space which she has most recently advanced to on the reputation track.
The player keeps track of her points on the scoring track. If a player reaches over 50 points, he takes one of the 50/100 point tiles and starts back at the beginning of the scoring track (with the 50 side up). If he reaches more than 100 points, he flips the small tile to the 100 side.
The player with the most points wins the game. In the case of a tie, the player who has more guilders wins. If there is still a tie, then there is more than one winner.
Continue Reading

